Learn about your role as a calendar administrator: How to structure your calendar, manage sub-calendars, add users, configure defaults, and use important calendar features.
The calendar administrator
The calendar administrator role is very important.
As an administrator, you can access and manage the entire calendar, including the default settings and subscription, sub-calendars and data, integrations, users, and more.
- You may be the person who created the calendar.
- Or you may have been given administrator-level access to the calendar.
A few important cautions:
- Only an authorized person should have administrator access to the calendar.
- For security, limit the number of administrators. Typically, one or two admins is best to prevent inadvertent changes to how the calendar works.
- The calendar administrator is responsible for all calendar settings and has full control over the calendar.
ℹ️ Learn more
First steps with Teamup
1: Decide on a calendar structure
If you are setting up a new Teamup calendar, one of the first and most important tasks is to decide how the calendar will be structured.
Here are some things to consider.
- Dimensions: Real-world scheduling often has multiple dimensions: who, what, where. With Teamup, you can use both sub-calendars and custom fields to represent different dimensions.
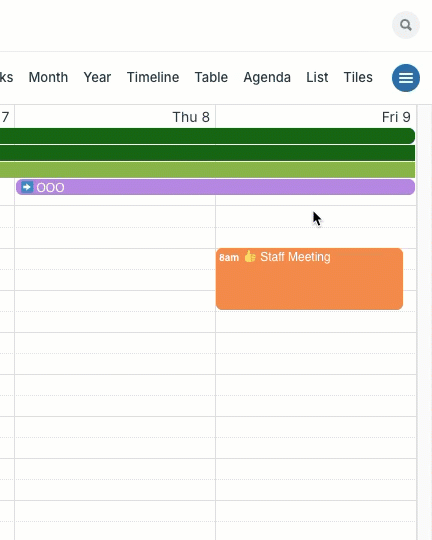
- Color-coding: The color of a sub-calendar determines the color of events added to that sub-calendar. For example, if you create a red sub-calendar for Room A, all meetings scheduled in Room A will be displayed as red events on the calendar.
- Organization: Use folders to group and organize sub-calendars, setting up nesting hierarchies if needed.
- Event field visibility: You can set the visibility of each event field for all users or only users with modify access.
- Selective sharing: For each user, you can select which sub-calendars they can access and what permission level they have for that sub-calendar.
✅ Start with a plan. Map out the dimensions to include in your scheduling. Once you have a plan for the calendar structure, you’re ready to create sub-calendars.
2: Access the calendar settings
- Open Teamup in a browser. Calendar settings are not available in the Teamup app.
- Click the blue menu in the top right of the calendar.
- Click Settings.
If you do not see Settings in the menu, you are accessing the calendar without administrator permission. You may be using a shareable calendar link. Log into Teamup with your user account and open the calendar from your dashboard to access the settings.
3: Create sub-calendars
- Click on the blue New button and select Add Calendar.
- Enter a title for the new calendar, select a color, and choose to allow or disallow overlapping events.
- Organize calendars in folders by using the > symbol in the calendar name: Main Office > Staff Calendar will create a calendar named Staff Calendar in a folder named Main Office.
ℹ️ Learn more
4: Share the calendar
Establish who needs access to the calendar, which sub-calendars they should access, and with what permission level.
To add users:
- Go to Settings > Sharing.
- Click Add User.
- Enter the user’s email.
- Select sub-calendars and set the permission level for the selected calendars.
Use calendar links to embed Teamup, give temporary access to an individual outside your organization, to share your calendar with a large group, on social media, or with the public. Since anyone can access the calendar via a shareable link, be very careful to set the appropriate permission (read-only is the recommended default).
ℹ️ Learn more
Configure your Teamup calendar
In the calendar settings, there are several options and defaults you can configure for your needs.
Subscription
- In the Subscription section, you can manage your subscription plan, update billing contact details, add or change the payment method, and access invoices.
- See our pricing page for details on the subscription levels.
- To test out paid features before purchasing an upgrade, start a free trial calendar or use a live demo calendar.
- To upgrade the calendar’s subscription, click the button on the plan you want and complete the payment. The upgrade is applied automatically as soon as payment is complete.
- If you see ‘Payment pending’ in your Subscription History, your payment did not go through. Contact your bank to identify the issue. If the problem persists, see here or contact support@teamup.com.
ℹ️ Learn more
General Settings
- Teamup supports various languages, with more being added. Choose the default language for your calendar.
- Enable or disable user signup for email notifications.
- Enable or disable iCalendar feeds.
- Enable or disable assigning one event to multiple calendars.
- Enable or disable event sharing, or change which event sharing options are included in the Sharing menu.
- Set the event opening preference: For modify users, events can open in the event viewer with an edit button, or open in the event editor directly.
- Set preferences for showing or collapsing the sidebar and showing or hiding the date picker.
- Edit the About box for the calendar.
ℹ️ Learn more
Date and Time
- Teamup supports time zone conversions for 140+ time zones. Learn more about working with time zones in Teamup.
- Select the applicable date format for your primary user base. The 24-hour clock can be enabled regardless of the common date/time format in your region.
- Select the default start day of the week. Options include Monday, Sunday, Saturday, and Friday.
- Select the visible time range when your calendar is displayed with a time grid. Time slots outside of the time range defined here will still be selectable in the event editor.
- It is possible to set the calendar to always open on a specific date, e.g. a conference date, rather than the current date.
ℹ️ Learn more
Calendar views
Teamup supports 12 calendar views which you can enable or disable in the calendar settings. Set your preferred calendar view as the default.
- Teamup supports multiple unique calendar views as well as the usual day, week, and month views.
- The default calendar view is used when a calendar is loaded in a new browser session. The default view can be overwritten by a link parameter or the user’s last selected view, which is remembered during the same browser session.
- Adjust the time resolution and choose to show or hide weekends.
- The calendar view picker is at the top right of the calendar.
- Enable or disable calendar views in the calendar settings; if toggled off, the view will no longer be available in the calendar view picker.
- Set defaults for calendar views, such as number of days to show in multi-day view.
- Choose whether to display event details by default in List and Agenda views.
ℹ️ Learn more
Identity
- Change the calendar title, if desired.
- You can upload your own logo.
- You can customize the header colors (background and font).
ℹ️ Learn more
Calendars
- There are a million ways to use Teamup Calendar. The essential decision to make as calendar administrator is what and how you want to organize or schedule, then translate that into your calendar structure.
- You can use live demos to test out various scenarios.
- Events assigned to a specific sub-calendar will be displayed in the color of that calendar.
- Prevent double bookings by choosing to disallow overlapping events on your calendars.
- Group sub-calendars into folders for easy organization.
- The number of active sub-calendars you may have is linked to your subscription plan. You can upgrade any time to use more sub-calendars.
- If you have more than 12 sub-calendars, you can filter by keyword.
ℹ️ Learn more
Sharing
- Add and manage account-based users.
- You can create groups for account-based users for easier user management.
- There are 9 levels of access permission, including the unique add-only and modify-from-same permission.
- Customize access to each sub-calendar by assigning granular access permissions.
- Create and manage shareable calendar links.
- Sharing limits are based on your subscription plan.
ℹ️ Learn more
Event fields
- Each Teamup calendar has certain default event fields, including Who, Where, Description, Signup, and Comments.
- You can configure these default event fields: rename, rearrange, set visibility level, etc.
- Create custom event fields: choice fields, number fields, and text fields.
- You can choose to show the contents of a custom event field in the event title.
- The number of custom event fields is linked to your subscription plan. You can upgrade any time to add more custom event fields.
ℹ️ Learn more
Notifications
- Teamup notifications include change notifications, daily agenda email, Slack notifications, and event reminders.
- If user signup for notifications is enabled (in General Settings), account-based users will be able to add or modify their own notification subscriptions.
- The calendar administrator can always see an overview of existing notifications, and can add, edit, or remove notifications as needed.
ℹ️ Learn more
Import
- You can import calendar data from other calendar applications, spreadsheets, databases and text fields.
- Currently supported import formats are iCalendar files (#.ics) and text files with comma-separated values (*.csv).
- You can also import data from one Teamup Calendar to another.
- Only the calendar administrator can import files.
ℹ️ Learn more
Export
- You can bulk export calendar data from your Teamup Calendar to text files with comma-separated values (.csv) or iCalendar files (.ics).
- Choose to export events from a specific sub-calendar or all calendars.
- If you would like to analyze or generate reports with your data, it is best to bulk export the data to the .csv file format, open it locally and display it on an Excel sheet, then conduct the analysis as you need.
- You can also export event signups and event comments in the .csv file format.
- Only the calendar administrator can bulk export.
ℹ️ Learn more
Integrations