Administrator access provides access to the calendar settings and full control over your Teamup calendar. To keep your calendar secure, only grant administrator access to authorized people who understand how to use the calendar settings.
Who gets administrator access?
When you create a new Teamup calendar, you are automatically given administrator access. This allows you to access the calendar settings, create and manage sub-calendars, configure the defaults and other options, and manage calendar sharing.
You can grant administrator access to other users, as well. However, administrator access should be carefully protected and only provided to people with the correct authorization and understanding.
Administrator vs modifier
A person who needs to the ability to manage all events on the calendar can be given Modify permission to all sub-calendars. This allows them to add, update, and delete events but does not give them access to the calendar settings.
What an administrator can do
Administrator access means the ability to design and configure your calendar’s global Settings to work best for your needs, include but not limited to:
- Create folders and sub-calendars.
- Add users and grant access to your Teamup Calendar.
- Control the access permissions for your users.
- Delete or modify any sub-calendars.
- Delete or modify any events.
- Delete the entire calendar.
- Manage notifications.
- Export partial or entire calendar data to external files.
- Import calendar data or .csv files to Teamup.
- Manage your subscription plans.
Be sure to use these abilities carefully and guard them properly to maximize the positive impact of Teamup on your group.
Grant administrator access
When you add a calendar user, you can grant an individual administrator-level access to the calendar. Do so with care. Only provide administrator privileges to authorized individuals who should have full access to the calendar and all calendar settings.
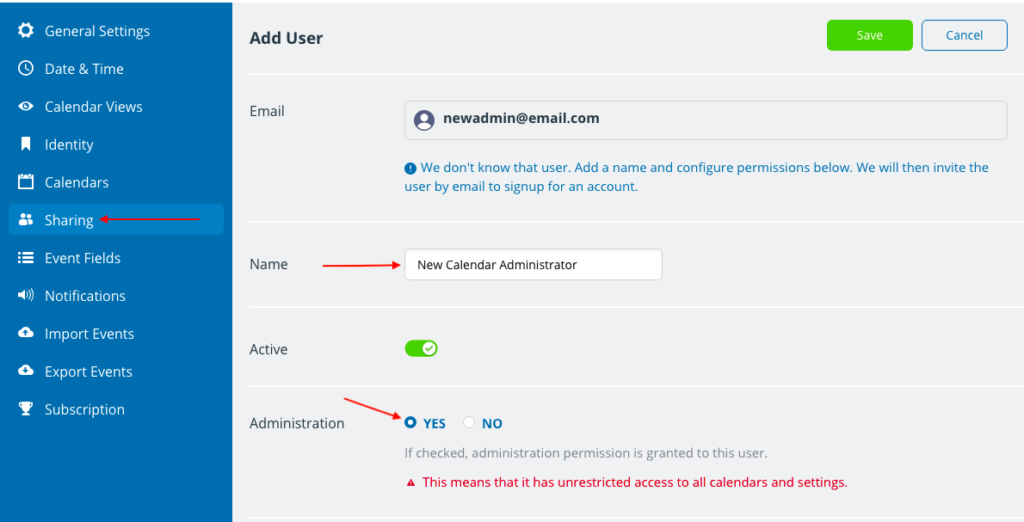
To grant administrator access to a new user:
- Go to Settings > Sharing.
- Click on Add User.
- Enter the email address of the user.
- Enter the name for the user. It is helpful to indicate that this user has administrator access.
- Check Yes in the Administration section.
- Click Save.
To grant administrator access to a current user:
- If the person is already an account user, find their name in the list of users:
- Go to Settings > Sharing to see all users and links.
- Click the Edit icon next to the user.
- Check the box to grant administrator access.
- Click the green Save button.
Keep your calendar secure
In order to keep your calendar secure and avoid accidental changes or problems in the calendar settings:
- We recommend limiting the administrator permission to as few users as necessary. Do not share grant administrator access to someone unless they need to manage the calendar settings.
- If a calendar user needs to have full capability to manage events, including adding new events, updating, or deleting existing events, add that user to your calendar with Modifier permission.
- When you create a notification subscription for someone who is not a calendar user, you can choose which calendar link to use from a drop-down menu. The notification email contains that calendar link in it. Be sure to choose a link with appropriate permissions (e.g. read-only).
- DO NOT use a link with administrator access. Switch to account-based access.
If you created a Teamup calendar prior to September 2020, you may have administrator access to your calendar via an administrator link, without having a Teamup user account. It is highly recommended that you switch to account-based access. To do so, follow these detailed steps.
- Register for a Teamup user account here.
- Open your calendar with your administrator link.
- Go to Settings > Sharing > Add User.
- Add yourself as a user, being sure to enter the same email address you used for your Teamup user account. You can also add a secondary email address of your user account but be aware that the user which appears on the calendar will be the primary email of your account.
- Grant yourself administrator-level access.
- Your calendar will now appear on your calendar dashboard, and you can access it without using your old administrator link.
- Delete your old administrator link.
See more detailed steps.
If you suspect someone unauthorized has gained administrator access to the calendar, here’s what you can do.