With a Teamup calendar, you can share your calendar securely with an individual, a group, or even with the public.
Sharing your Teamup calendar
You always have centralized control of what is shared from your calendar, by choosing which sub-calendars to share and whether to include all event details. You also have control of what people can do with your calendar, by setting the level of access permission that each individual or group is given.
Note: if you want to share an individual event, see this article.
Let’s take a look at how it works.
Users, groups, and links
When you open your Teamup calendar with administrator access, you can go to the calendar settings from a browser and manage the sharing options.
Go to Settings > Sharing, and you’ll see this screen:

There are three options:
- Add user
- Create group
- Add link
Add user
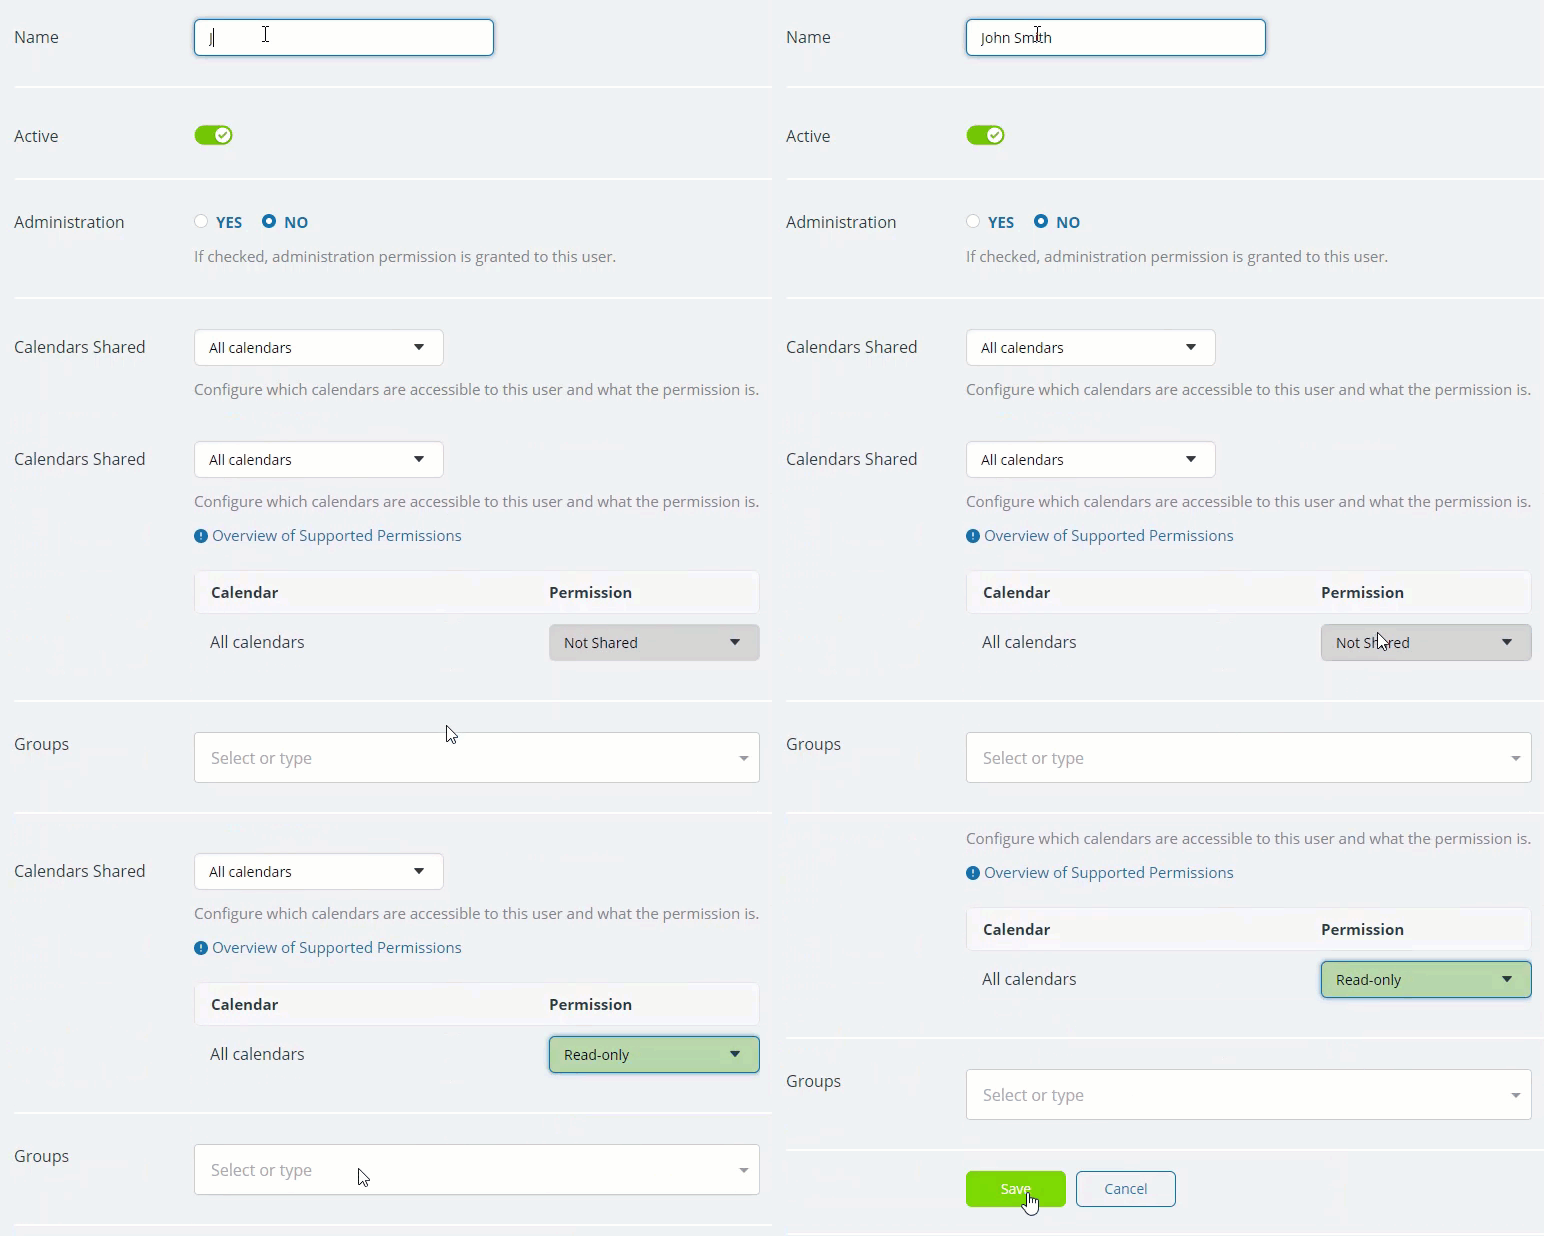
Teamup registered users can be granted access to your calendar through their user account. You control which sub-calendars they can see, and what permissions they have. Teamup users have a globally synced calendar dashboard, which automatically syncs across devices and platforms when they are logged in.
Note: each subscription level of Teamup allows a different number of users as listed here. On the paid plans, you can add additional users if needed.
Click Add User to set up your first calendar user. And don’t worry: if they don’t yet have a Teamup user account, they will be able to create one.
Enter the email address of the user:
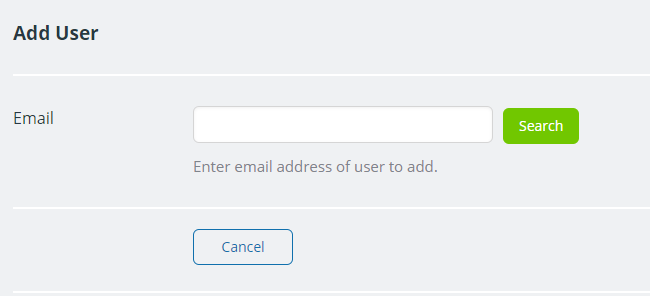
If the email address is not found in the Teamup user database, they will receive an email invitation to create a user account and access your calendar. You can fill in the basic information and set calendars and permissions to share:
Create a group
Groups are a convenient way to organize users. Let’s say you have a sales team of 10 people. They all need the same access to the calendar. Instead of going through the tedious process of assigning the sub-calendars and permissions for each of these users, you can create a group. You’ll set the access permissions for the entire group, then add individual users to the group.
Assign group permissions and adding group members
Choose a name for the group, select which calendars to share, and then set the permission level.

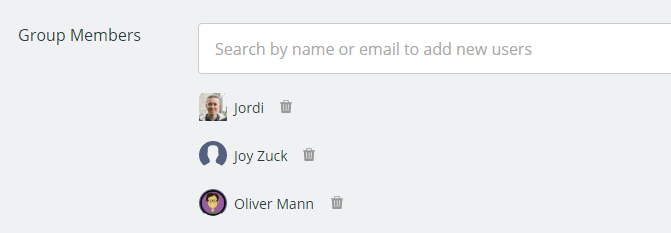
If you already have calendar users, you can add them to the group from the drop-down menu at the bottom. You can also add users here by their email address.
Removing members from a group
You can remove members from a group by clicking the trash icon:
Deleting a group
You can also deactivate or delete a group at any time.
To do so, locate the group in Settings > Sharing.
- To deactivate the group, use the toggle to the left of the group name.
- To delete the group, click the Edit icon to the right of the group name. On the next dialog, use the red Delete button to remove the group from your calendar.
Note: Deleting a group will NOT remove the members of the group from your calendar. They will still be calendar users unless you also remove each user individually.
Adding a user to groups from user settings
You can also add users to a group at the bottom of the user setting page when adding a new user or editing an existing user.
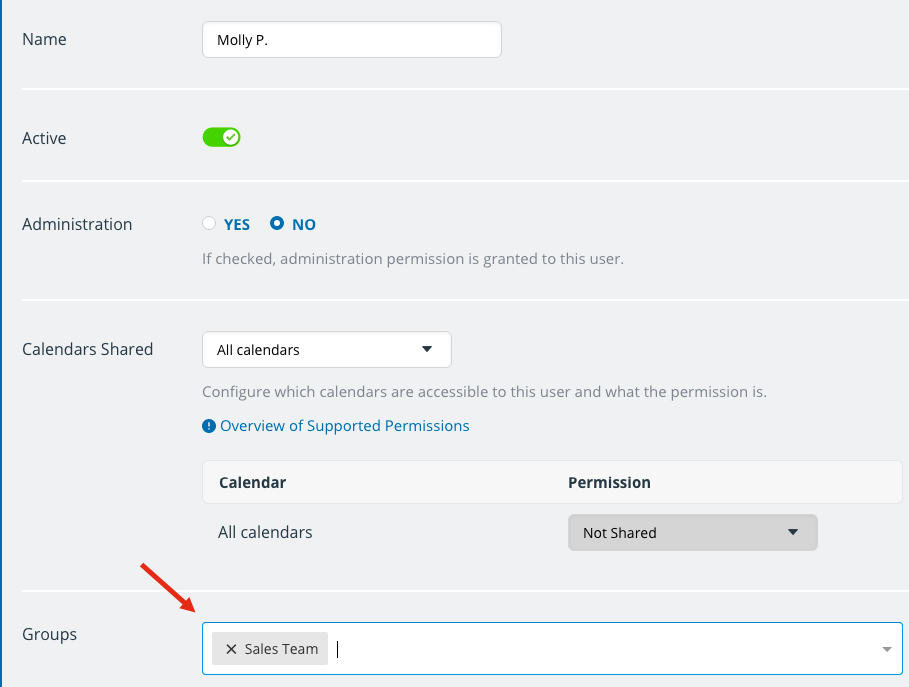
To remove a user from a group, simply click the X beside the user’s name.
Add links
Links are a way to give temporary access to your calendar to an individual outside your organization, to share your calendar with a large group, on social media, or with the public. You can use a link to embed Teamup on your own website, too.
Since anyone can access the calendar via a shareable link, be very careful to set the appropriate permission (read-only is the recommended default).
To create a link, click the Add Link option on the Sharing screen. Put in a name for the link (make sure it’s something obvious, so you’ll remember who is using the link). Then scroll down to select the sub-calendars to include and set the permissions.
In the example below, we’ve only included one sub-calendar, with permission set to read-only:
Manage users, groups, and links
You can manage the Teamup account users who have access to your calendar, as well as groups and links. To do so, go to Settings > Sharing. You will see a list of all users, groups, and links that have access to your calendar.
Here’s how to manage users, groups, and links:
- Use the filters at the top to sort by type or keyword.
- Click the name or the Pencil icon to open the Edit dialog for any user, group, or link.
- Click the Copy icon to copy a user URL or link to the clipboard.
- Click a link to open it.
- Use the toggle to deactivate or reactivate a link. Green color (with a checkmark symbol on the right) means activated; red color (with an x symbol on the left) means deactivated.
- Click the blue Calendars link to see a user’s access summary in a pop-up window:
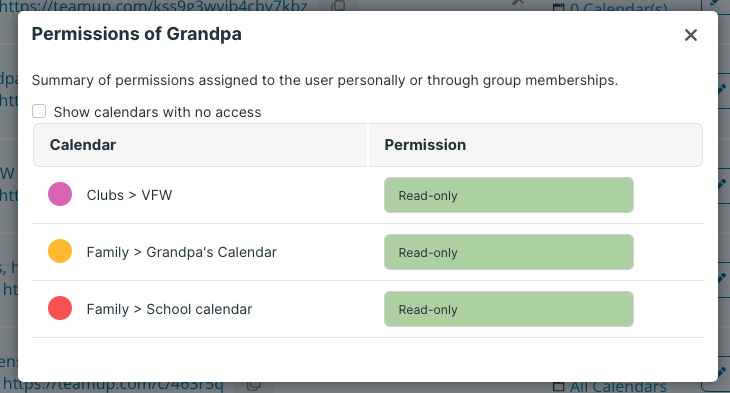
In the Edit dialog for any user, group, or link, you can do the following:
- Delete or deactivate a link, or remove a user or group.
- Change the calendars shared and/or the permission assigned to any or all sub-calendars.
- Add or remove a user from any group.
- Change the name of a link.
Once you have made any changes desired, click the green Save button.
Important security notes
- The best way to maintain security is to be careful to assign appropriate permissions for each user, group, or link. If in doubt, assign a lower permission level; you can always grant a higher access level if needed.
- Remember that a user who is part of a group will have the calendar access which is assigned to the group; so if the group has Modify permission for all sub-calendars, every user in the group will have the same level of access.
- What if there is a conflict between permission levels? For example, if a user’s individual permissions are different than the group permissions; or if a user is a member of two groups with different access permissions. When there is a permission conflict, the higher level of permission takes precedence. So if a user’s individual permissions are Not shared or Read-only, but she is part of a group with Add-only permission, she will be given the Add-only access from the group. If the user is removed from the group, her access will revert to her individual permission settings.
- When a user leaves your organization, be sure to revoke his calendar access. You can do so by going to Settings > Sharing, finding the user in the list, then deactivating or deleting the user.
- Review your calendar links regularly and deactivate or delete any which are not current, or which may be out-dated. If you have granted temporary access to someone via calendar link, be sure to deactivate or delete the calendar link when the individual no longer needs calendar access. More details here.


