Account-based access is the most secure way to share a Teamup calendar with others. This article discusses how a calendar administrator can manage account-based calendar users.
About account users
When you add someone as an account-based user, they will be sent an invitation via email to access the calendar.
- If the individual already has a Teamup user account, the calendar will be added to their dashboard automatically. They can simply log in to access the calendar.
- If they do not yet have a Teamup user account, they can follow the link in the email invitation to activate an account, then log in and access the calendar.
Add users
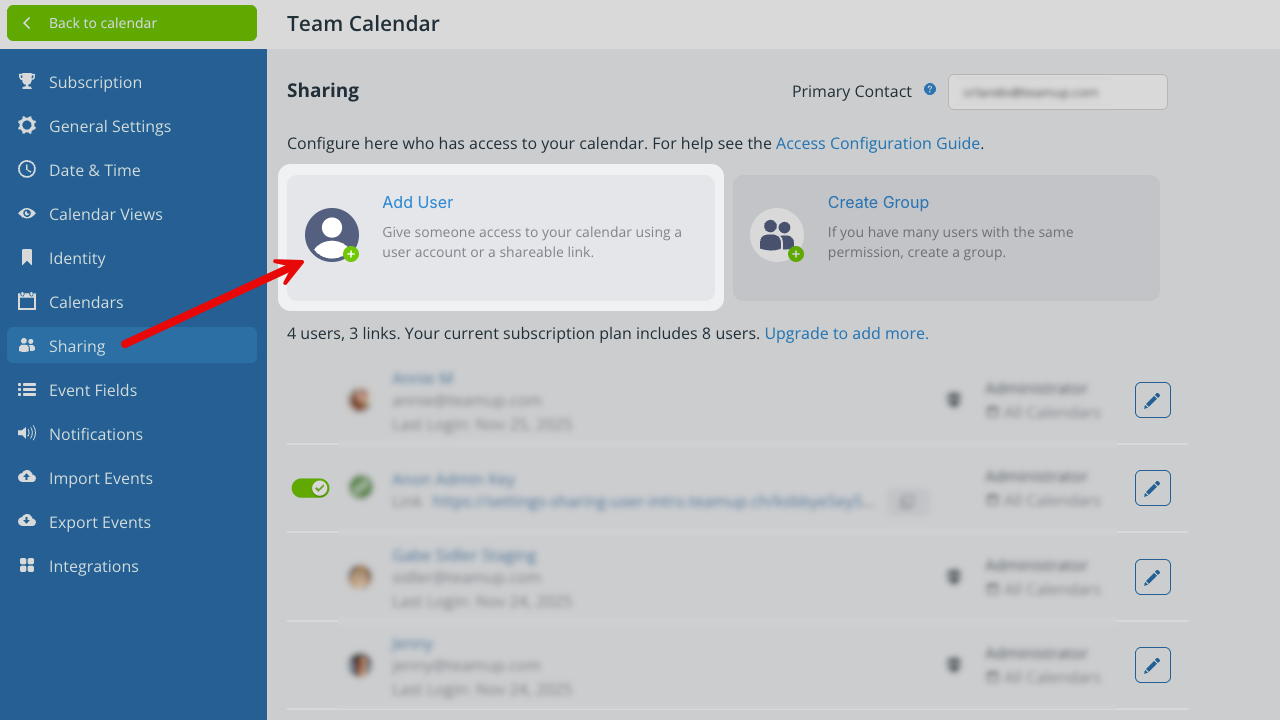
Only the calendar administrator can add, remove, or manage account-based users.
- Open Teamup in a browser.
- Click the blue menu (top right).
- Select Settings.
- Go to the Sharing tab.
- Click Add User.
- Enter the email address of the user.
A current Teamup user
Teamup will search for matching user accounts. If the user already has a Teamup account, you will see their avatar and name with their email address on the next screen.
A new Teamup user
If the user does not have a Teamup account, only their email will be shown on the next screen. Type the user’s name into the Name field.
Configure user permissions
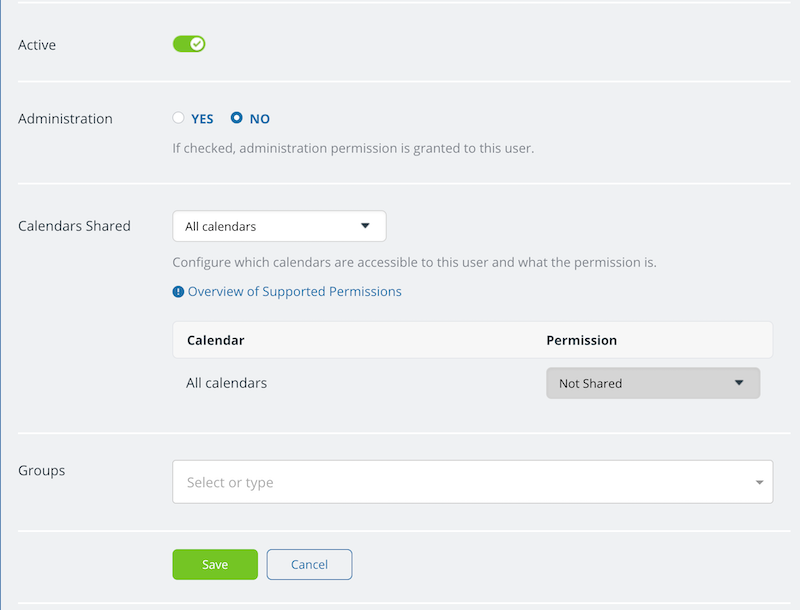
The next step, for both current and new Teamup users, is to configure their calendar permissions.
You will see an option to grant administration permission to the user. Be very careful when granting administration-level access. Only authorized calendar administrators should have administration permission. Administration access to the calendar allows a user to access all calendar settings.
Choose the sub-calendars
Scroll to the Calendars Shared section.
- From the drop-down menu, choose All calendars or Selected calendars.
- If you choose All calendars, this user will have access to all sub-calendars. You can set the permission level globally for all the sub-calendars.
- If you choose Selected sub-calendars, this user will have access to only those sub-calendars which you include. You will set the permission level individually for each sub-calendar.
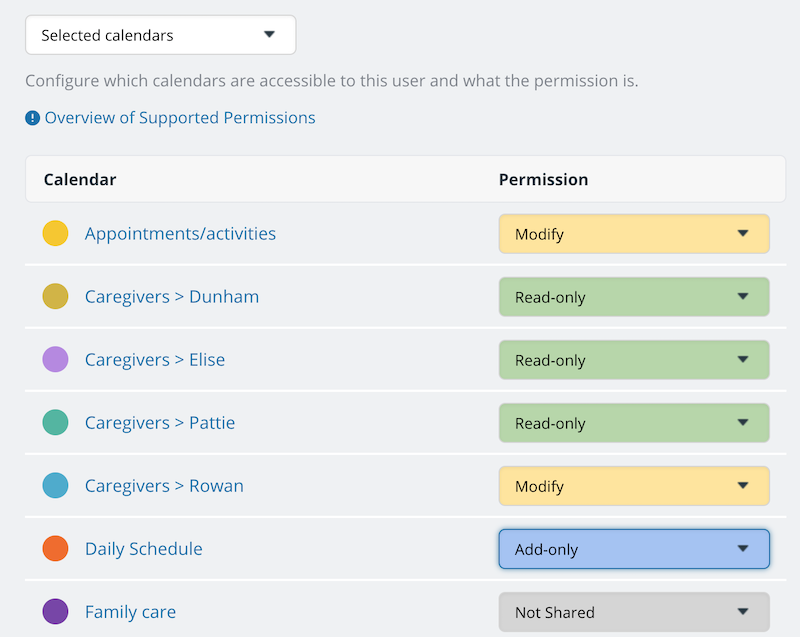
Choose access permission level
To set the level of access permission, use the drop-down Permission menu.
Set a single permission level for All calendars:
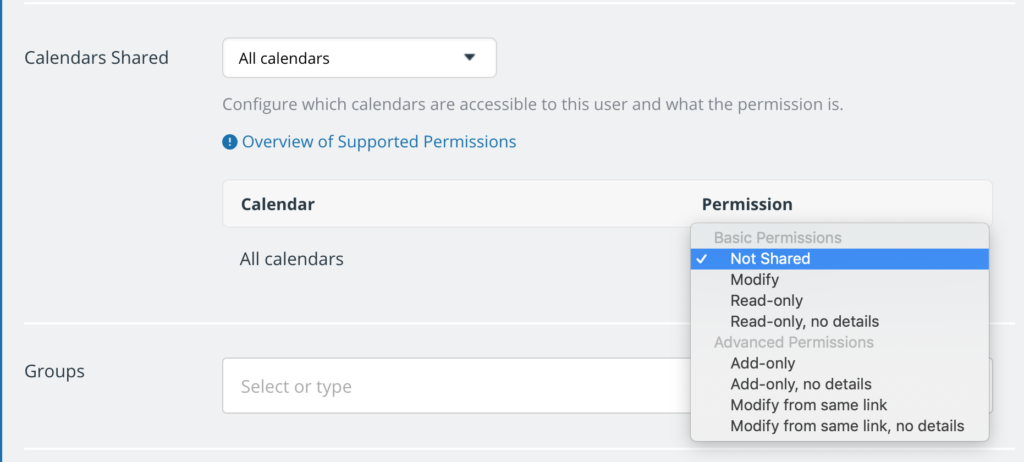
Set a permission level individually for Selected calendars:
When permissions are set, click Save.
The calendar invitation email
Once you have configured and saved the user permissions, the calendar invitation will be sent via email. To access the calendar, the individual simply follows the link in the invitation email.
If needed, you can resend the invitation email:
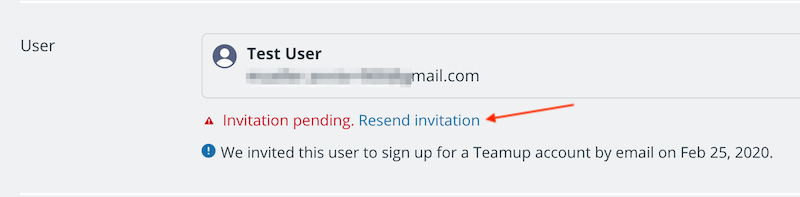
- Go to Settings > Sharing.
- Find the user in the list of users, links, and groups.
- Click to edit the user.
- Click on “Resend invitation” below the individual’s email address.
Modify a user’s permissions
At any time, you can modify the calendar access and permissions for any account-based user:
- Open Teamup in a browser.
- Click the blue menu (top right).
- Select Settings.
- Go to the Sharing tab.
- Locate the user in the Sharing list.
- Click on the user’s name or on the Edit icon next to the user’s name.
- Scroll to Calendars Shared section and make changes as needed.
- Click the green Save button.
Add a user to a group
Groups are an easy way to organize and manage multiple users. If you have multiple individuals who need the same kind of calendar access, create a group. Then you can set the calendar permissions for the entire group, and add or remove individual users from the group as needed.
When you add an account user, you can add them to an existing group:

- Scroll to the Groups section of any user’s settings.
- Select the group from the drop-down menu.
- Click Save.
The user will be granted the permissions that are set for the group.
ℹ️ Learn more
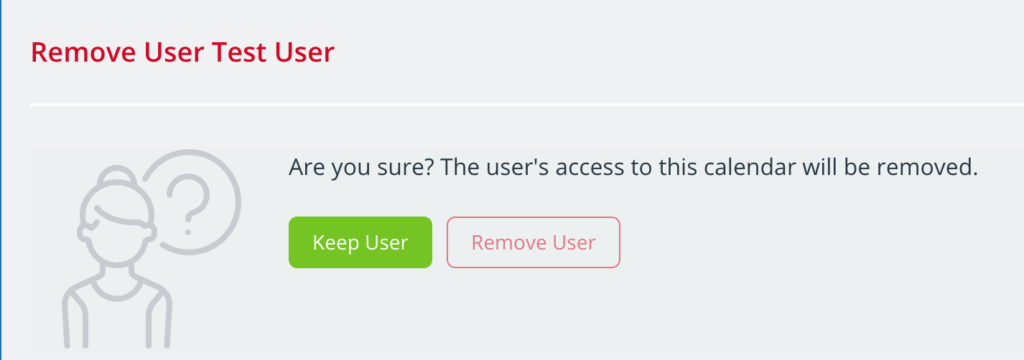
Remove a user
When needed, you can remove an account-based user from your calendar.
- Open Teamup in a browser.
- Click the blue menu (top right).
- Select Settings.
- Go to the Sharing tab.
- Locate the user in the Sharing list.
- Click on the user’s name or on the Edit icon to open the settings for that user.
- Click the red Remove button.
- You will be asked to confirm the removal: