Sub-calendars are a way of organizing your Teamup master calendar, as well as categorizing and color-coding events. They can represent people, resources, projects, areas, anything you like. Sub-calendars can be assigned to folders. This article discusses how calendar administrators can create, organize, and manage sub-calendars, and how any calendar user can use sub-calendars.
Video: How to Share and Organize Sub-Calendars
Blog post: How to Use Teamup’s Color-Coded Sub-Calendars
How to create sub-calendars
To create, modify, or otherwise manage sub-calendars, you must access your Teamup Calendar in a web browser with administrator access.
The number of sub-calendars that can be added to your master calendar is a feature of the subscription plan. See our pricing page for details.
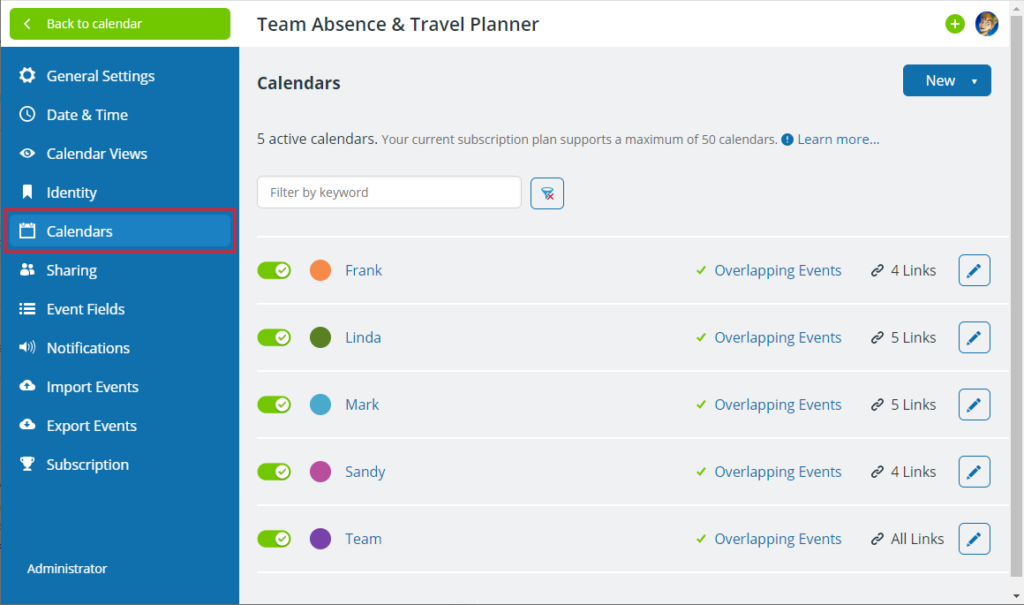
- To create a new sub-calendar, go to Settings > Calendars.
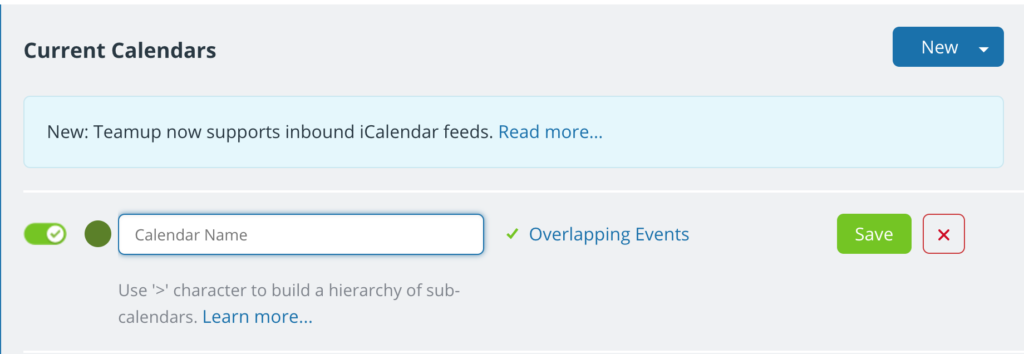
- Click the blue New button in the top right.

- Select Add Calendar.
- Enter the calendar name and click Save.

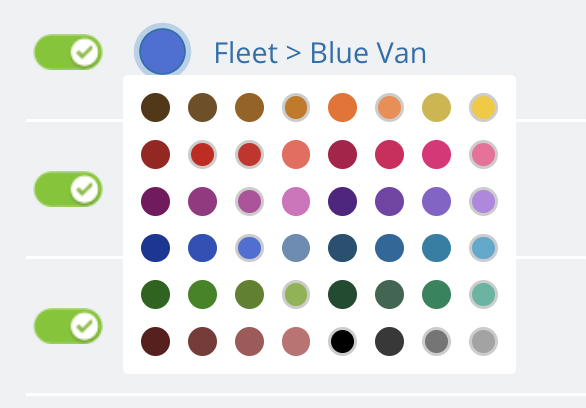
- To change the color, click the colored circle next to the calendar name, then choose your desired color.

- To adjust more details of any sub-calendar, click the Edit icon to the right of that calendar.

Sub-calendars or iCalendar feed
When you add a new sub-calendar you can choose between two types:
- Regular sub-calendar
- iCalendar feed: Data is periodically fetched from a remote calendar application. This can be another Teamup Calendar or any other third party calendars system like Google Calendar, Outlook, iCal, and many more. iCalendar feeds are read-only. Read more about setting up iCalendar feeds.
Prevent double-bookings
Sub-calendars can be configured to allow or disallow overlapping events:
- Click the Edit icon next to any sub-calendar.
- Toggle the button next to Allow Overlapping Events on or off as desired.

This feature can be used to prevent the double-booking of resources. Please note that the check for overlapping events is limited to one year from the start date of an event.
Organize sub-calendars
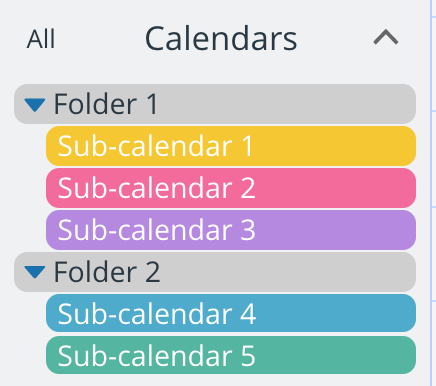
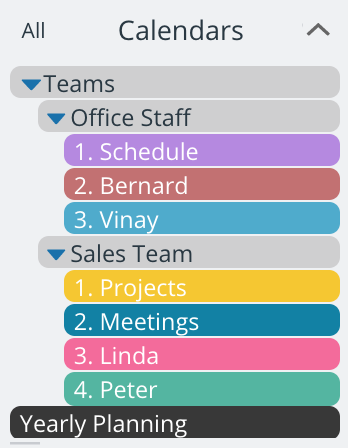
Sub-calendars can be organized in a hierarchy of folders. Learn more about organizing sub-calendars in folders.
Ordering of sub-calendars
By default, sub-calendars are arranged alphabetically. Using numbers in the sub-calendar names allows you to control their order.
Access to sub-calendars
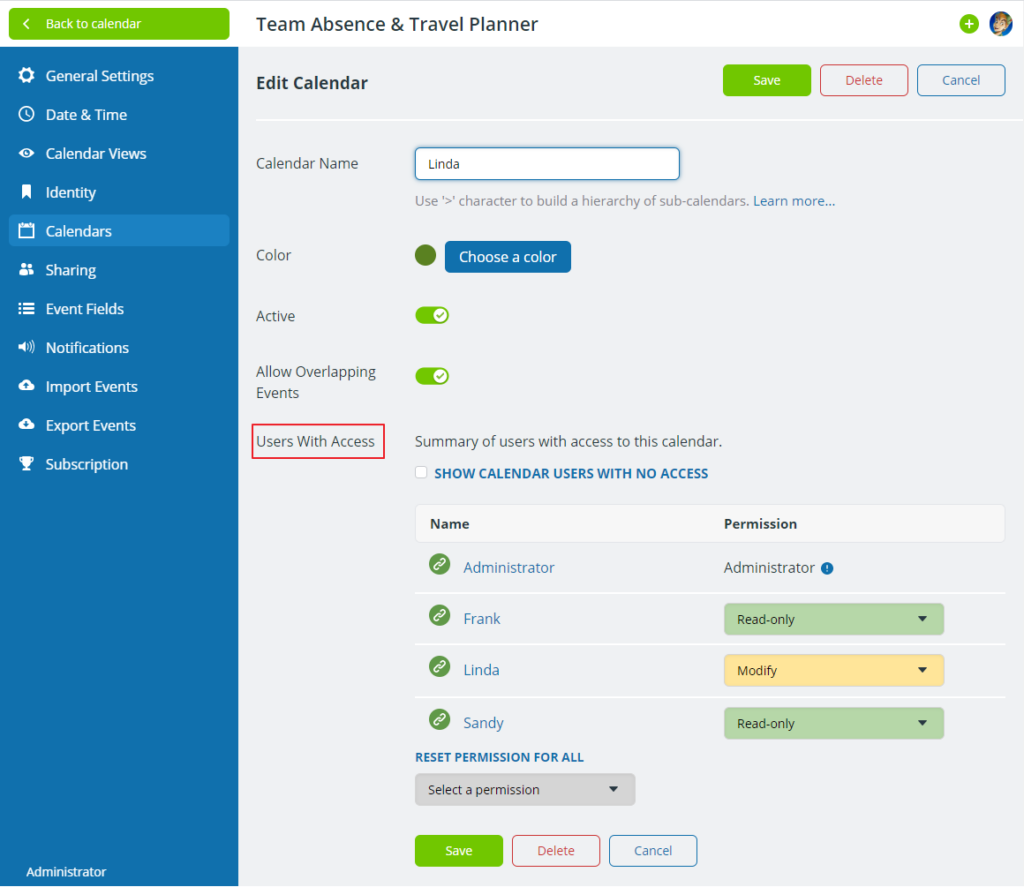
Access permissions to a sub-calendar can be configured in the Sharing view of the calendar settings. However, the edit view of a sub-calendar provides a summary view of all users and links and their access permission to a sub-calendar.
How to use sub-calendars
You can see all sub-calendars listed in the Calendars section of the left-hand control panel of your calendar.
Smart filter for sub-calendars
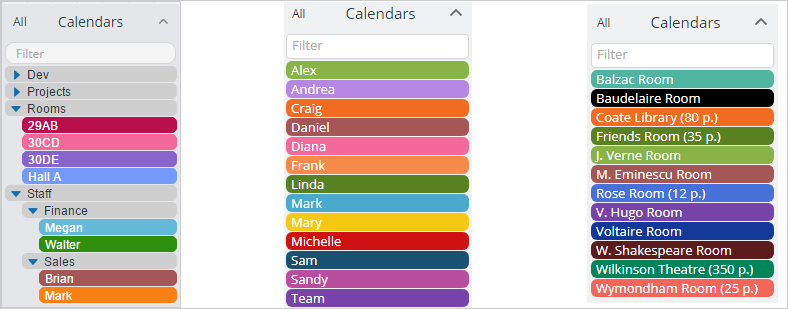
If you have more than 24 sub-calendars, a smart filter will be placed above the sub-calendar list. Start typing in the smart filter to quickly see a shortened list of matching sub-calendars. The calendar will display only events on those matching sub-calendars. Clear the smart filter to restore all sub-calendars (and events) into view.
Here are three examples of the sub-calendar list:
Control sub-calendars in your view
You can turn sub-calendars on and off from your current calendar view. When a sub-calendar is toggled off from your view, events on it will not show up. When you toggle it back on, the events will show back up on your calendar.
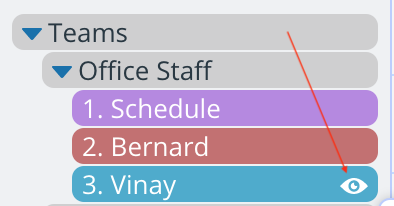
To toggle on a single sub-calendar (and simultaneously turn all others off), use the Eye icon.
The Eye icon appears on the title bar for a folder or sub-calendar when you hover your mouse over it. On mobile, simply tap the Eye icon to the right of the sub-calendar.
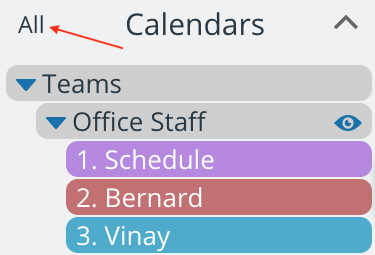
Add more sub-calendars back to your view by clicking on their title bar.
Add all sub-calendars back to view by clicking All above the calendar list.
Filter events by sub-calendar
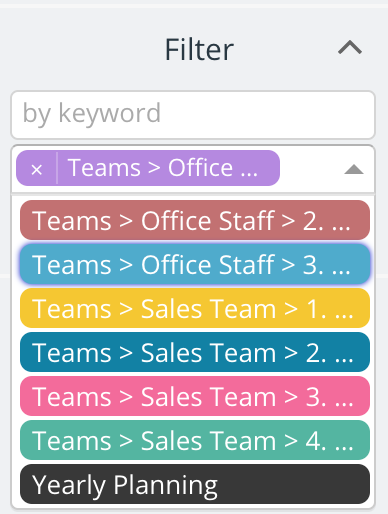
You can also filter by sub-calendars without turning them on and off from your calendar view.
To do so, use the filter option below the calendar list.
There is a drop-down menu with the list of sub-calendars. You can select one or multiple sub-calendars. To clear your filters, click on the blue Clear text below the filters.
Deactivate sub-calendars
You can deactivate sub-calendars if they are no longer needed but you do not with to lose the event history on the sub-calendar.
To do so:
- Access your Teamup Calendar in a web browser with administrator access.
- Go to Settings > Calendars.
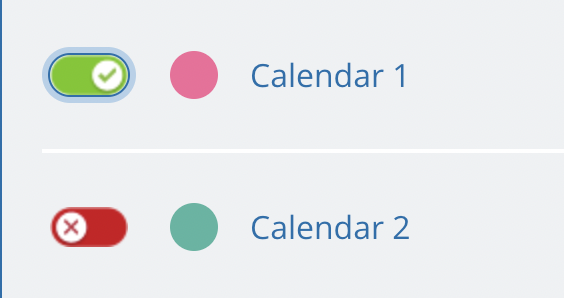
- In the list of sub-calendars, use the toggle button to deactivate (or activate) any sub-calendar:
Delete sub-calendars
To delete a sub-calendar:
- Access your Teamup Calendar in a web browser with administrator access.
- Go to Settings > Calendars.
- Click the Edit button next to the sub-calendar you wish to delete.
- Click the red Delete button in the top right.
- Note the warning: This calendar and all events assigned to it will be deleted permanently.
- Click the red Delete Forever button to permanently delete the sub-calendar.
Keywords: colour coding, color-coding, categories, organize

