Open the Room Reservations live demo: a secure self-booking calendar for room reservations.
Secure self-booking for shared resources
Scenario: A community center has several meeting rooms for members. These spaces can be used for meetings, activities, special events, and seminars. To make booking easier and reduce admin work, the center offers self-booking. This lets members securely add their own reservations to the calendar.
Each shareable calendar link gives the right access level. A read-only link lets users see reservations but not change them. An add-only link for one room allows users to book that room.
Try it out
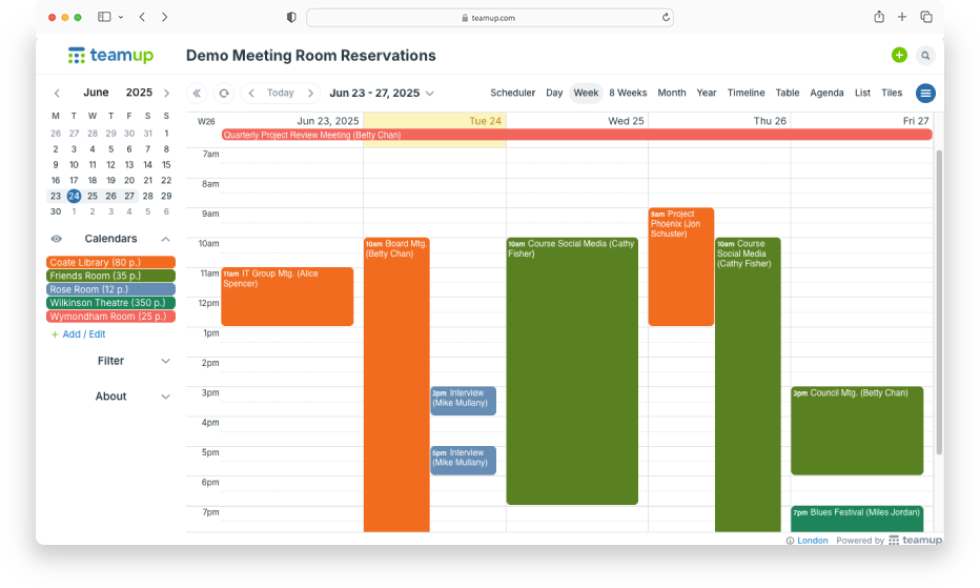
Open the live demo Room Reservations calendar, then use the links and tips in the About box (left sidebar):
- Role play as different team members to try out customized calendar access. Use the links in the About box. You can switch back and forth between views.
- Switch calendar views to see room availability in different layouts. Be sure to try Scheduler view and Timeline view!
- Create a recurring event for a weekly reservation. Upload images or files to the Description or Attachments field.
- Check out the settings: Click the blue menu in the top right corner, then select Settings. Add and organize sub-calendars, create a custom field to capture booking requests, and change any other defaults.
When you’re ready, you can create your own Teamup calendar. Follow the steps below to recreate this scenario for your calendar.
Set up a self-booking reservations calendar
This scenario involving scheduling one dimension. See also how to manage two or more dimensions, or read about a real user story similar to this scenario.
Create sub-calendars
- Create a sub-calendar for each room or space.
- If you have many rooms to manage, organize sub-calendars in folders.
- Turn Overlapping Events off on each sub-calendar to prevent double-booking.
Configure event fields
- Set up default event fields to capture the information needed for each booking.
- Create custom field(s) to provide a choice field or space for more details.
Provide guidelines
- Give self-booking users helpful information, steps, or guidelines for booking in the About box (left sidebar, browser only).
Customize access
Add anyone who will help manage the calendar as an account user with appropriate permissions, such as Modify access for all sub-calendars. This permission will allow the Manager to add, modify, or delete any events from any of the calendars.
Create shareable calendar links with customized access to share with community members.
For example, to create a shareable link for self-booking in one room only:
- Go to Settings > Sharing.
- Click Create Link, then name the link.
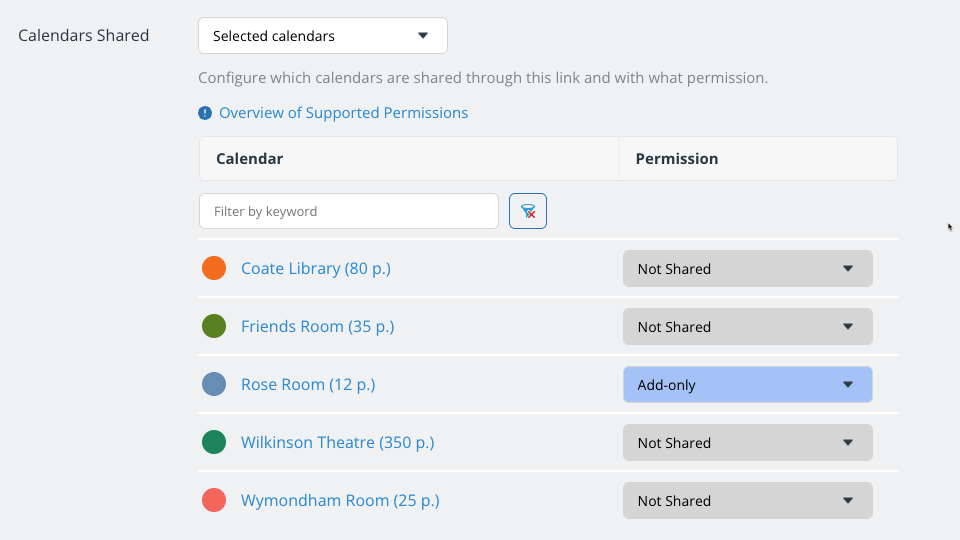
- In the Calendars Shared section, assign Add-only permission to the self-booking room’s calendar (e.g. Rose Room). For all other calendars, assign Not Shared or Read-only, as shown below.
Share the calendar
You can embed the booking calendar in a website. This is an easy way for users to check room availability.
- Go to Settings > Sharing.
- Click Create Link, then name the link.
- Set the permission to Read-only, no details for All calendars.
- Adjust the permissions if you want to show availability only for certain rooms: Choose Selected calendars instead of All calendars and assign the appropriate permission (Read-only, no details or Not shared) for each calendar.
- Save the link.
- You can share the link directly or use the link to embed the calendar.