Choice fields are a type of custom field. A choice field has prefilled options that are configured in the calendar settings. A choice field can be single choice or multiple choice. Choice fields allow important predefined information to be consistently captured without having to type out the details in each event.
Create a custom choice field
- Open Teamup in a browser with admin access.
- Go to Settings > Event Fields.
- Click New Field (top right).
- Enter a name for the custom field.
- Select Choices from the Type menu:

- Select Single-choice or Multiple-choice:
- Create the options for the choice field. For each option, type in a name, set the color, and (optionally) assign an emoji, then click Add.
- Make the field required or optional by selecting Yes or No in the Required section. Choose what shows in the event title: The option name, assigned emoji, or nothing.
- In the Visibility section, select the option you want (All users or Users with modify permission) from the menu.
- Click Save.


Ways to use single-choice fields
- Project management: Add status options to the choice field so team members can update task status and keep each other informed.
- Workflow consistency: Set the specific workflow steps as the option. Users can update the field as they move a task or assignment through the workflow.
Ways to use multiple-choice fields
- Job scheduling: Set relevant skills as options for the choice field. When a job is confirmed, the calendar user can select the required skills for that job.
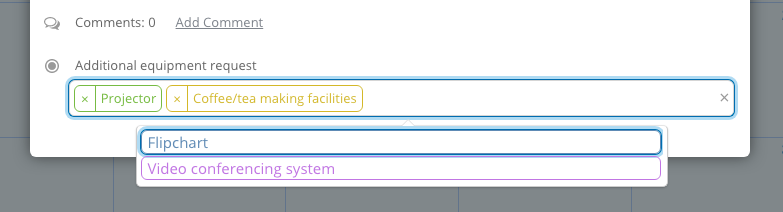
- Room booking: Add available equipment as options for the choice field. The equipment can be requested by selecting the desired options.
Manage custom choice fields
The calendar administrator can manage custom choice fields in Settings > Event Fields:
- Add or edit options for the choice field.
- Disable options that are no longer needed.
- Deactivate the choice field.
- Rename or rearrange the choice field.
See more details on configuring event fields.