
When you create a Teamup calendar, you create a master calendar which can have multiple sub-calendars. Each master calendar has its own subscription plan, from Free to Enterprise, which is managed within that calendar’s settings by the administrator.
Each calendar has its own subscription
A subscription is attached to a master calendar, not to a person or a user account.
An individual might create or have access to multiple calendars through their user account. Each Teamup calendar has its own subscription, which is managed through the calendar settings (not through a user account).
ℹ️ Master Calendar vs. Sub-Calendars
What happens when I change the subscription?
Changing the subscription of a calendar doesn’t change the calendar itself: the data, settings, and users will stay the same. If you’ve been using Teamup on the free plan, you don’t have to start over with a new calendar; just upgrade to the paid plan you need.
- Upgrading a calendar subscription: The additional features and higher limits of the upgraded plan will become available for that master calendar.
- Downgrading a calendar subscription: The limitations of the downgraded plan will be applied to that master calendar.
- Data older than the historical data limit will no longer be accessible.
- Sub-calendars, users, and custom fields over the plan limits will be deactivated.
ℹ️ Manage Calendar Subscription Plans
⏺️ How Calendar-Based Subscription Plans Work
Do I need multiple Teamup calendars?
Maybe! Scaling Teamup to include more teams or projects can be done two ways:
- Upgrading one master calendar to a subscription with more sub-calendars and users (requiring one subscription only for the one master calendar)
- Creating additional, separate master calendars (requiring a subscription plan for each master calendar).
One master calendar: A Teamup master calendar can have only one sub-calendar, or many. So it’s possible to scale up by adding more sub-calendars to the Teamup calendar you already have. To do this, upgrade the subscription for that calendar to allow more sub-calendars, users, and so on.
⏺️ When to Use One Big Master Calendar
Multiple master calendars: For most larger organizations, multiple master calendars are standard. As more locations, departments, and teams move their scheduling into Teamup, separate master calendars give each group the independence it needs. For example, an organization with 20 locations creates 20 Teamup calendars, one for each location. Each location’s calendar is entirely distinct: Separate administrator, unique configuration and users, and its own subscription plan.
ℹ️ Organization Accounts provide centralized administration, an org-wide user count, SSO support, and consolidated billing for multiple master calendars.
What each subscription plan includes
Plans differ mainly in how many sub-calendars and users a calendar can have. Other important differences include additional custom fields, historical data limits, inbound feed refresh rates and the Daily Agenda feature.
| Free | Plus | Pro | Business | Enterprise | |
|---|---|---|---|---|---|
| Sub-calendars | 5 | 12 | 25 | 70 | 150 |
| Users | 5 | 12 | 25 | 50 | 100 |
| Custom fields | 1 | 1 | 10 | 20 | 50 |
| Calendar history | 1 year | 5 years | 5 years | 10 years | 15 years |
| Inbound iCalendar feed refresh | 12 hours | 4 hours | 1 hour | 15 minutes | 5 minutes |
| Daily Agenda | — | ✓ | ✓ | ✓ | ✓ |
See a full plan comparison chart and pricing.
Try out a paid subscription plan
When you create a new Teamup calendar, it automatically starts on the free (Basic) plan. It will stay on the free plan unless you change the subscription in the calendar’s settings.
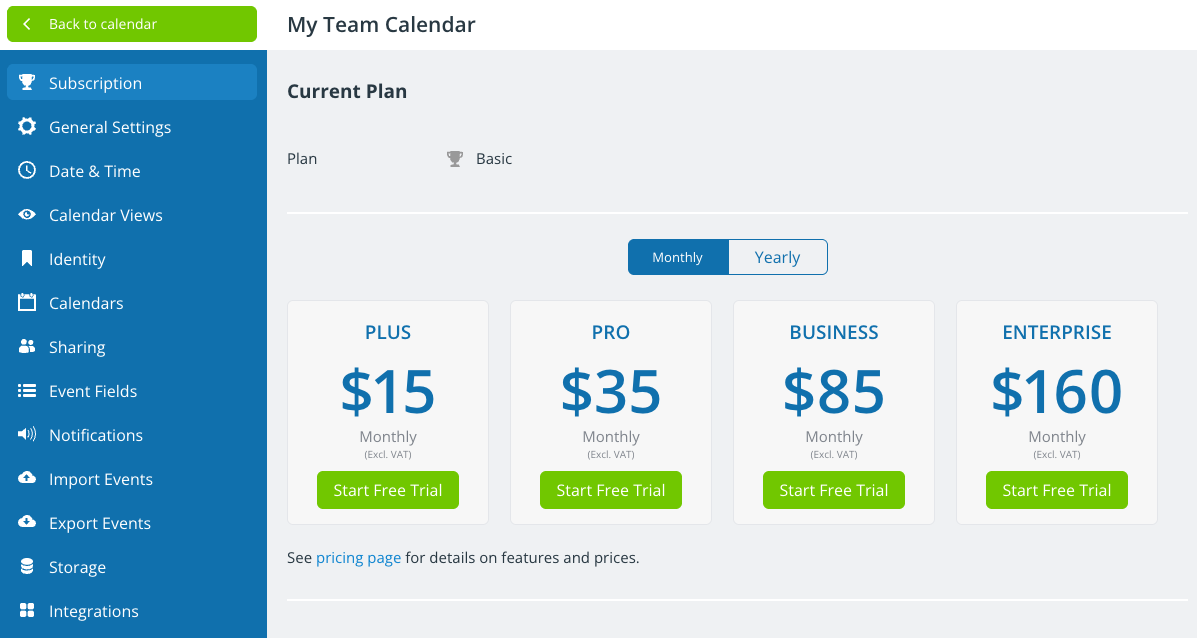
You can try out a paid subscription by starting a free three-day trial. Entering billing details during the trial starts a paid subscription. To keep it a trial only, don’t enter payment details.
- Open your new Teamup calendar in a browser.
- Go to the Settings.
- Go to the Subscription tab.
- Click the green Start Free Trial button under the subscription level you want to try: Plus, Pro, Business, or Enterprise. The free trial does not require a credit card.
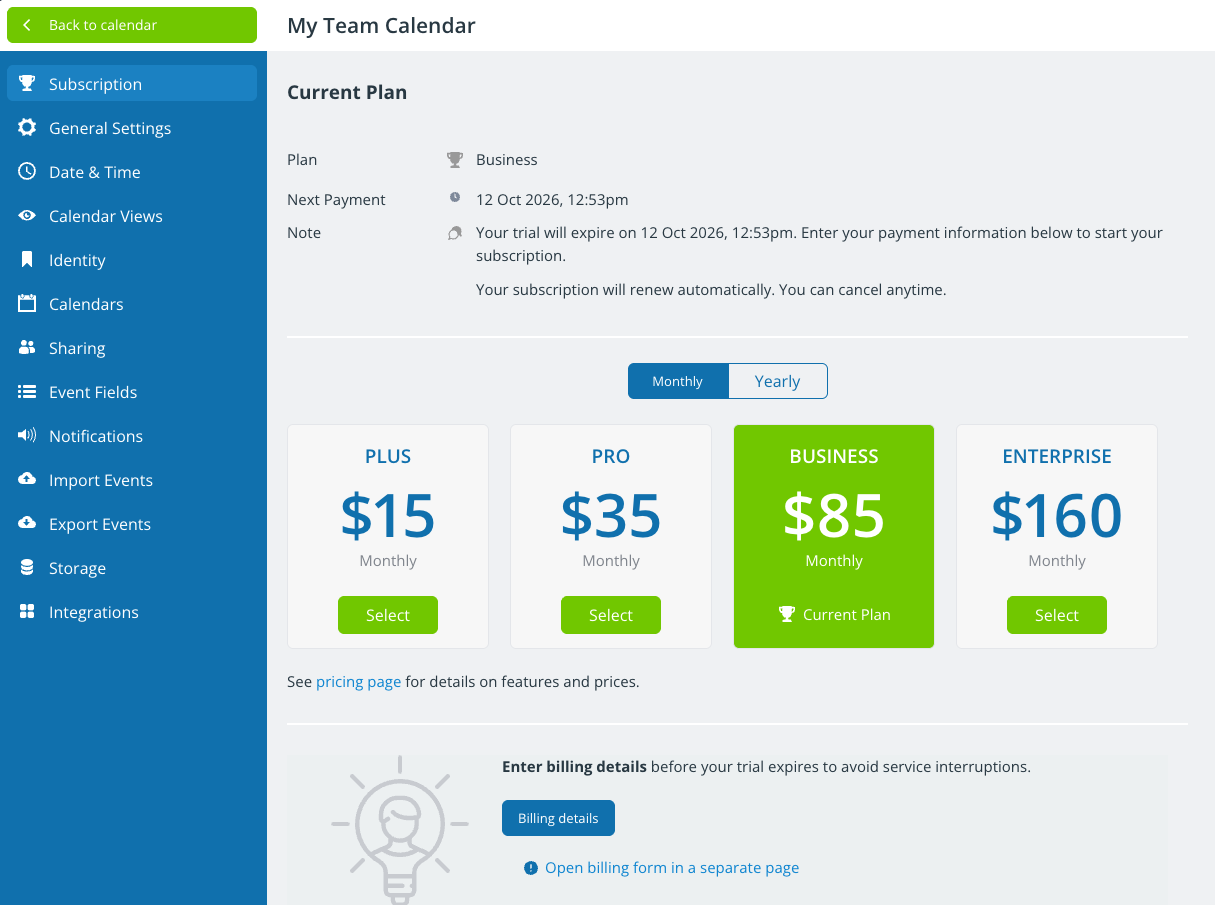
- The calendar’s subscription information will update, showing you when the free trial ends:

- To revert to the free plan: Do nothing. If you do not enter payment information during the trial, it will automatically end after three days and the calendar will revert to the free plan.
- To initiate a paid subscription: Enter billing details. Doing so will initiate a paid subscription for the plan you select. Payment will be processed immediately.
Add more sub-calendars, users, or fields
Some plans can add capacity without requiring an upgrade to a higher plan.
- More users: Pro, Business, and Enterprise. Add the additional users as needed in Settings > Sharing. Each user over the plan limit will be charged at $3/month or $36/year per user.
- More sub-calendars: Business and Enterprise only, in packs of 10.
- More custom fields and field choices: Business and Enterprise only, in packs of 10.
Extras are added to the calendar’s existing subscription, and charged a prorated amount up to the next renewal date. An invoice is emailed when the charge goes through. After that, extras renew at full price along with the plan.
To add sub-calendar, custom field, or field choice packs to a Business or Enterprise plan, contact support with the calendar name.
Upgrade, downgrade, cancel, or reactivate
All changes to a subscription are made in the calendar’s settings:
- Open the Teamup calendar in a browser.
- Go to Settings.
- Go to the Subscription tab.
- Upgrade: Click Select on the new plan. If upgrading from Free, add billing details first. Upgrading from a paid plan charges only the price difference and takes effect immediately.
- Downgrade. Click Select on the lower plan. The change takes effect at the end of the current billing period. Sub-calendars, users, or custom fields over the new limit are deactivated (not deleted). Historical data older than the new plan allows is no longer visible.
- Cancel: Click the blue Cancel Subscription button in the top right. Confirm on the next screen. More details below.
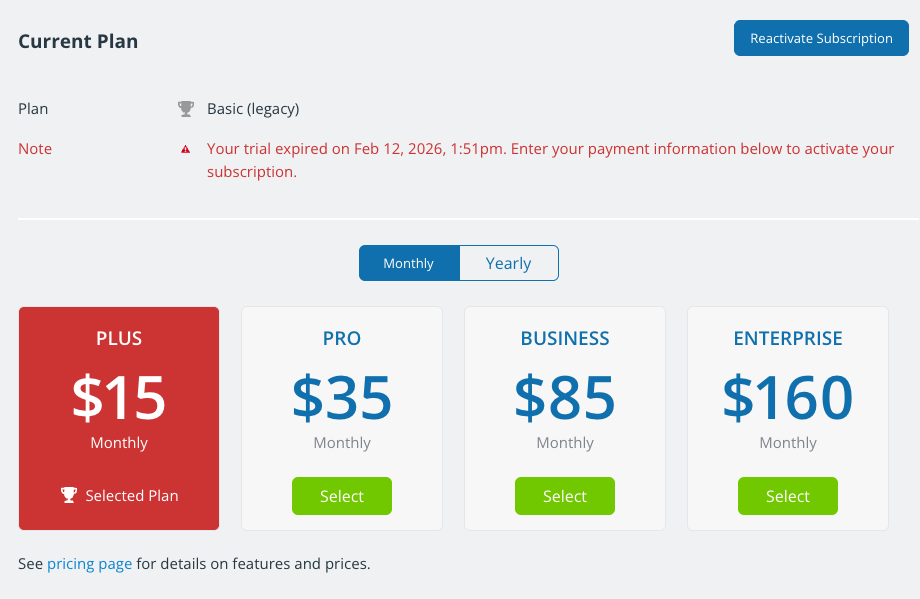
- Reactivate: To start a paid subscription after the trial has ended, or restart after cancelation, click Select on the plan you want to activate. Enter Billing details if needed. Then click the blue Reactivate Subscription button in the top right.
▶️ Upgrade a Calendar’s Subscription Plan
ℹ️ Upgrade or Downgrade a Calendar Subscription
Plan renewal and billing cycle
The free plan has no time limit and requires no payment method. However, note that inactive free calendars are periodically cleared from our servers.
On paid plans, subscription renewal is automatic. The next renewal date is shown in Settings > Subscription.
A calendar subscription can switch between monthly and yearly billing.
- Open the Teamup calendar in a browser.
- Go to Settings.
- Go to the Subscription tab.
- Click the Monthly or Yearly tab to switch the billing cycle as preferred. Any credit left on the current cycle will be applied to the new one, so only the difference is charged.
Payment, currency, and invoices
Payment methods include credit card, PayPal, Google Pay, and Apple Pay. Checks, purchase orders, bank transfers, and invoices in advance are not accepted.
- All prices, payments, and invoices are in US dollars.
- Payment and billing details, as well as billing history, are always available to the calendar administrator in Settings > Subscription.
- After a payment is successfully completed, an invoice is automatically emailed to the billing contact and made available to download.
- The billing contact can manage billing and payment details via direct billing link or through the calendar settings (with administrator access).
- If a payment fails, it will be automatically retried; if still unsuccessful, the calendar will be reverted to the free plan.
Add, change, or remove payment method
- Open the Teamup calendar in a browser.
- Go to Settings.
- Go to the Subscription tab.
- Add a payment method: Click the blue Billing details button, enter the required information, and click Save.
- Change the payment method: Scroll to the Billing section. Click Update Payment Method to change the payment method. Enter new details, then Save.
- Remove a credit card: Scroll to the Billing section. Click the trash can icon next to the Update Payment Method button. On the next screen, click Delete Payment Method to confirm.
Cancel a subscription
Canceling turns off automatic renewal. It doesn’t delete the calendar or calendar data or remove users. However, once the calendar reverts to the free plan, any sub-calendars, users, and custom fields over the free plan limit will be deactivated. Historical data will only be accessible up to the free plan’s limit (one year).
- Open the Teamup calendar in a browser.
- Go to Settings.
- Go to the Subscription tab.
- Click Cancel Subscription (top right).
- On the next screen, click the red Cancel Subscription button.
The plan will remain until the end of the paid billing period, then the calendar will revert to the free plan. See how to export data and do so before historical data access is limited to the free plan.
Note that canceling a calendar subscription does not delete the calendar or delete any user accounts.
ℹ️ Cancel a Calendar Subscription
▶️ Interactive demo: Cancel a calendar subscription