When you create a Teamup Calendar, you can set defaults and configure other settings as needed. One of these settings is the default calendar view. In this guide, we’ll go over the different calendar views and how you can configure them.
The default calendar view
Teamup’s web client has 12 unique calendar views. When the calendar is loaded (in a browser) it will open with the default calendar view.
Choosing the most appropriate default calendar view is an important task for the calendar administrator. The default view can make the calendar more user-friendly by helping people see what is important right away and work more efficiently.
Set the default calendar view

- Open your calendar in a browser with administrator access.
- Go to Settings > Calendar Views.
- In the Default section (at the top), choose the view you want.
- Set the Calendar Resolution to the desired increment for the time grid.
- Choose whether or not to Hide Weekends.
- Scroll to the section for the selected view and adjust any configuration options as needed.
- Enable or disable other calendar views as desired.
Important notes
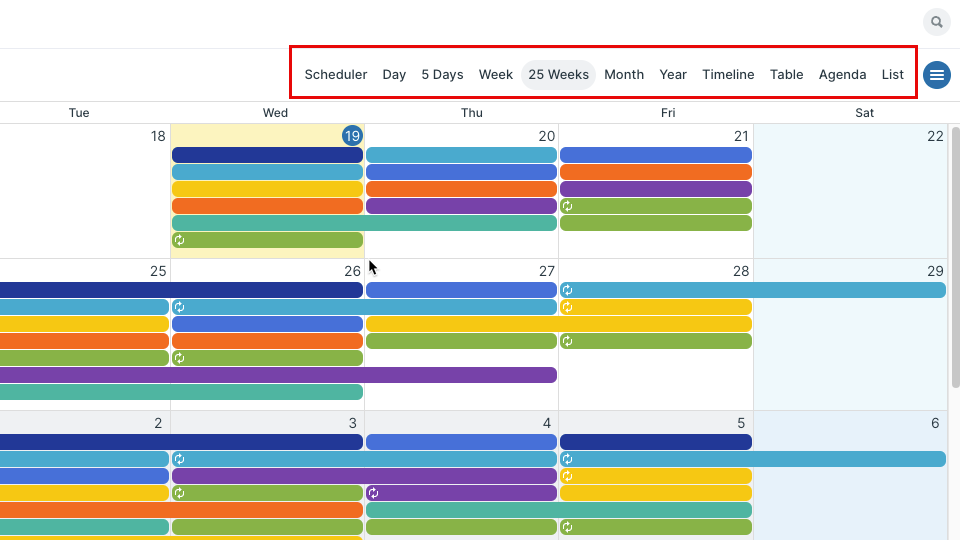
- Calendar users can switch to other enabled calendar views using the view picker.
- Calendar users can switch to any calendar view by using a link parameter.
- On the Teamup app, there are four calendar views (List, Day, Week, and Month). If the default calendar view is not one of these views, the app will open on List view as the default.
Calendar view types and considerations
Short-term views
For a short-term focus, like overseeing daily job assignments, managing a weekly schedule, or dealing with priorities for the workweek, choose a short-term view.
- Day view: Standard calendar day view with all-day events above the time grid.
- Multi-day view: Choose the number of days, up to 6.
- Week view: Standard calendar week view with all-daye events above the time grid.
- Multi-week view: No time grid. Choose the number of weeks.
- Scheduler view: Calendars shown side-by-side, showing a single day or multiple days.
Long-term views
When a calendar is used for long-range planning or project overviews, choose a default view showing the big picture.
In these calendar views, you can see a whole year (or more) on one screen:
- Multi-week view: Set to a higher number of weeks, up to 53.
- Year view: Set to the desired number of months (1-12).
- Scheduler view: Calendars shown side-by-side, showing up to 5 years with adjustable resolution.
- Table view: Events in a spreadsheet-like format; you can set a custom long-term date range.
Timeline view also provides a long-term view, showing up to 30 weeks with adjustable resolution. Each sub-calendar is in its own row with the time displayed horizontally.
Visible information
Different calendar views show varying levels of information.
Table view, for example, shows each event field in its own column. So event details are visible without clicking to open individual events.
List and Agenda views can be used with details shown by default, so event information and images can be seen by scrolling down the event list.
Other views show event titles. Users can hover over an event to see an event preview, or click to open an event to view all details, images, and attachments.
Calendar resolution
Consider also the best setting for the calendar resolution, which determines the time increments shown on any view with a time grid. Here are a few considerations:
- Set the calendar resolution to a smaller increment (5 to 15 minutes, for example) to view schedules at a more granular level.
- Set the calendar resolution to match the most common event types. For example, if you frequently schedule 15-minute meetings, set the resolution to 15 minutes as well. Make sure the default event duration is set to automatic. When you create a new event from the time grid, the prefilled duration will be 15 minutes.
Users can adjust the calendar resolution from the menu; their adjustment will last for a single browser session and will reset to default for a new browser session.
For Scheduler and Timeline views, the resolution is adjusted with the calendar view controls.
Standard or custom date ranges
Will calendar use fit into standard calendar view ranges, like day, week, and month? If so, one of these views may be the best choice. They’re familiar to users, too, which can be helpful for calendars that are shared with a large group or embedded for public viewing.
Current date on top
It’s often helpful to have the current date at the top of your calendar view, even if you’re working in a standard date range like week or month. You can use Multi-day view set to 7 days and you’ll always have the current day in the first column (rather than the first day of the week). You can use Multi-week view set to 4 weeks for a view that shows a month, but with the current week always at the top.
Custom date range
If you’re working most often with custom date ranges, use one of the calendar views with a configurable default date range.
Calendar view configurations
Some calendar views support specific configuration options. In Settings > Calendar Views, scroll to the appropriate view to adjust the settings.
Scheduler view
 Set the default date range, number of days, weeks, or months shown, and default zoom level.
Multi-day view

Set the number of days (from 2 to 6).
Multi-week view

Set the number of weeks (from 1 to 53).
Year view

Set the number of months (1-12) to show by default. You can still adjust the number of months shown when using the calendar.
Table view

Set options for default date range, wrapping content, and event time sums. Select the default sorting order and choose columns (event fields) to show by default.
Timeline view

Choose between day, multi-day, week, or multi-week range, and set the default zoom range.
Agenda view

Set the default date range and choose whether or not to show details by default.
List view

Set the default date range, the default grouping, and whether or not to show details by default.
Enable or disable calendar views
The calendar administrator can choose which calendar views are enabled for users. Some calendar views are not helpful for certain use cases:
- If a calendar is primarily used for long-term planning, then short-term views like Day or Multi-day may not be helpful.
- If a calendar is shared publicly, some calendar views (e.g. Table, Scheduler, Timeline) are not needed and may confuse users.
- If a calendar is used for self-booking, you may want to limit bookings from being made too far in the future. Help users to stay within guidelines by disabling long-term views.
- In Settings > Calendar Views, there is a toggle beside each view.
- Switch it off (red) to disable that view.
- At any time, switch the toggle back on (green) to enable the view.
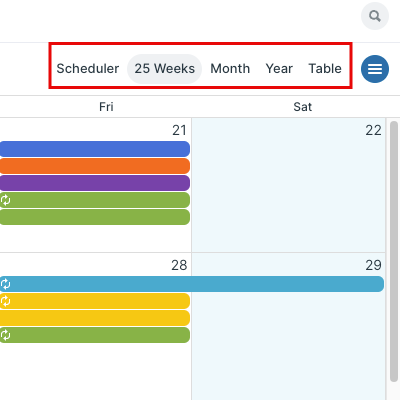
Enabled views will show in the view picker. Here’s a calendar with 5 views enabled:
Note: With a link parameter, users can switch to any calendar view, whether it is enabled or not.
Test different views and configurations
Don’t be afraid to try out different calendar views as you explore the best default for your needs. You can use any of our live demos to test out different views and configurations. When you’re ready, update the default view on your own calendar and see how it improves efficiency and makes things more user-friendly.