When you create a new event, you can set the duration of the event (the amount of time the event covers from beginning to end). The calendar administrator can set the default event duration. If the default event duration is set to automatic, all users can adjust it (for their browser session) by changing the calendar resolution.
About the default event duration
When you click anywhere on the hour grid to create a new event, the event duration will be preset to the default event duration: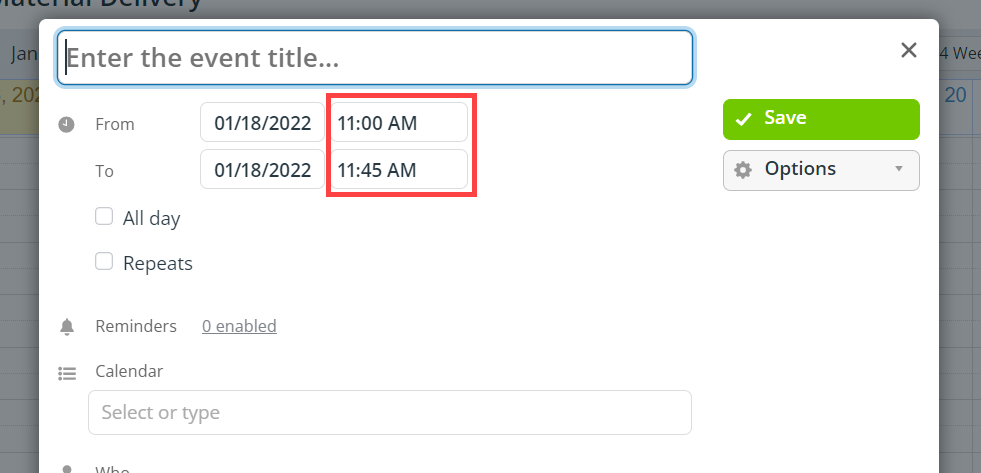
The default event duration can be automatic (based on calendar resolution) or set to a specific number of minutes. The default event duration setting applies to all users in all browsers.
Automatic event duration
Automatic default event duration is based on the calendar resolution.
Automatic duration allows more flexibility, as each user can adjust the calendar resolution (for their own browser session) and thus adjust the event duration without affecting other users. This is the default setting for Teamup calendars.
- The default event duration as set in Settings is stored on the server, which presets the event duration when any calendar user with Modify permission clicks on the time grid to create a new event.
- The calendar resolution is a client-side value; as such, it is only applied to an individual browser session, which impacts the display of the calendar and preset the event duration for each slot on the grid.
Manual default event duration
If the default event duration is set manually to a specific number of minutes, the duration will be prefilled at this amount regardless of the calendar resolution.
Set the default event duration
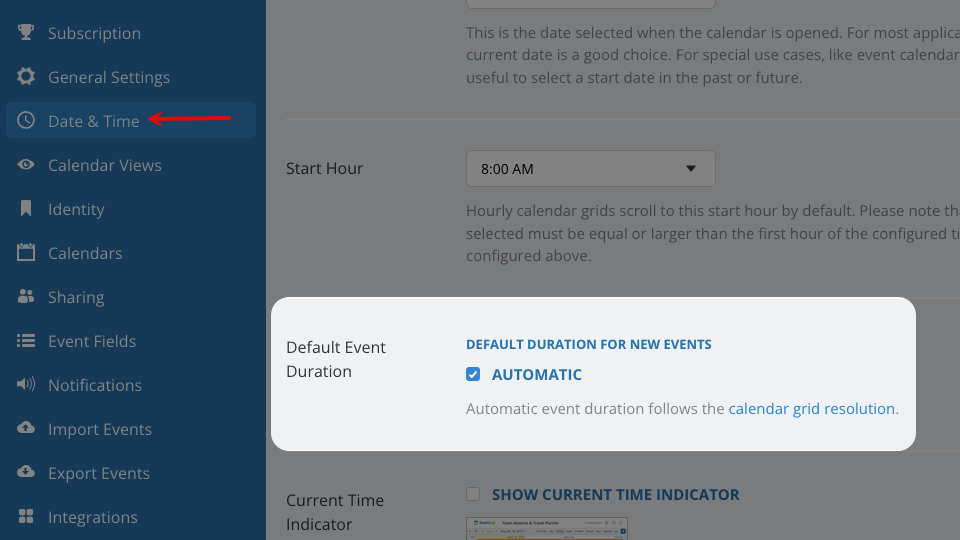
The calendar administrator can configure the default event duration in Settings > Date & Time.
- Open Teamup in a browser.
- Go to Settings > Date and Time.
- Scroll to the Default Event Duration section.
- Automatic: Leave the Automatic box checked. Automatic event duration follows the calendar resolution. Set the default calendar resolution in Settings > Calendar Views.
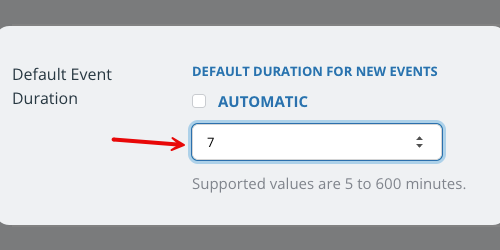
- Manual: Uncheck the Automatic box to manually set the default event duration. Click your cursor into the minutes field. Use the arrows or type to enter the number of minutes for a specific event duration.

- Your changes will be saved automatically.
Working with event duration
Change calendar resolution
If the default event duration is set to automatic, any calendar user can adjust it by changing the calendar resolution. This change only applies for that particular user for that particular browser session.
- Open Teamup in a browser.
- Click the blue menu (top right).
- Click on Calendar Resolution.
- Choose the time resolution, from 5 minutes to 180 minutes.
- For the duration of that browser session, the calendar resolution and default event duration will adjust to your setting.
When you start a new browser session, the calendar resolution (and corresponding default event duration) will revert to what has been set by the calendar administrator.
Adjust event duration manually
No matter what the default event duration, the duration for any event can be changed:
- In the event editor, adjust the beginning and/or ending time of the event.
- In calendar views with a time grid, adjust the event duration by clicking and dragging.