Scheduler view (browser only) is a unique calendar view which shows each sub-calendar in its own column. Seeing events from each calendar side-by-side is a great way to compare schedules and availability. To learn about other calendar views, see this article.
Scheduler view: Side-by-side calendar events
Scheduling people, facilities or booking rooms and items are typical tasks when working in a group context.
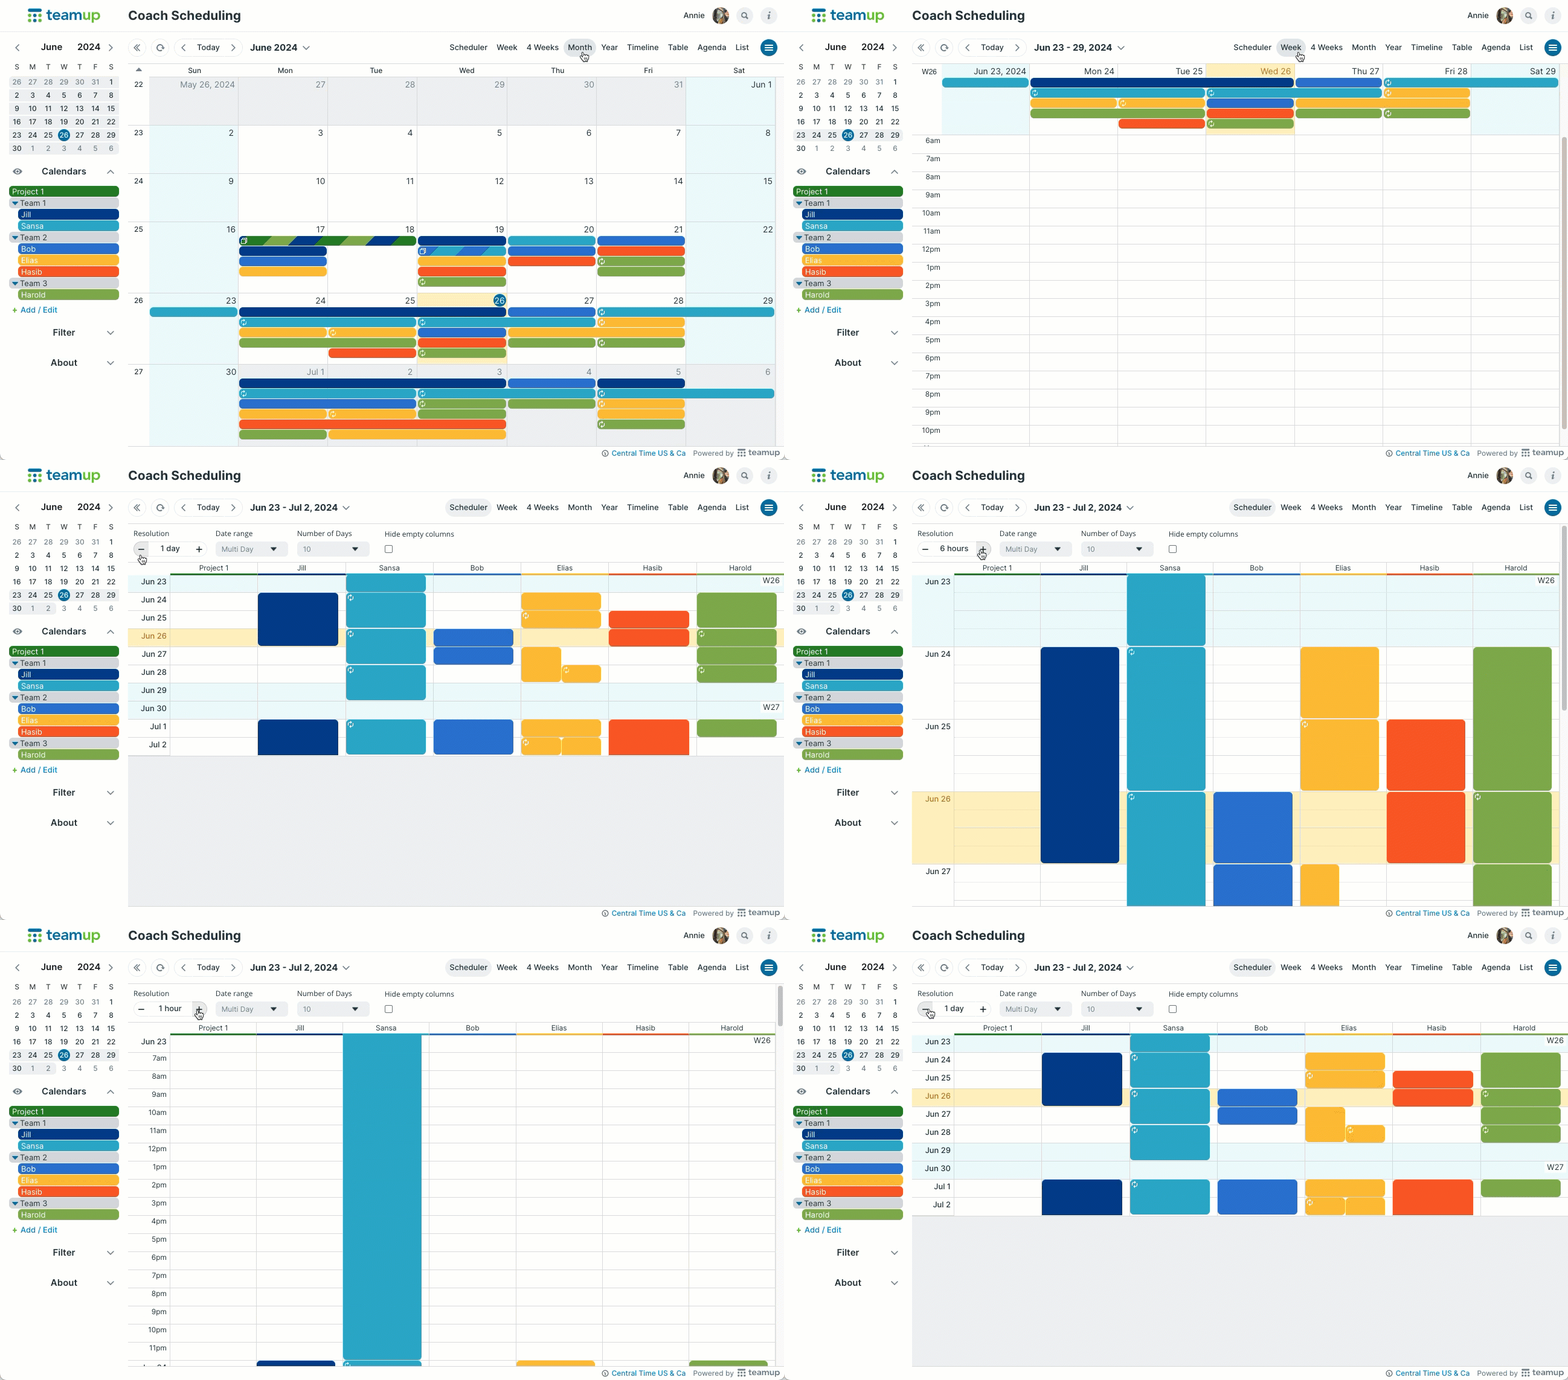
It is often helpful to view bookings or schedules side by side in these scenarios. For example, you might want to compare bookings for a shared space, employee shifts, or scheduled events and meetings for staff. Take a look at this calendar in different layouts (Month, Multi-week, Week, and Scheduler):

Scheduler view provides a clear visual layout with each calendar shown in its own column.
- See events from multiple calendars next to each other.
- Adjust the date range and resolution as needed.
- Toggle calendars on or off from view to view only the relevant events.
How to use Scheduler view
- Choose Scheduler from the view selector.
- Use the arrows or date picker as needed to adjust the visible date(s).
- Adjust the Resolution and Date range.
Note: If you don’t see Scheduler as an option in the view selector, ask your calendar admin to enable this view in settings (details below).
Adjust resolution and date range
Date range: Choose from Single Day, Multi Day, Weeks, Months, or Years.
Resolution: Click the − or + to adjust the resolution from 5 minutes to 1 year. As you change the resolution, the date range options will adjust.
- If you do not see one of these date range options, adjust the resolution.
- As you adjust the date range, you can set the number of days, weeks, etc.
Adjust visible columns (sub-calendars)
Hide or show selected calendars: click on the calendar title to show or hide that particular calendar.
Automatically hide empty columns: Check the box to automatically hide columns (sub-calendars) which do not have any events displayed in the visible time period.
Create, move, and copy events
- Create an event: Click and drag to create an event. The event editor will default to the calendar represented by the column you click in.
- Move an event: Drag an event from column A to column B, and the event will be automatically moved to the Column B calendar.
- Copy an event: Use CTRL + drag to copy an event from column A to column B and the copied version of the event will be automatically assigned to Calendar B.
Enable and configure Scheduler view
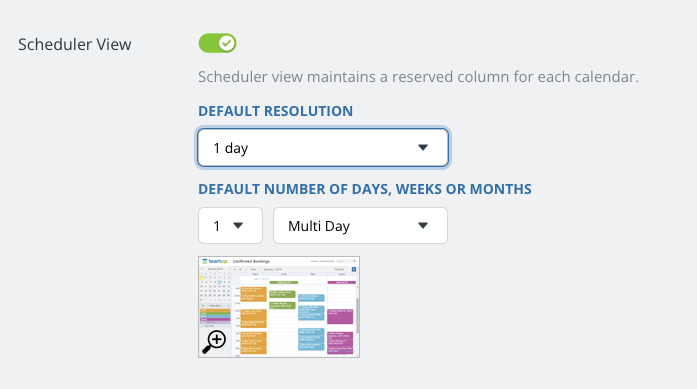
Calendar administrators can enable Scheduler view in Settings > Calendar Views and adjust the default settings. Once enabled, Scheduler view will be an option in the view selector. These views are available to all current users.

Users can adjust the settings while using the calendar in Scheduler view (i.e., change the date range, number of days, and zoom level). The calendar will reset to defaults when a new browser session is started.


