Conference room booking is a common use case for Teamup. We’ll go over a simple implementation to show how you can structure Teamup for booking conference rooms. It’s a flexible system that scales to meet your needs.
Single conference room
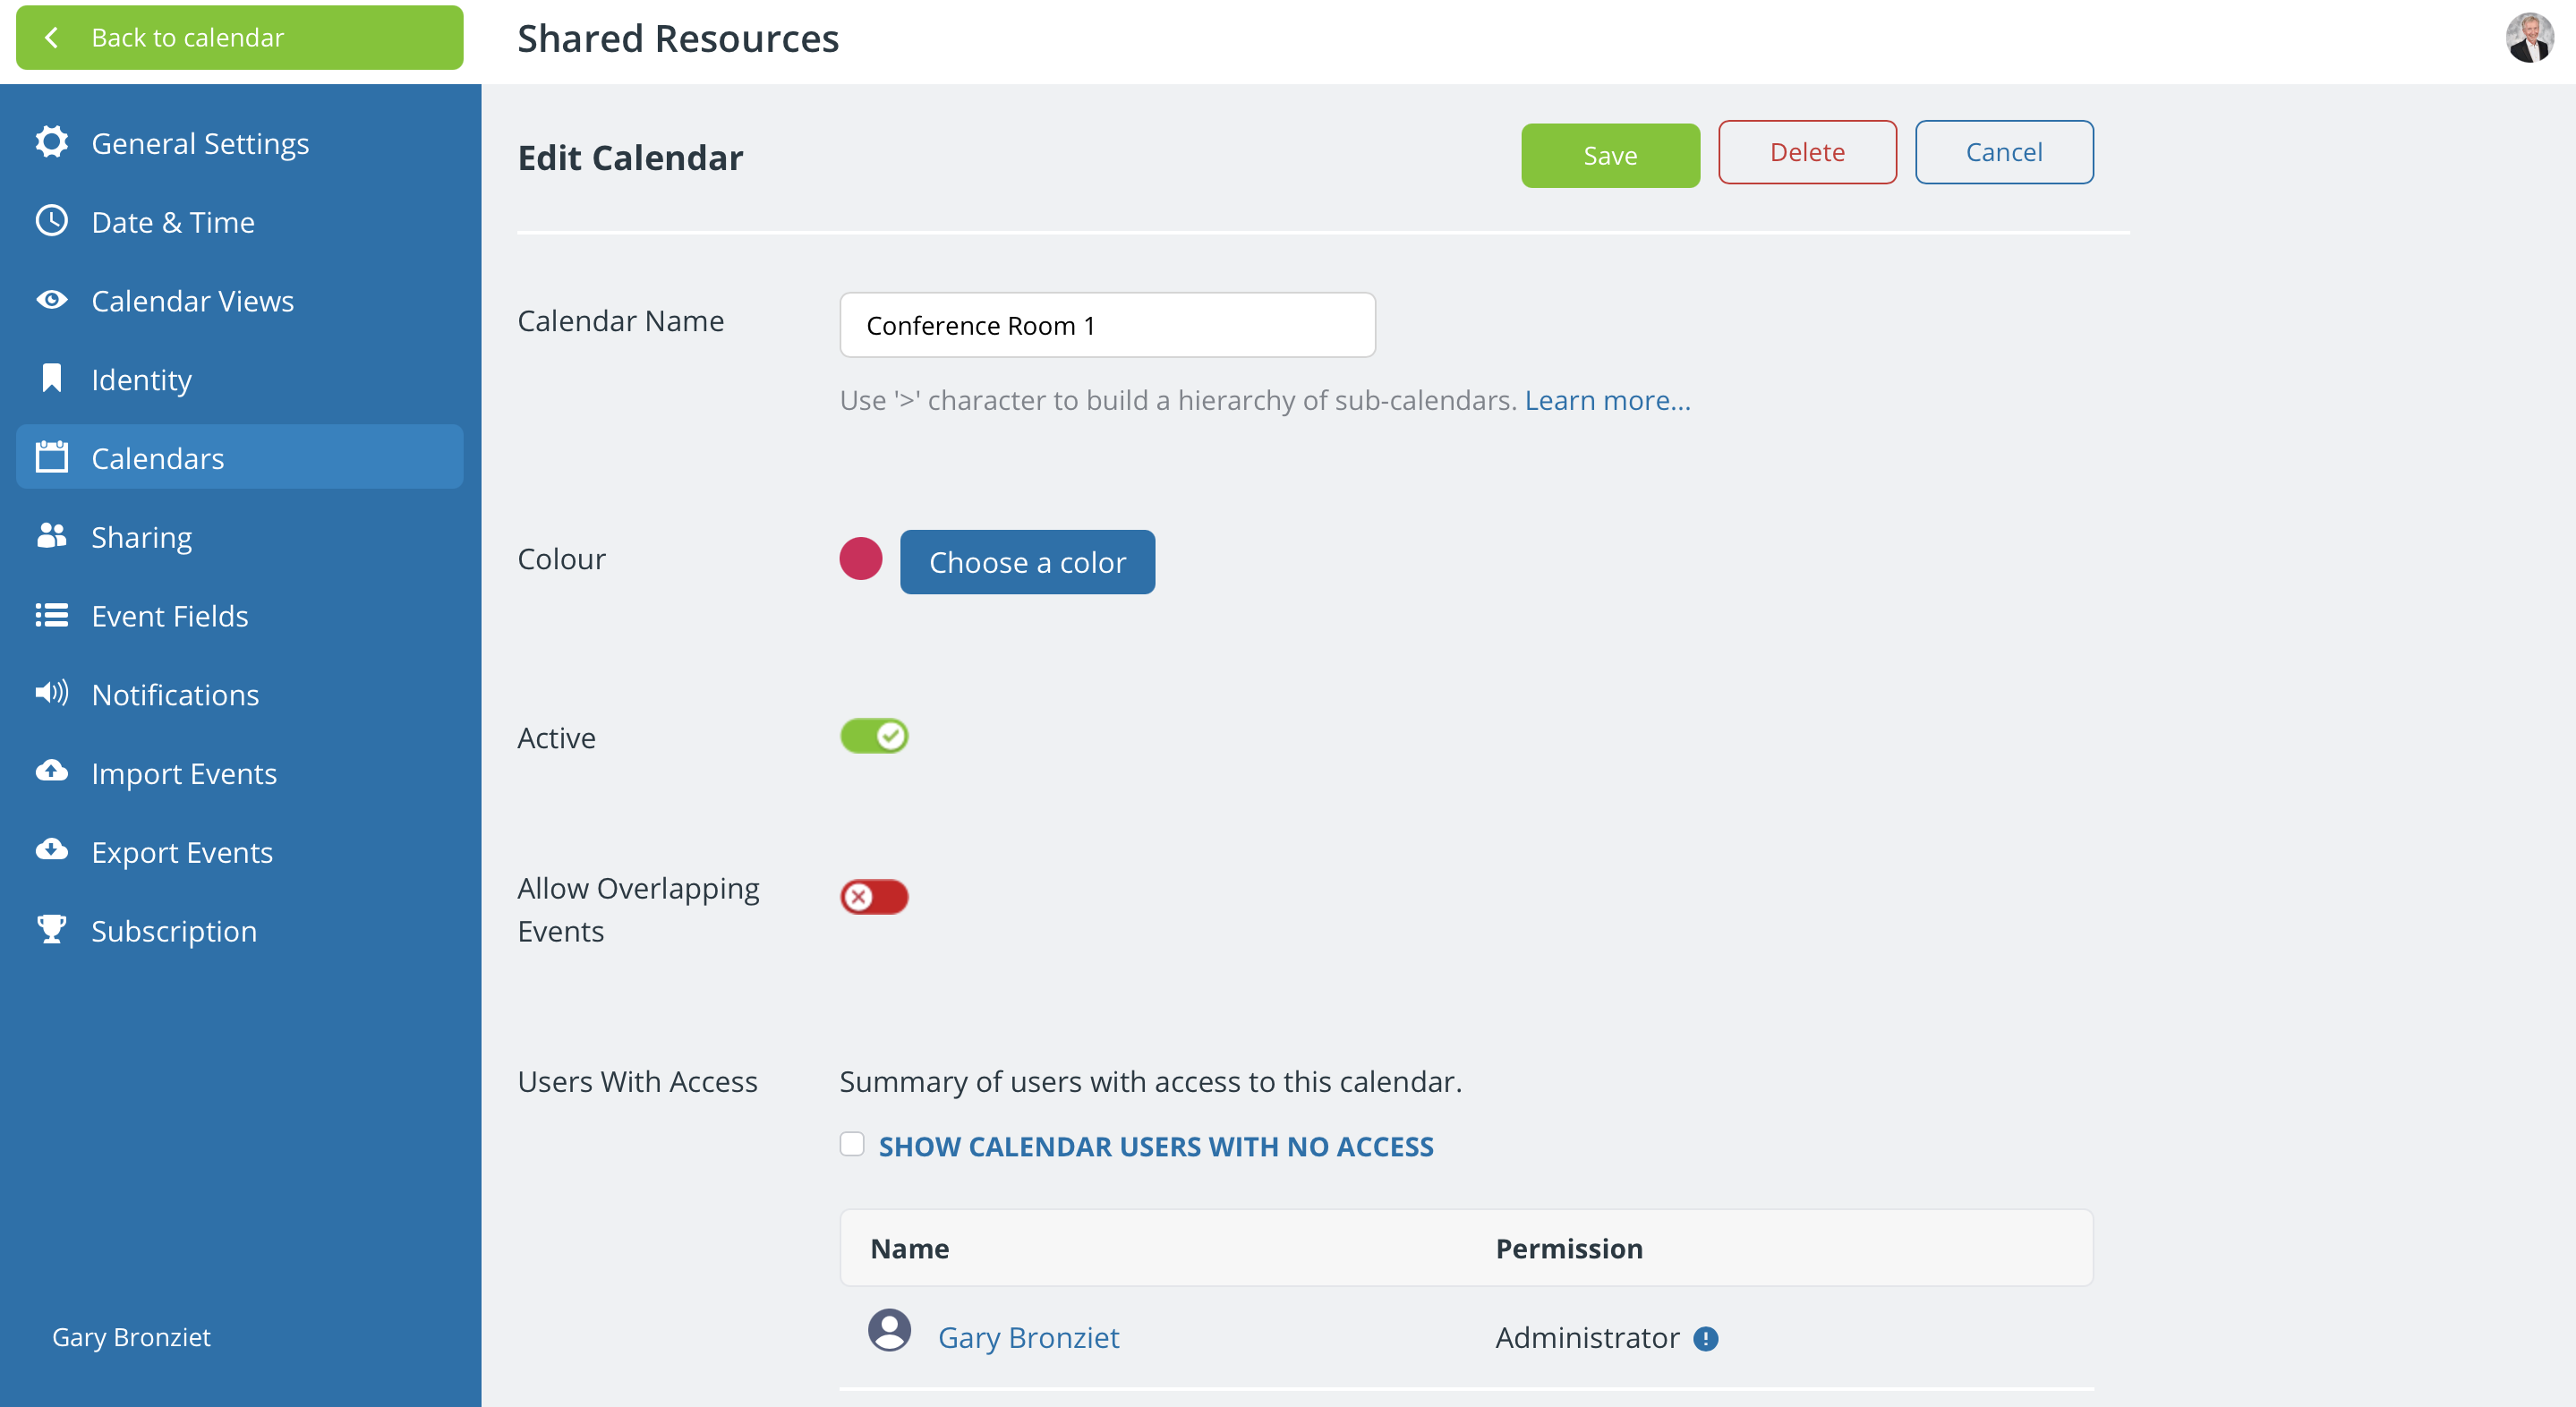
Create a sub-calendar
Go to Settings > Calendars and create a new sub-calendar to represent the conference room. The sub-calendar should be created with Allow overlapping events set to NO.
Set up access
In this step, we will provide access so users can make and modify bookings. There are two ways to provide calendar access: via user accounts, or with shareable calendar links.
No matter which method you use, you always have control of what people can do with your calendar, by setting the level of access permission assigned to each account user or calendar link.
In a room booking scenario for a small group of people (e.g. team members who share a conference room in their office building), we recommend account-based access. It is more secure and provides additional benefits such as the ability to set event reminders.
In a room booking scenario involving a larger number of people, with multiple groups and individuals who may or may not be part of your organization, shareable calendar links are a good choice. Shareable calendar links work well for limited-time access, such as a room booking system at a week-long event. When the need for access is over (i.e. the event has ended), you can delete the links to revoke access.
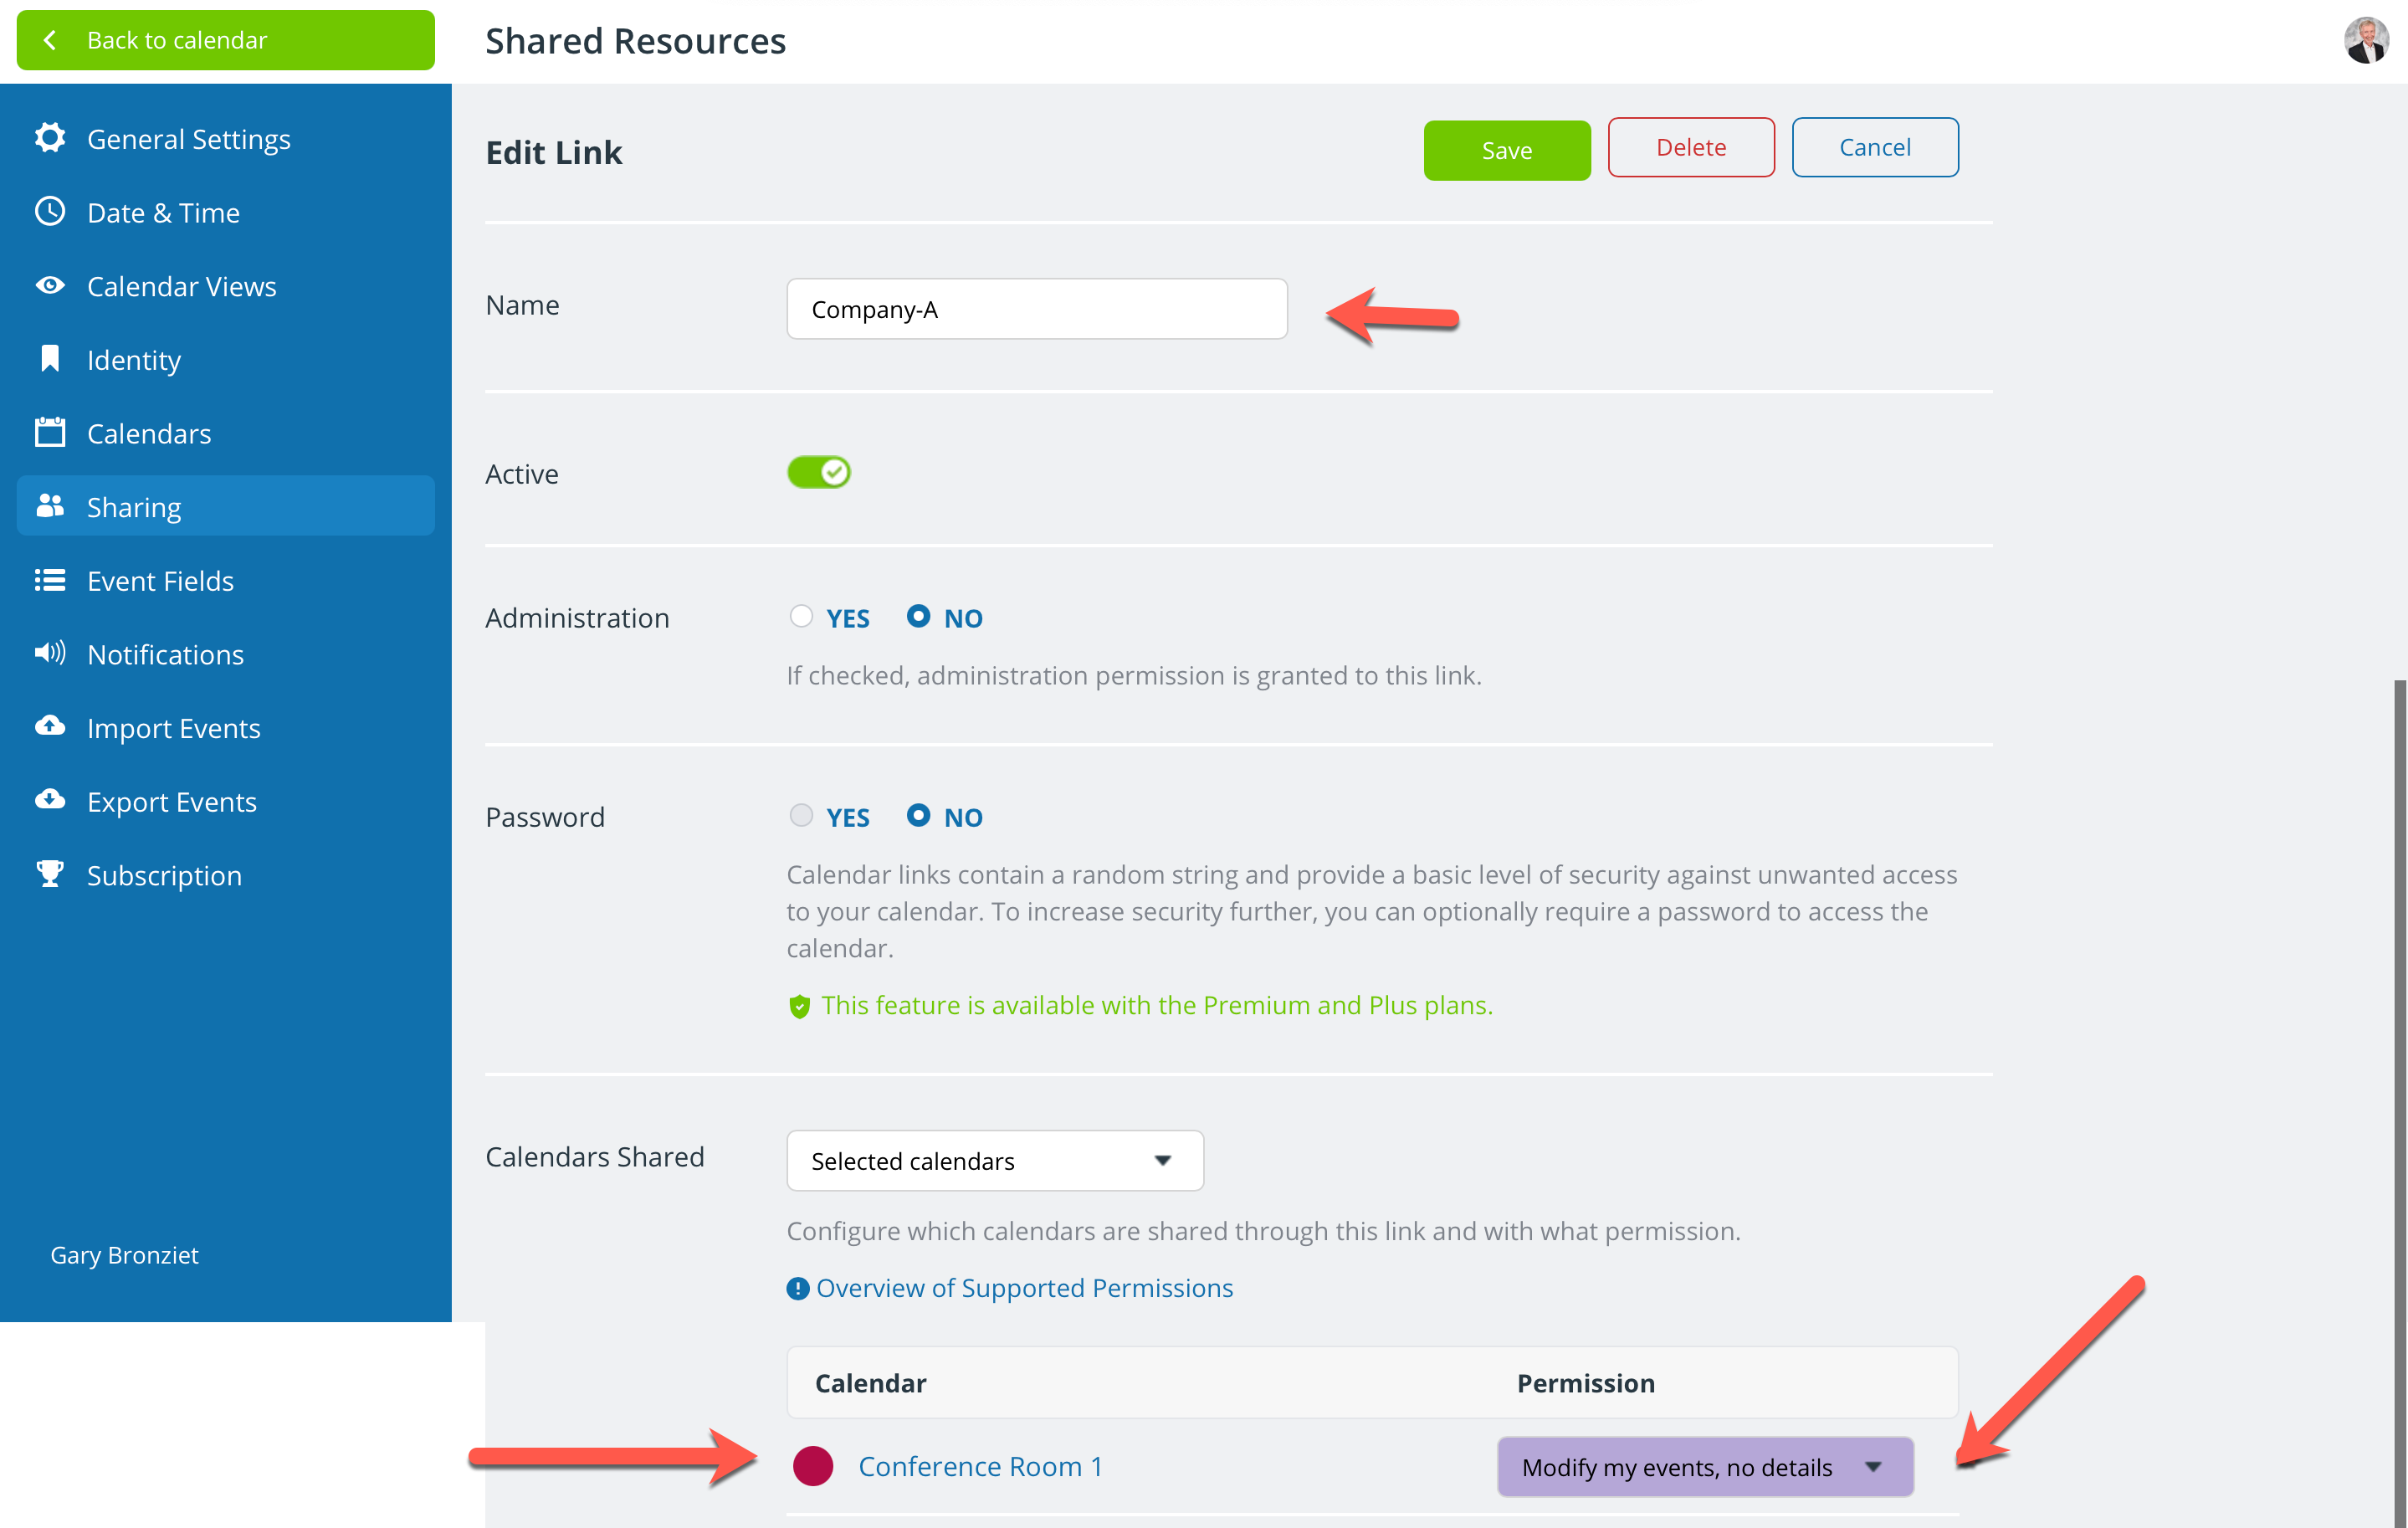
Create a shareable link with customized access
We’ll use the example of creating a link.
- Go to Settings > Sharing > Create link. Name the link to designate which individual or group will be using this link to access the calendar.
- In the Calendars Shared section, set the Permission level for the Conference Room 1 sub-calendar. We’ve set this permission to Modify my events, no details. This means that anyone using this link will be able to create, view and modify events on behalf of Company-A only. They will see bookings made by other groups/individuals on the calendar as Reserved, without any event details.
Repeat this process to create a shareable link for each company or group who needs booking access. Alternately, to add individuals with account-based access, follow the same steps but choose Settings > Sharing > Add User. Then set the access permission as needed.
Other Scenarios
- Individual team members sharing a bookable conference room: Add each team member as an account-based user. Set the permission to “Modify my events, no details” for the Conference Room 1 sub-calendar. See details here.
- Multiple teams or departments sharing a bookable conference room: If team members or department members will be account-based users, you can organize them in user groups with the needed permission to make their own bookings on the Conference Room sub-calendar. Otherwise, create a separate link for each team or department as demonstrated above.
- Internal team members and external contractors sharing a bookable conference room: Add each team member as an account-based user. Create a shareable link for each external contractor, as shown above.
Booking the Conference Room
To book a time in the conference room, a member of Company-A creates an event on the Conference Room 1 sub-calendar:
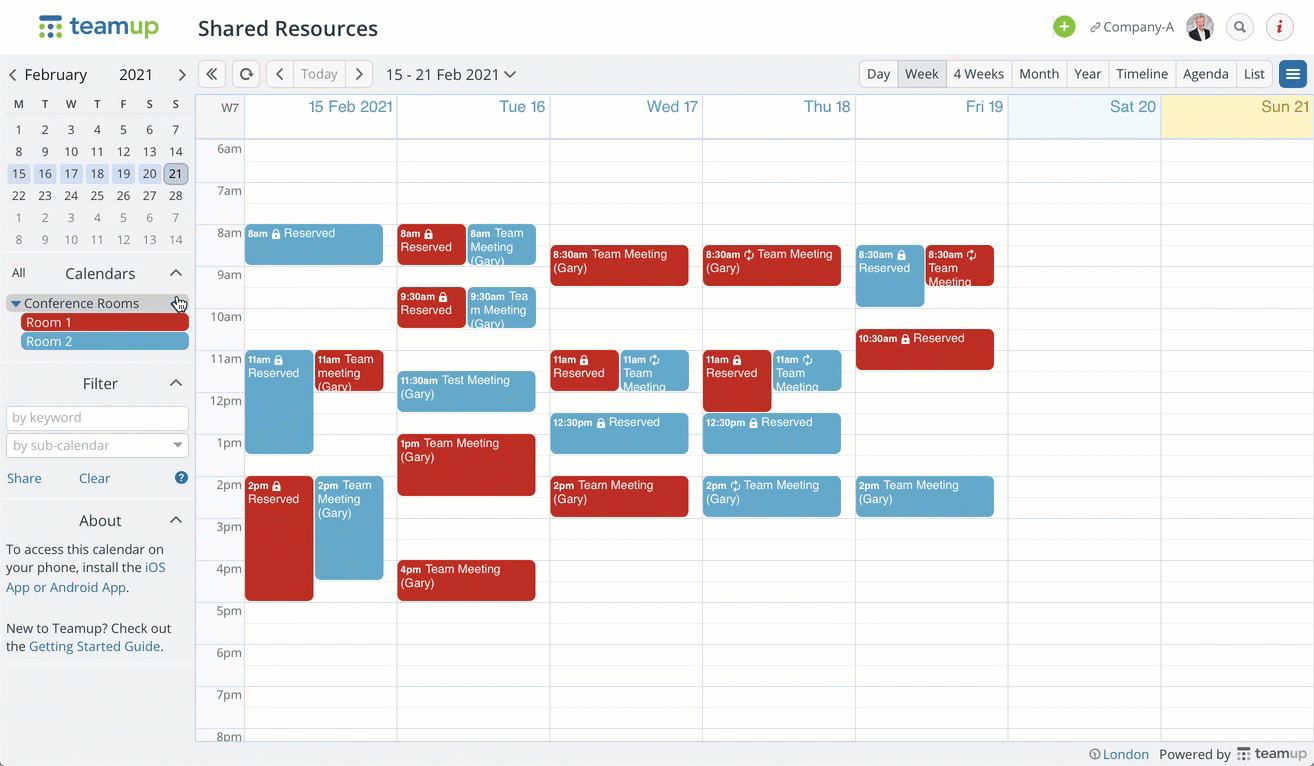
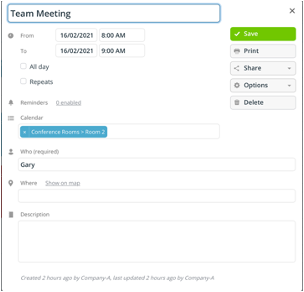
- Gary accesses the calendar using the link for Company-A. He adds an event to book the conference room for use as his preferred time. Because there aren’t any other bookings for that time, it’s open for his use. He gives the event a title, selects the Calendar for Conference Room 1 and puts his name in the Who field.
- Then another user accesses the calendar using the link for Company-B. The space at 11:00 am is shown as Reserved. He cannot modify the event or view the booking details.
Note that in this case we made the Who field required. See Custom Fields later.
Multiple conference rooms
For multiple conference rooms, you follow the same basic setup as above.
- Create a sub-calendar for each room. In this example, we’ve organized them in a folder.
- Set up calendar access with appropriate permission level for each conference room sub-calendar. Company-A’s link would have Modify-my-events, no details permission for both Room 1 and Room 2 sub-calendars, for example.
The conference rooms are identified by distinguishing colors. And the display can be filtered to show either or both sub-calendars.
Both Company-A and Company-B can book either conference room subject to availability. Here’s a view of the calendar from Company-A’s link. For bookings made by Company-A, we can see the booking details. For bookings made by Company-B, we can just see that the room is Reserved for that time:
Capture booking information
When you set up a room booking system, you may want to make sure that certain details will be included with each booked reservation. You can configure the built-in event fields and add custom fields to capture this information.
- Make a field required: If a field is required, a user can’t make a booking without filling out that field. So it’s a good way to make sure the needed information is included with the booking.
- Rearrange event fields: Here are the default event fields. Title and Calendar are mandatory. The remaining fields may be relabeled, rearranged, and deactivated or activated as needed.

- Add custom fields: You can create custom fields, too. Choose the field type (choice, text, numerical), label, and arrange as needed. You can make custom fields required.
Filtering displays
Calendar users can filter the calendar to focus on selected criteria. For example, they can filter to see just the bookings for a particular conference room, or bookings on behalf of a particular company or user.
Sub-calendars can be toggled on or off from view to view only bookings for certain conference rooms. Users can also search for events containing a particular keyword:
