Groups such as workplace teams, departments, volunteers, and others may need the ability to book rooms that are shared among the group. For example, a team may work in an office that has a small and a large meeting room. The team members can use the meeting rooms by booking the time needed on a calendar. Here’s how the calendar administrator could set up a room booking system for a group.
Set up the calendar
First, set up the sub-calendar structure:
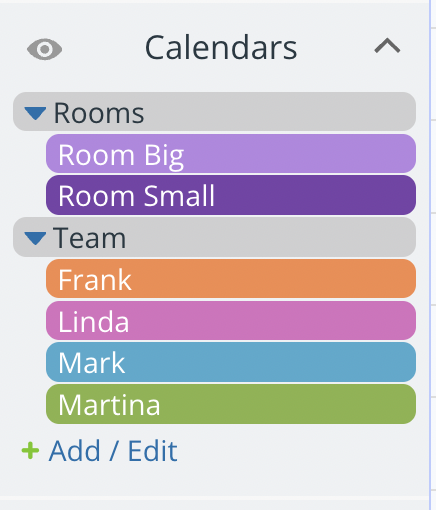
- Create a sub-calendar for each room or other shared space. Set each of them to disallow overlapping events to prevent double bookings.
- Create a sub-calendar for each individual who is part of the group. This is optional but helpful if you have a stable group of users who regularly use the booking system, such as employees and collaborators at a small business. This makes it easy to see who booked what and keep an overview of what’s happening with team members.
- Organize the individual sub-calendars in respective folders, e.g. a folder for Rooms and another one for Team. It’s helpful to create separate folders for each distinctive group (e.g., Group A, Group B). Note that the folder name does not need to be an active sub-calendar.
Customize calendar access for team members
One of the most important responsibilities of a calendar administrator is to provide access to users and assign them the appropriate access permissions. For a room booking system, users typically need to see availability and book rooms but do not need the ability to modify or even view calendar data that’s not relevant to their bookings.
Here are the main steps to grant access and share the calendar with users:
- Go to Settings > Sharing > Add User (or create a link if preferred).
- Enter the email address for the individual team member.
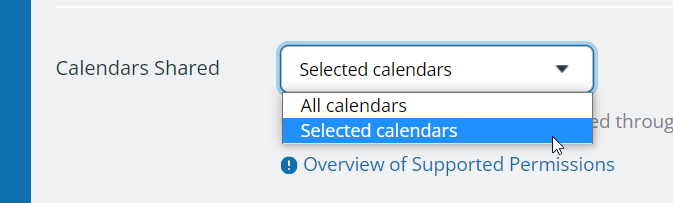
- Scroll down to the Calendars Shared section and choose Selected Calendars:
- For the room sub-calendars, choose a permission level for each sub-calendar:
- Set the permission to Modify my events to allow the team member to see all details of the events on the calendar, add bookings to the room sub-calendars, and modify their own bookings. They can view all details of bookings made by others but will not be able to change them.
- Set the permission to Modify my events, no details to allow a team member to add and update their own bookings and see the availability of the rooms only. They will see all bookings made by others only as Reserved, without event details, and will not be able to modify them.
- For each individual’s sub-calendar, set their permission to Modify. This will allow the team member to add and modify events on their own sub-calendar.
- For the sub-calendars which belong to other team members, you have two options:
- If you wish the team members to see each others’ bookings and whereabouts, set the permission to Read-only.
- If you do not want the team members to see each others’ calendars, choose Not Shared.
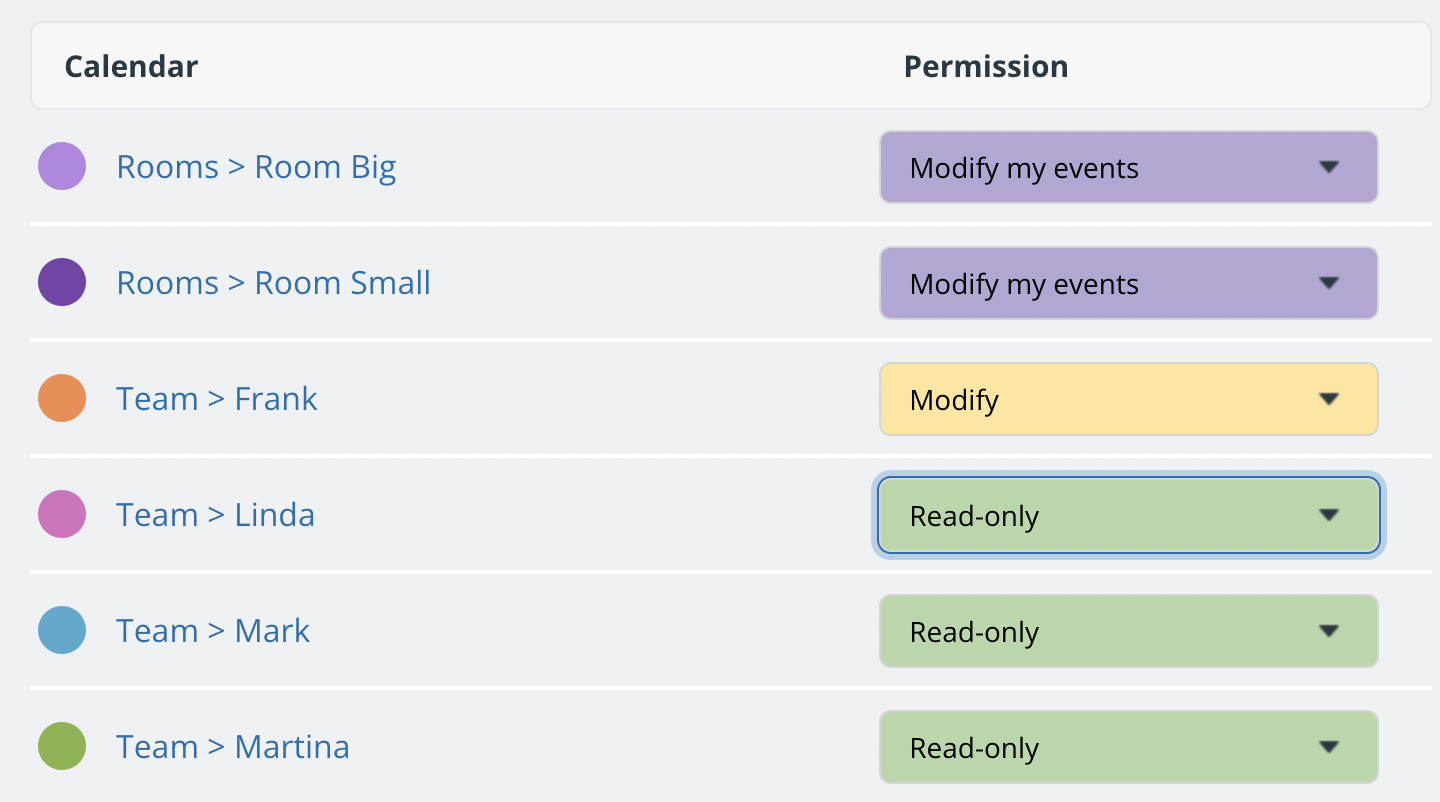
Here’s how the permissions look for team member Frank who is granted the ability to view details of the bookings and the calendars of his team members:
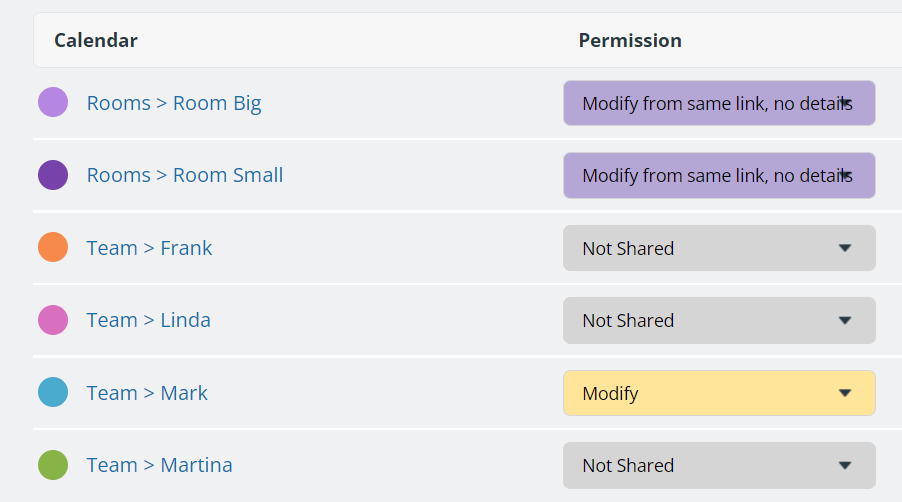
Another user, Mark, may be given permission only to see available slots of the rooms without details and no access to other people’s calendars. The permissions would look like this:
See more about access permissions and adding users. For more about booking privacy considerations, check out this blog post.
Users: Book rooms on the calendar
To book a room:
- A team member creates an event on the calendar for the time they need the room.
- They assign the event to both the room sub-calendar and their individual sub-calendar.
- They add any details needed with custom fields and in the event description.
Filter bookings on the calendar
You can toggle the sub-calendars or use the built-in filters on the booking calendar to see the availability of a specific room or get a focused overview of booking status.
Examples of filters in use
View the images below to see ways to filter events and see room availability. (Click an image to enlarge.)
- Unfiltered: The striped colors represent the colors of the sub-calendars to which the event is assigned.
- Filtered to show only bookings for Room Small by hovering over the eye icon of that sub-calendar.
- Filtered to show bookings of all rooms by hovering over the eye icon of the folder for room sub-calendars.
- Filtered by a keyword in the left panel under the Filter section.
- Filtered to show bookings in the Scheduler view with each room in its own column.
- Filtered to show bookings in the Scheduler view with a Team sub-calendar in the Filter section.


Filter for a time period
To see the bookings or whereabouts of a certain team member, filter by that individual’s sub-calendar. To check on whereabouts of all team members over a certain time period, adjust the calendar’s date range as needed, then filter by the custom field option for Whereabouts:
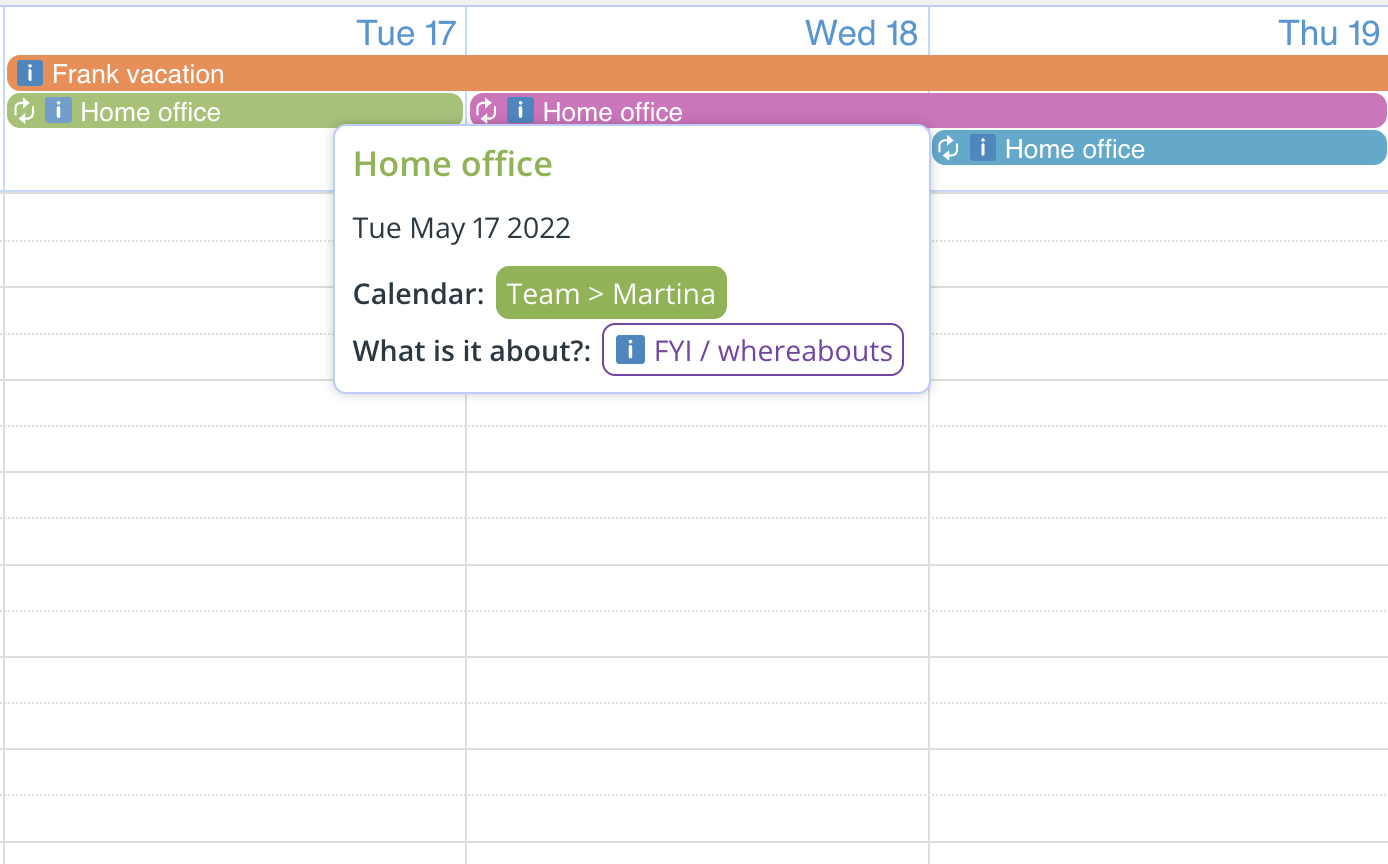
Custom fields make it easy to get quick visual clues on calendar events: Assign an emoji to any custom field option and set the emoji to show in the event title.
You can also filter by keywords, and by a combination of sub-calendar, keyword, and/or custom field. See how to filter on the mobile apps by keyword, custom field, or a combination.
Use powerful calendar views
Teamup has a variety of calendar views which allow you to work productively with the least distraction or gain the most useful insights from your calendar data. If you’re working with short-term issues, you can use the Scheduler view to see each sub-calendar in its own column, the Day or Multi-Day view (customize the number of days shown), or the Week view. If weekends aren’t relevant, you can adjust the calendar settings to hide weekends.
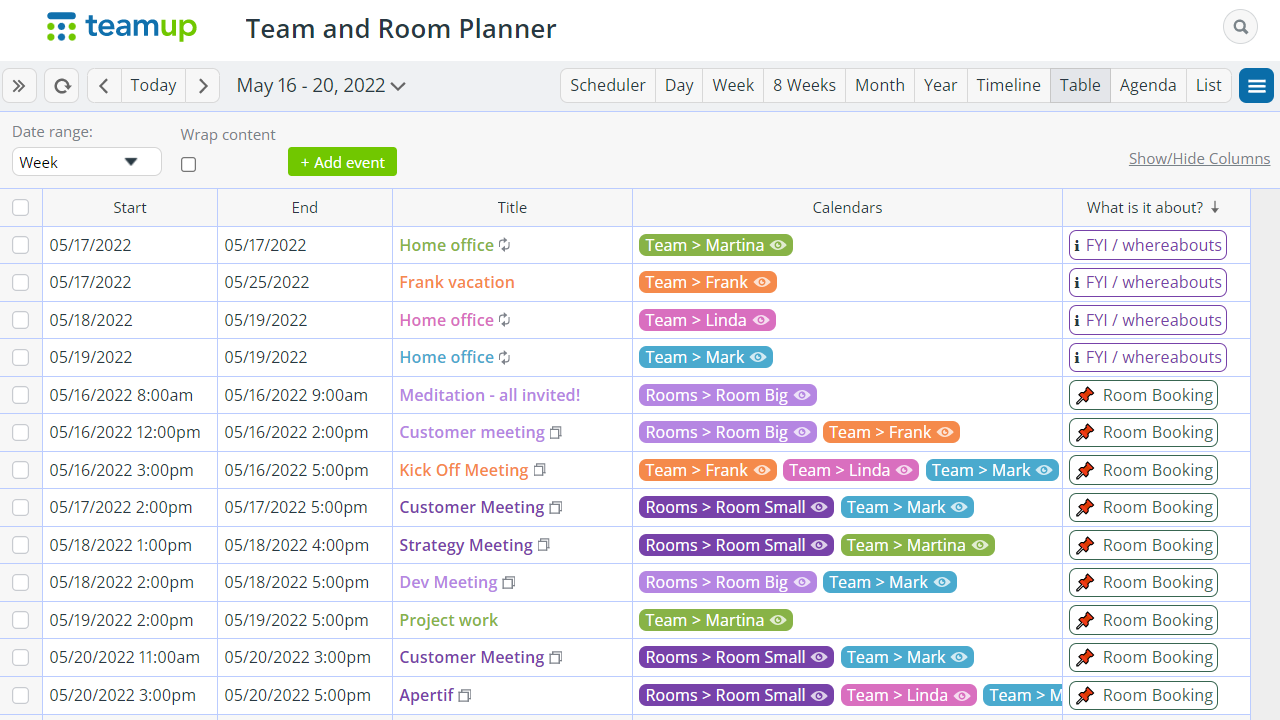
Text wrapping for event titles is supported in the Scheduler, Day, Multi Day and Week views. In the Table view both event titles and descriptions support text wrapping. Table view is a powerful way to sort and work with calendar data in a spreadsheet-like format. You can see all the details of each event in a neat, filterable and sortable view:
Get started with a live demo!
You can try out a live demo with pre-populated sample events. All live demos have paid features enabled for 7 days with administrator access so you are free to explore and experiment with any relevant features before creating a custom solution for your needs. Please note live demo calendars will be deleted automatically, so do not use the demo calendar for your ongoing use.