Any event on your Teamup Calendar can be viewed and shared as a unique, stand-alone web page. This article discusses how to share an event page when using Teamup in a browser. See here for sharing event pages from the Teamup app.
About event pages
With an event page, you can share specific event information with people who otherwise have no access to your calendar. Event pages also make it easy to share an event with a group or with the public, without giving anyone access to your calendar.
An event page is read-only. Each event page has a unique link (URL).
Benefits of event pages
Better security
If you access a Teamup calendar via a shareable calendar link, you can share an event as a page and there is no link back to the originating calendar. This means no calendar details are shared; viewers see only the details of the specific event, and cannot access your shareable calendar link from an event page.
Visual event flyers
You can share events that have images in them: it’s free to insert images or files that are stored elsewhere to a Teamup event. For example, a picture of goods delivered, an event brochure, or a floor plan in a .pdf file for a technician to perform a plumbing job at a client site.
Interactive fields
The event page will contain the event description, including any images you have inserted. If you add Event Signup or enable Event Comments for all users, these will be visible and usable on the event page.
Accurate and updated
Event pages are automatically updated whenever you update the event on your calendar. For example, you can share a meeting agenda by sending the event page link to all participants. As you update the event agenda in your calendar, the event page will repopulate with the latest changes. Participants will always see the latest agenda when they open the event page, with all relevant documents linked on one page.
Share an event page
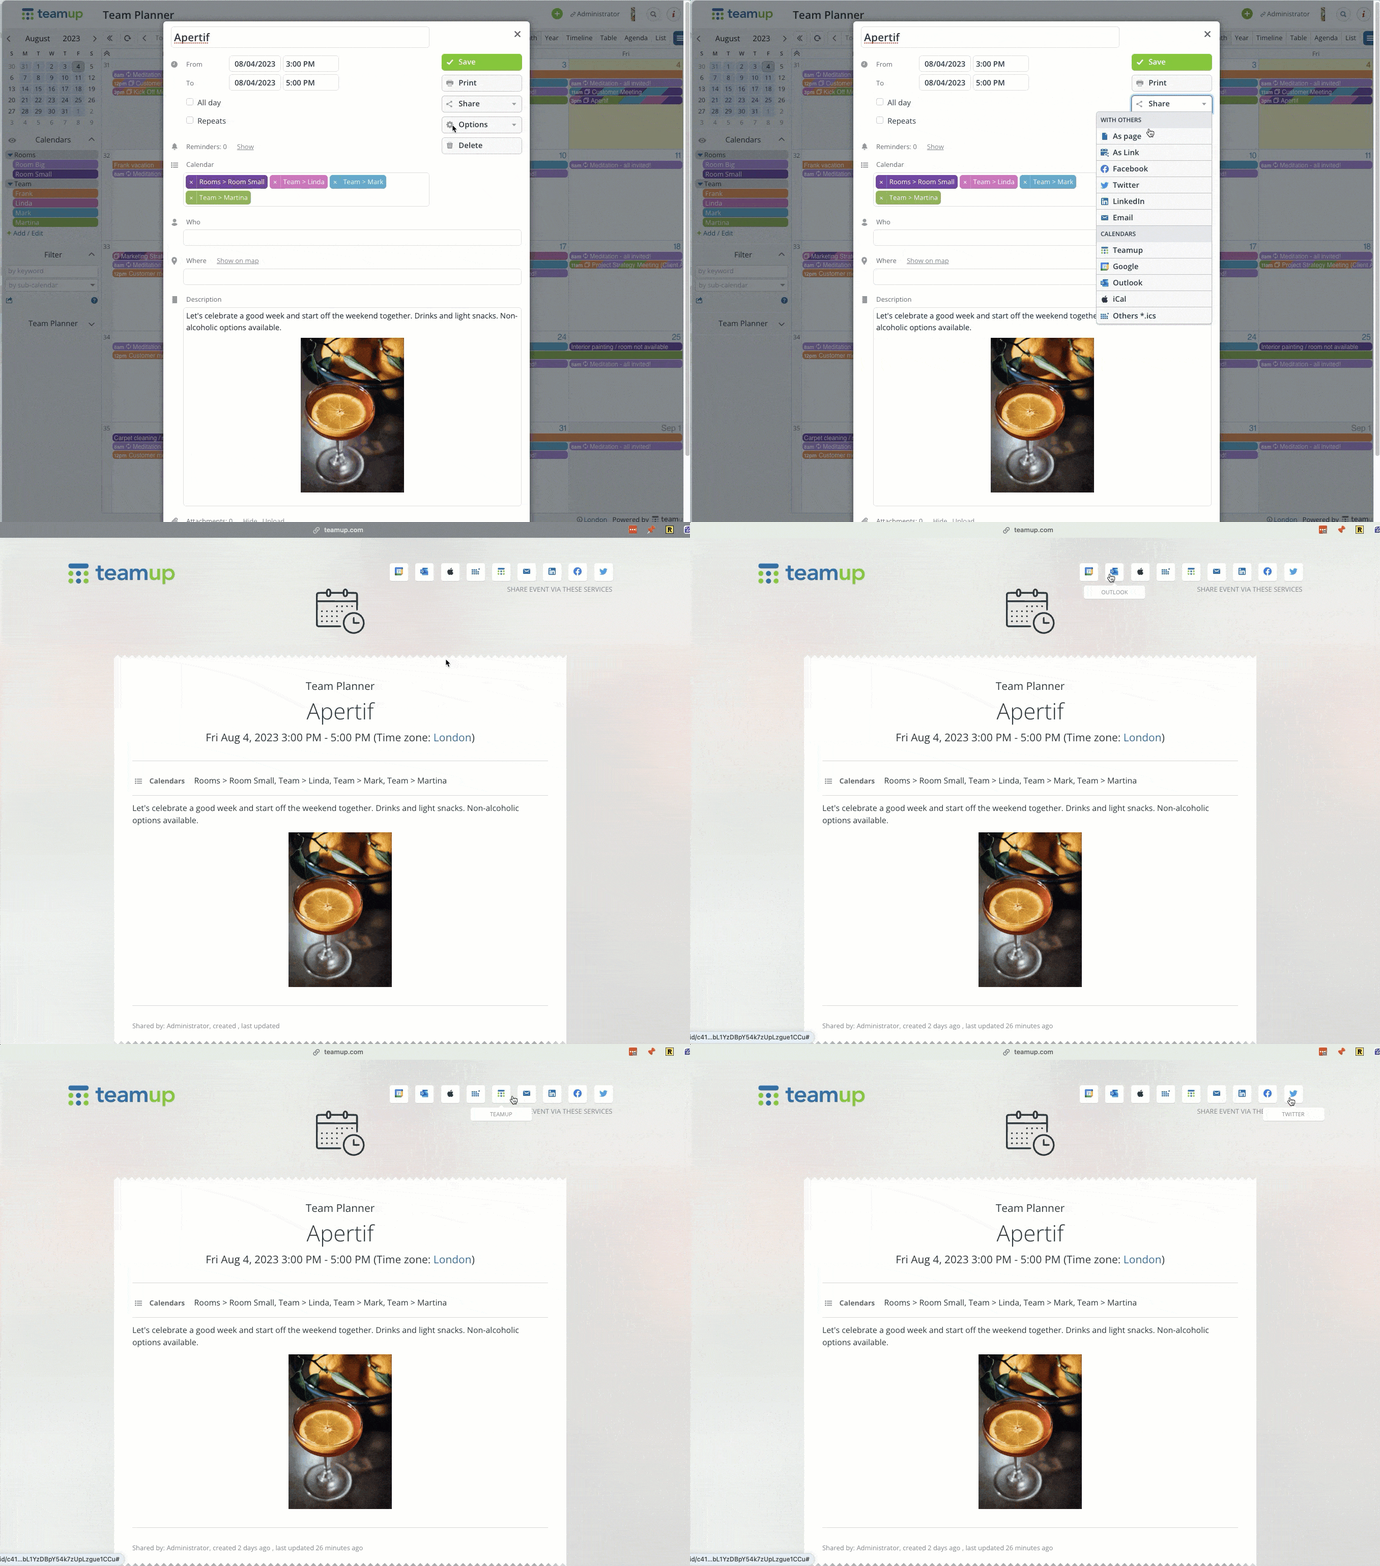
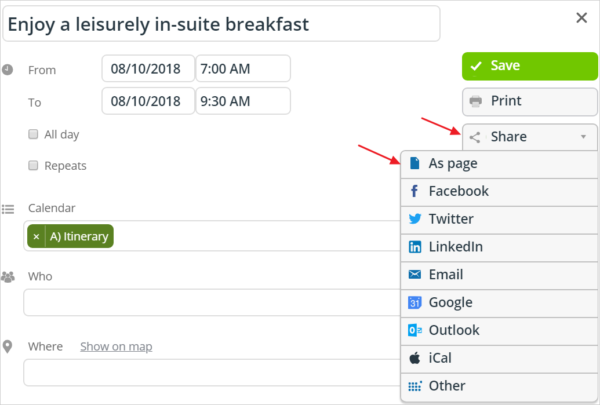
In the event viewer/editor, click the Share button, then select As page:
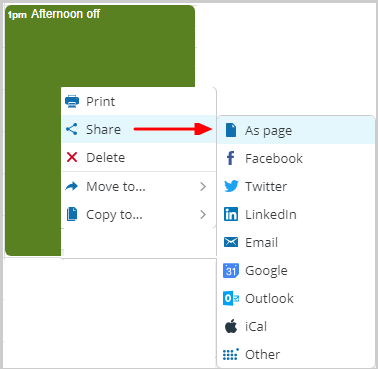
Alternatively, right-click any event on your calendar, select Share and As page from the options list:
The event page
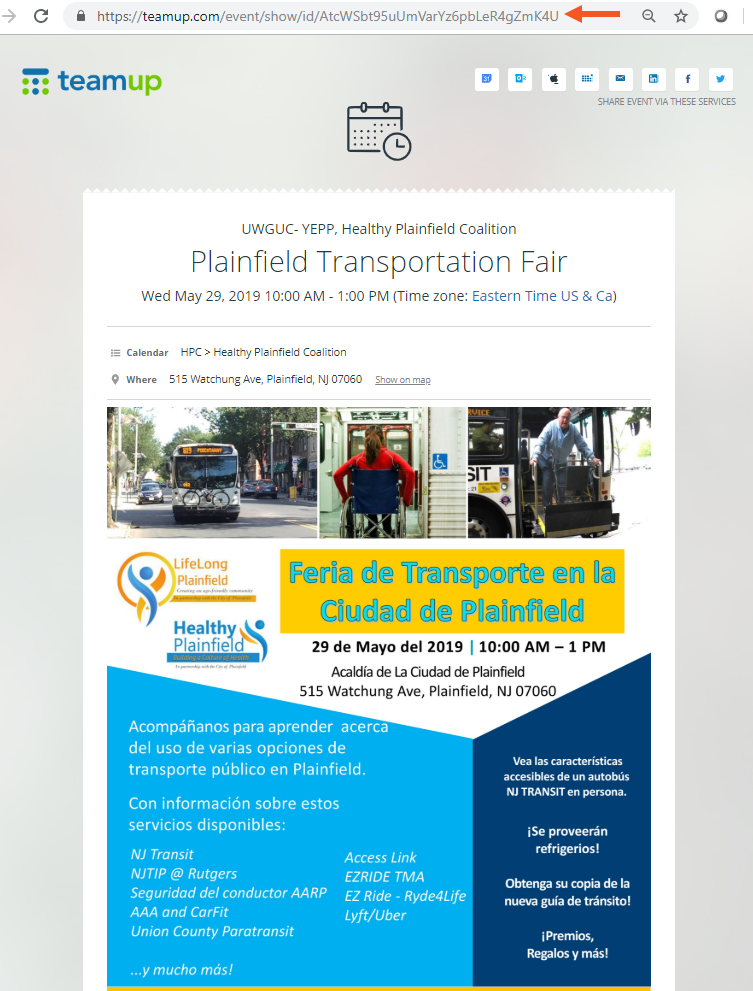
The resulting web page that opens up in a new browser tab is read-only and has a unique link, as indicated below. The event page link can then be shared with anyone. Note that your calendar logo will be displayed, as will any images in the details section.
Try for yourself: Open this calendar, right-click any event, select Share > As Page. Note the event time is automatically displayed in your time zone!
Here’s an example of an event page with a well designed event flyer uploaded as an image (see it live):
Save the event to your personal calendar
Notice the sharing options in top right of the event page? Viewers of the event page can add this event to their own personal calendar directly from this page. It can also be published to Facebook or Twitter.
Anyone can do share an event via social media by using the buttons on the event page. See more details here.
Good to know
- If the event is shared from a notification email, a link back to the originating calendar is included; therefore, we do not recommend sharing events from a notification email. Instead, open the event in the calendar, then share it.
- Pro tip: use a URL shortener to make the event page link easier to remember. Follow these steps, using your event page link rather than your read-only calendar link.
You can try out this feature with any event on your own calendar or one of our live demo calendars.


