Teamup Calendar can be used to allow clients, guests, account users, groups, or members of an organization or community to schedule appointments and/or add events to a calendar directly. This article discusses how a calendar administrator can set up a calendar to allow users to submit or add events without jeopardizing calendar security.
Let users add or submit events
The ability to allow users to add events or submit requests directly to your shared Teamup Calendar can be useful in many scenarios:
- A school or university may want students to sign themselves up for one on one discussions with teachers.
- A beauty salon or hairdresser may want to allow clients to create their own appointments online.
- In a team environment, members could request meetings on the calendar.
- A charity program may want volunteers to sign themselves up for shifts or events.
- A department in a large corporation or a small business may need to allow staff to request time off.
Allow for approval
The above scenarios are straight-forward enough with a Teamup Calendar.
As a calendar admin, you need control over the process. And you need to maintain calendar security.
This is where the Add-only and Add-only, no details permissions come in handy. You can essentially use a Teamup Calendar as a pending and approval system.
Keep control over the process
Use a dedicated sub-calendar

Add a sub-calendar solely for event submissions, meeting requests, appointments, or shift sign-ups. It could be called Submit Event or Pending Appointments or something more applicable.
There are two ways to allow access to your Teamup calendar for adding events or submitting requests:
- Add account-based users and groups
- Create a customized shareable calendar link
Set up user access
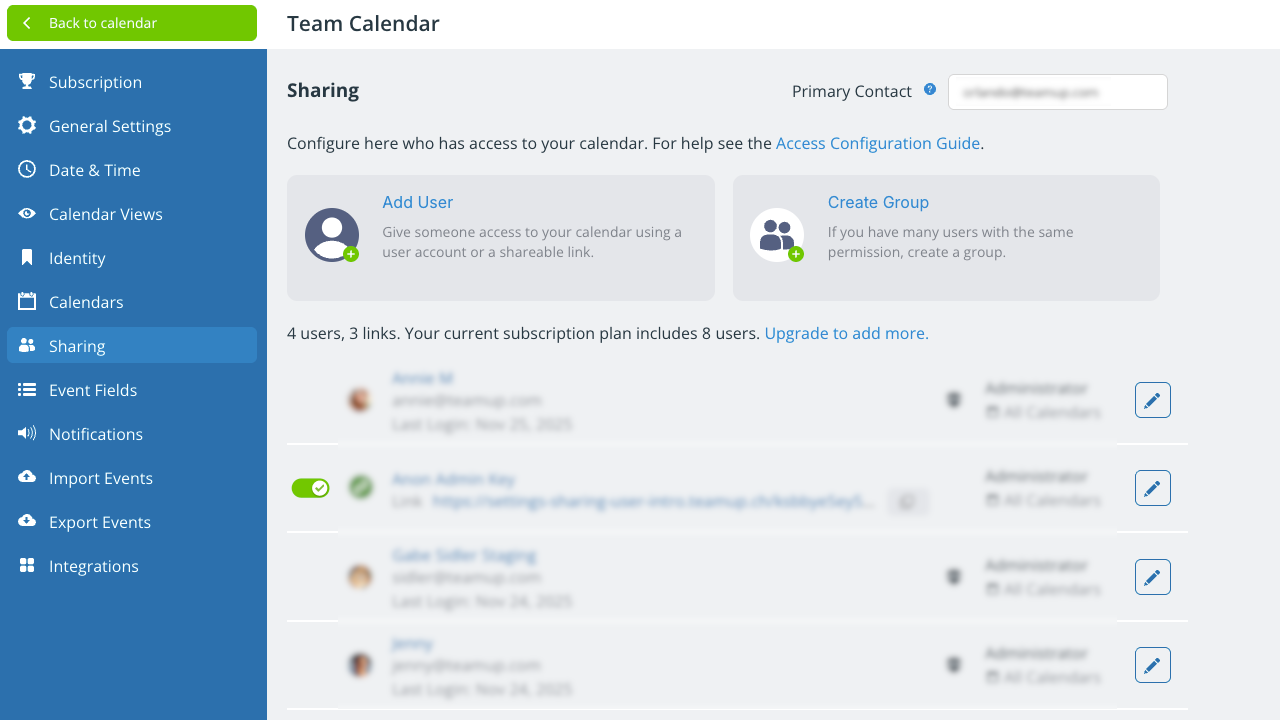
Each user is added through the Settings > Sharing menu.
- See how to add users: Primary, convenient, secure access for individual users.
- See how to add groups: Easily manage individual users with the same access.
- See how to create links: For temporary access, public sharing, or embedding Teamup on your website.
Select which calendars to share
When adding users, you can choose which sub-calendars to include in their access. For example, you may want to share only the Submit Event/Pending Appointments calendar with the permission level that works best.
Choose the permission level
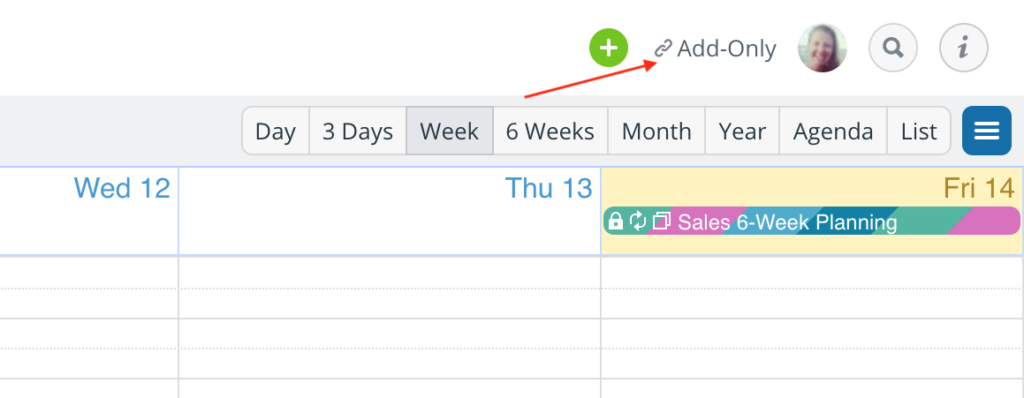
Add-only or Add-only, no-details permission
This permission means that users with this link will only be able to add events to the event submissions calendar, and nothing more. They will be able edit any events they create within the same 30 minutes. Note that the Add-only, no-details permission does not allow the user to see the details in the other events. They will merely see other slots as Reserved.
Modify-from-same-link permission
If you want to allow the requester also to be able to modify what he or she submitted earlier, you could create a link just for that specific user and assign it with the Modify-my-events permission.
Read-only permission
An alternate approach would be to additionally share the sub-calendars (with read-only permission) that hold the fixed events or appointments. That way, the person could see when there are time slots available for adding their own event.
View and approve events
When users submit requests or add events, you can view and approve events that have been submitted.
The calendar administrator or a user with Modify permission to the “Submit Events” calendar can review submitted requests and move approved ones to the appropriate sub-calendar. They can receive an automated email notification to be alerted when events are submitted.
Create a user with approval authority
If the calendar administrator does not wish to be the person to review and approve events, another calendar user can be given the necessary calendar access.
- Add an calendar user.
- Give the user access to all or only the needed sub-calendars.
- Assign Modify permission for the sub-calendars.
With Modify permission, this user can modify, delete, or add events to any included sub-calendars.
To approve the event, simply move the event from the Submit Events sub-calendar to the appropriate sub-calendar for approved events and appointments.
Note that in the Scheduler View, you can use a shortcut to move an event from one sub-calendar to another: Simply drag the event from one column to another.
Try it out
Try a Live Demo here: Click the Submit Events link in the About box on the left. To see how this calendar is configured, go to Settings > Sharing.
This process, while it requires some initial set-up, can create a much simpler and faster workflow. You can eliminate multiple email conversations, queries, phone calls, messages, and back-and-forth conversations about event details. When users can enter the information directly into the calendar themselves, everyone saves time.