Teamup notifications include change notifications, daily agenda email, Slack notifications, and event reminders. For reminders, please check our Event Reminders article.
If your calendar is on the Business or Enterprise plan notifications include changes to past events. Otherwise, notifications are sent for future events only.
A calendar administrator can see, add, and manage notification subscriptions for all users (with or without a Teamup account). Teamup account users can set up and manage their own notifications.
Administrators
Calendar administrators can set up and manage notifications for any calendar user with or without a Teamup user account. More details below.
Enable account users
Calendar administrators can allow account users to manage their own notifications.

- Go to Settings > General Settings.
- In the Notifications section, check the box to enable user signup.
- Uncheck the box to prevent users from managing their own notifications.
Account users
If you have a Teamup user account, you can manage your own notifications. (If you are unable to manage notifications for a certain calendar, ask the calendar admin to enable this setting as shown above.)
In a browser
- Log into Teamup.
- Open your calendar and click the blue menu (top right).
- Select Preferences > Change Notifications.
- Choose the notification type to add or modify.
In the Teamup app
- Swipe to open the left sidebar.
- Tap the gear icon to open app settings.
- Tap Change notifications.
- Tap to select Email notifications or Push notifications.
- Adjust your preferences as needed then tap the check mark (top right).
- Or, to unsubscribe: Tap the Active toggle to off/white to deactivate the change notifications.
- Tap the check mark.
ℹ️ Learn more
Administrators: Manage notifications
Calendar administrators can view all notifications and can activate and deactivate, delete, duplicate, or edit the notification subscriptions to the calendar. This management ability allows the administrator to set up notifications for any calendar user and to remove notifications when an employee leaves the organization.
View and manage notifications
- Open the calendar in a browser.
- Go to Settings > Notifications.
- Notifications are listed on this screen.
- Click the pencil icon to the right of any subscription.
- Modify the subscription: Change the options as needed, then click Save. Note: You cannot change the recipient of a subscription once it has been set up.
- Delete a subscription: Use the red Delete button.
- Duplicate a subscription: Use the Duplicate button. This will create an exact copy of the subscription with the same recipient and selected options. Change any options if needed, then click Save.

Filter notification subscriptions
- Go to Settings > Notifications.
- Choose the filter options needed.
- Status: Select All, Enabled, or Disabled.
- Recipient: Type in a (partial) name or email.
- Type: Select All types or a specific notification type.
- Link: Choose a link from the menu.
- Click the blue funnel button.
- To clear filters, click the funnel with a red x.
Add a new notification subscription
- Go to Settings > Notifications.
- Click New in the top right.
- Choose the notification type.
- In the Recipient field, choose from the list of current users or type in an email address.
- On the next screen, set the appropriate options for the notification subscription.
Set notification subscription options
Calendar link
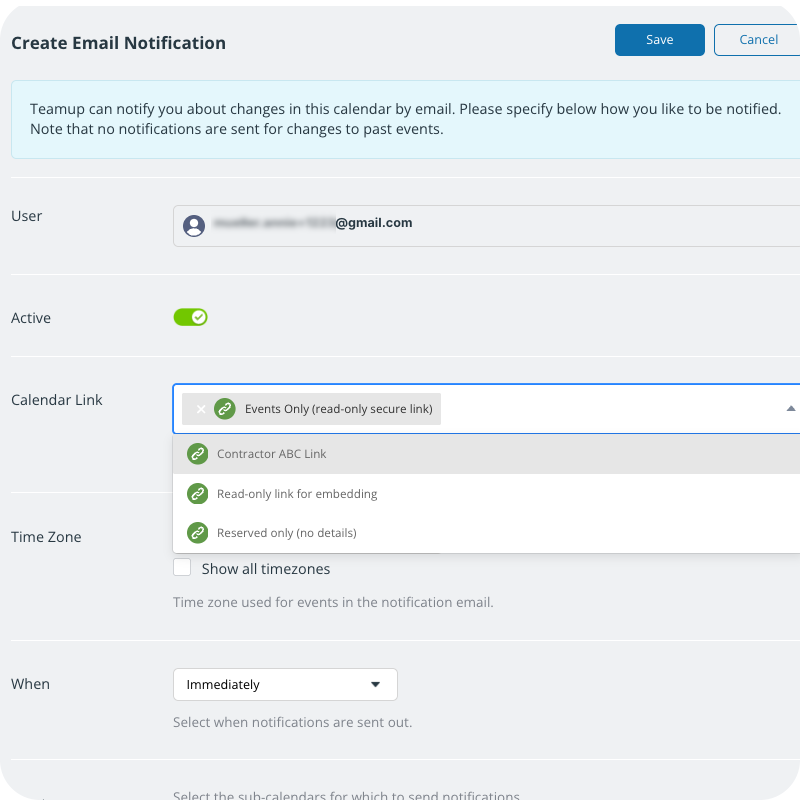
When you set up notifications for someone who is not an account-based user, you’ll need to choose the calendar link used for their notifications. The notification emails will contain the link you choose. Be sure to choose a link with an appropriate permission level.
👉 Best practice: Use a read-only link or a link specifically created for the user.
Time zone
Set the time zone needed for the person receiving the notifications.
When
Choose the timing for notifications:
- Immediately (separate notifications sent for each change) or
- Daily Summary (one notification set with a summary of all changes for the day).
What
Choose the type of notifications.
You can set one type for All calendars or set the notification type individually for each calendar.
Notification types include None, New events, Important changes, All changes, or Comments.
- All changes include any changes to an event as well as event comments and event signups.
- Important changes include new events, deleted events, and date and time changes.
- Comments will only trigger a notification for event comments.
Maintaining calendar security
Use the appropriate calendar link
To keep your calendar secure, be sure to choose the appropriate link when you add new notifications for someone who does not have a Teamup account.
The link you choose will be included in notification emails. So the recipient of the notification emails will be able to access the calendar using that link. If someone should have read-only access to the calendar, and you set up notifications for them with a modify link, they will be able to access the calendar with modify permission.
For better security, default to a read-only link for all notification subscriptions.
Review notifications regularly
To ensure that notifications are only sent to authorized users, periodically review all notification subscriptions. Ensure that each subscription is sent to an active, authorized user and the appropriate link is used. Delete any outdated notification subscriptions.