Embed a Teamup Calendar in a website using an iFrame code or embedding link. Customize the appearance and other options for the embedded calendar using Teamup’s Embed Wizard or link parameters.
Customize an embedded calendar
Teamup provides many customization options for embedding a calendar so you can create a seamless look with the website where the calendar will be displayed. Set a customized title, add a colorful border, and select whether to show or hide UI elements.
Here’s a live embedded calendar with most UI elements hidden for a minimal look:
Here is the customized embedding link for the calendar shown above. Note the link parameters after ? in the URL that make the respective UI elements invisible, achieving the simple and sleek look that blends with the webpage.
See this calendar in a new window to compare the calendar with the embedded version.
Advantages of embedding Teamup
With an embedded calendar, you can make your shared Teamup Calendar available under your existing personal or business brand:
- The embedded calendar can correspond to an existing web presence.
- Assign an easy-to-remember web address to an embedded calendar.
- Reach a wider audience.
- Provide a visual display of events.
- Keep your personal or business branding consistent.
See this gallery of live embedded calendars for examples and ideas.
Embed a Teamup calendar
Here are the basic steps:
- Generate a secure (read-only) calendar link.
- Use our Embed Wizard to generate iFrame code or an embedding URL.
- OR, add link parameters to customize the look and feel yourself.
- Insert the iFrame code or URL into your website’s HTML editor.
Create a secure calendar link
To keep your calendar secure, use a read-only link for embedding.
- From your calendar, go to Settings > Sharing.
- Click Create Link.
- Scroll to the Calendars Shared section.
- Choose which sub-calendars to share and set the access permission:
- Choose All calendars to include all sub-calendars in the embedded calendar, then assign the Read-only or Read-only, no details permission, OR
- Choose Selected calendars to share only certain sub-calendars, then assign the Read-only or Read-only, no details permission to shared sub-calendars, and the Not shared permission to sub-calendars you do not wish to include on the embedded calendar.
In certain situations, you may want to allow users to add events (such as reserving an appointment time or booking use of a shared resource) to an embedding calendar. In this case, use a link with add-only permission for the appropriate sub-calendar.
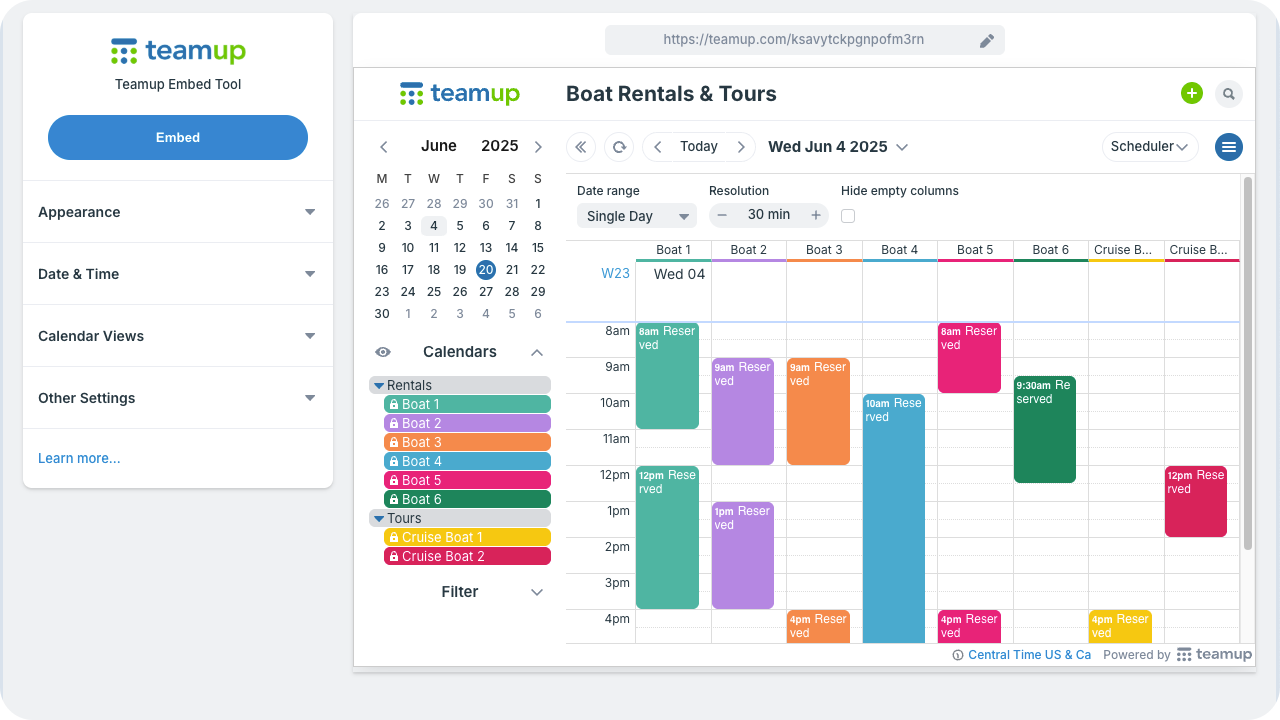
Use the Embed Wizard
Teamup’s embedding tool makes it easy to set up the look and feel of your embedded calendar. As you adjust different options, the calendar will show your changes in the preview window. Once you’re ready, click Embed to get an automatically generated iFrame code and/or embedding URL.
ℹ️ Learn more
Use link parameters
If preferred, you can append link parameters manually to a secure calendar link.
Link parameters are key=value pairs that are appended at the end of a calendar link. For example, you can add link parameters to set the initial calendar view, configure the start date, set the language, and hide the side panel.
ℹ️ Learn more
Publish on your site
Most content management systems allow you to access the HTML editor when you are creating or editing a new post or page. If you are unsure how to do this, talk to your website administrator for help.
On your website, access the HTML editor in your website’s content management system. Copy the iFrame code or customized embedding URL. Then paste it where you want the calendar to be embedded.
Embedded calendar examples
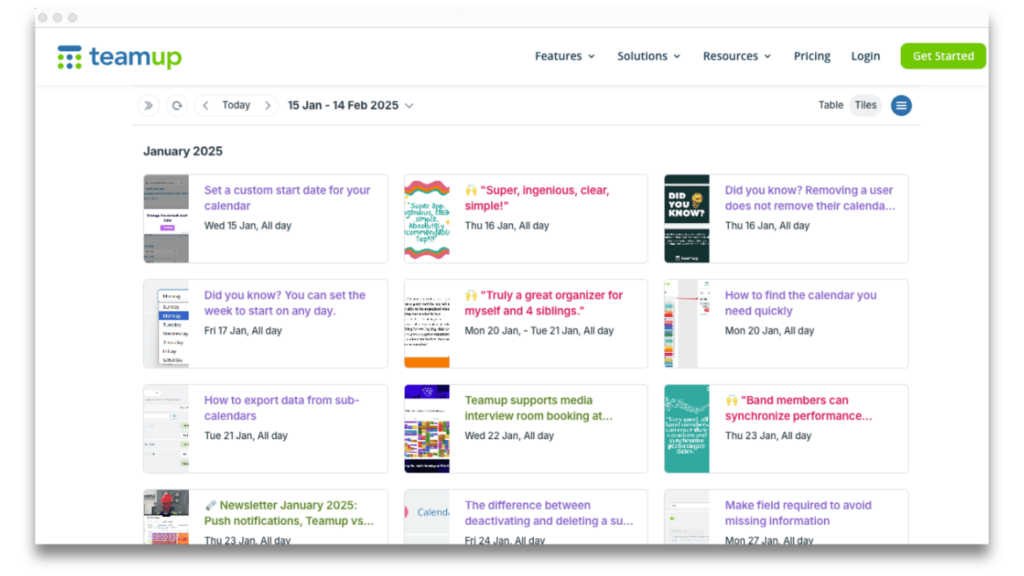
Visual event display
Many embedded calendars are used to share events with a group, community, or with the public. Tiles view provides a polished display of events that’s perfect for this scenario. Each event is shown in its own tile. Tile size can be set to small, medium, or large. If the event has an image uploaded, it will be used as the cover image for the even tile.
Here’s the embedded Teamup Ticker calendar in Tiles view:
A minimal look
It’s often helpful to disable elements that aren’t specifically needed on the embedded calendar. A minimal interface is easier for users to navigate. See many examples in our gallery of live embedded calendars.
Here is an example of an embedded calendar with several elements hidden (view selector, search, menu, and profile info) and the side panel closed:
