
Each Teamup master calendar can have multiple sub-calendars, which can be color-coded and organized in folders. The calendar administrator can create, configure, and manage access to sub-calendars. Each subscription plan allows a certain number of sub-calendars.
Create sub-calendars
The number of sub-calendars that can be added to your master calendar is a feature of the subscription plan. See our pricing page for details.
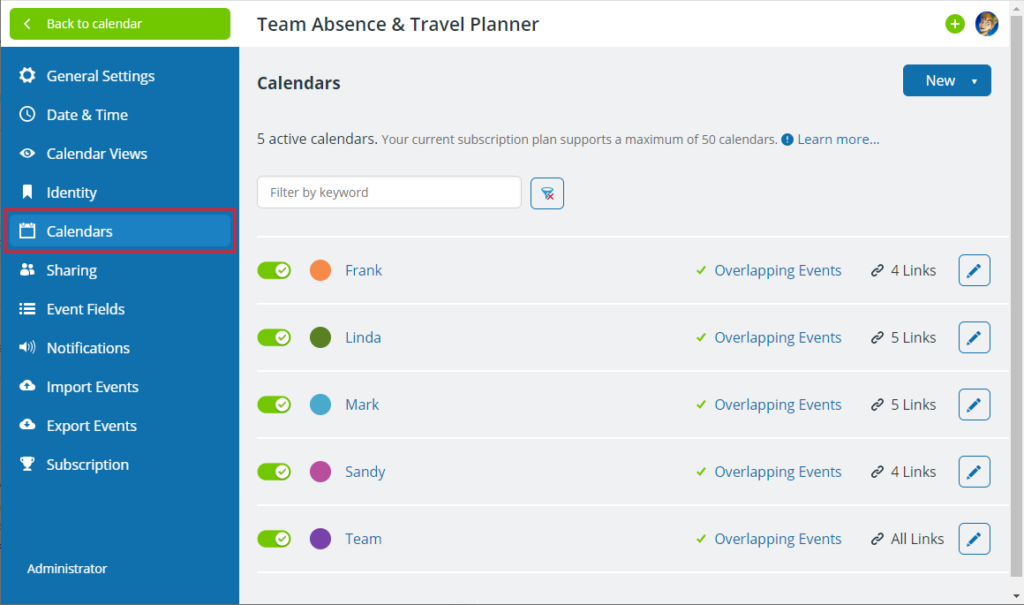
- To create a new sub-calendar, go to Settings > Calendars.
- Click the blue New button in the top right.

- Select Add Calendar.
- Enter the calendar name and click Save.
-
Use > to organize sub-calendars in folders. Example: Department > Team > Calendar. Learn more.
-
Assign a color
When you create a sub-calendar, a color is assigned automatically. To change the color, click the colored circle next to the calendar name, then choose your desired color.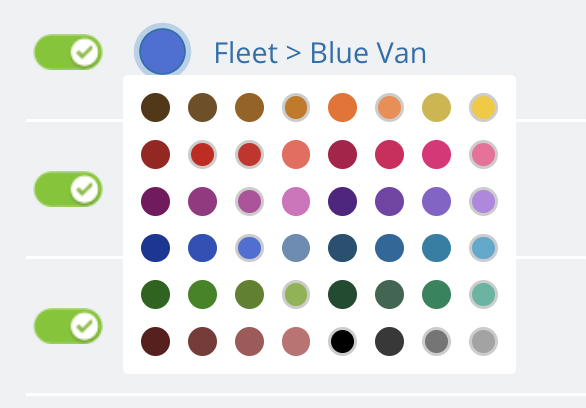
Sub-calendar or iCalendar feed
When you add a new sub-calendar you can choose between two types:
- Regular calendar
- iCalendar feed: Data is periodically fetched from a remote calendar application. This can be another Teamup Calendar or any other third party calendars system like Google Calendar, Outlook, iCal, and many more. iCalendar feeds are read-only. Read more about setting up iCalendar feeds.
Configure sub-calendars
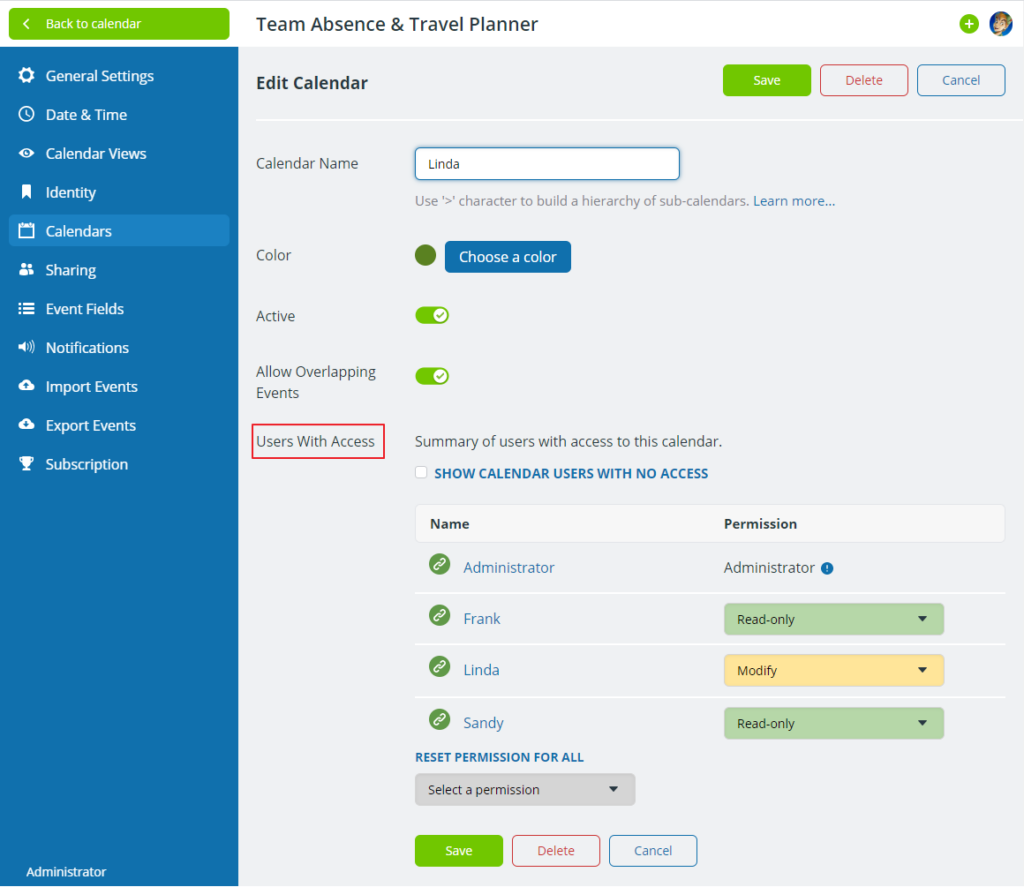
Use the Edit screen for an individual sub-calendar to configure its options and manage user access.
Note: When creating a new sub-calendar, you must first enter a calendar name and save ✅ before the Edit screen becomes available.
- Open Teamup in a browser.
- Go to Settings > Calendars.
- Click a sub-calendar name or select Edit to the right of a calendar to open the Edit screen.
- Configure options and access as needed (details below).
- Click the green Save button.
Change the color
In the Color section, click the colored circle to open a color menu, then click a color to assign it.
Change sub-calendar status
Use the toggle to change the sub-calendar status:
- Green: activated.
- Red: deactivated.
Deactivating a sub-calendar does not delete the sub-calendar or its data; it is simply inaccessible to users while deactivated. Learn more.
Prevent double-bookings
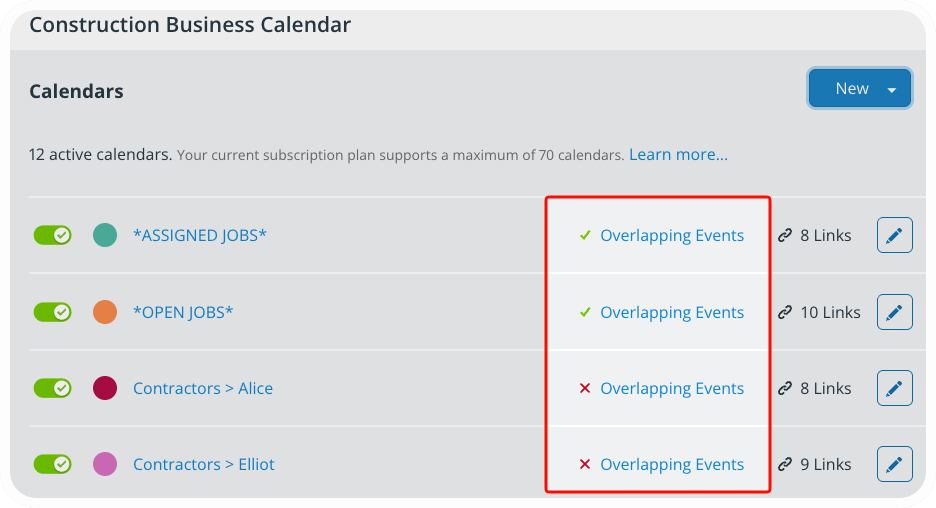
Sub-calendars can be configured to allow or disallow overlapping events.
- A green checkmark indicates that overlapping events are allowed on that sub-calendar.
- A red x symbol indicates that overlapping events are NOT allowed that sub-calendar.
- Open Teamup in a browser.
- Go to Settings > Calendars.
- Click a calendar name or Edit next to any sub-calendar.
- Toggle the button next to Allow Overlapping Events on or off as desired.
This feature can be used to prevent the double-booking of resources. Please note that the check for overlapping events is limited to one year from the start date of an event.
Access to sub-calendars
Access permissions to a sub-calendar can be configured in the Sharing view for each user. Learn more.
The Edit screen for a sub-calendar provides a summary view of all users and their access permission to a particular sub-calendar. Use the Reset Permission option below to user list to quickly change the permission for all users.
Delete a sub-calendar
To delete a sub-calendar:
- Open Teamup in a browser.
- Go to Settings > Calendars.
- Click a calendar name or Edit next to any sub-calendar.
- Scroll to the bottom of the Edit screen.
- Click the red Delete button.
- Note the warning: This sub-calendar and all events assigned to it will be deleted permanently.
- Click the red Delete Forever button to confirm your choice and permanently delete the sub-calendar and all its data.
Organize sub-calendars
Sub-calendar folders
Sub-calendars can be organized in a hierarchy of folders.
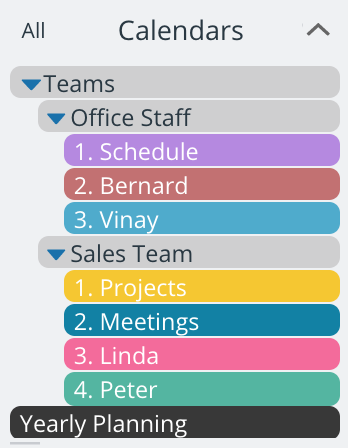
- Use > in sub-calendar name fields to organize sub-calendars in folders. For example: Folder 1 > Calendar 1.
- To create nested folders, use additional brackets and folder names, e.g. Crews > Crew 1 > Janet.
ℹ️ Learn more
Sub-calendar order
By default, sub-calendars are arranged alphabetically. Using numbers in the sub-calendar names allows you to control their order.
How to use sub-calendars
Active sub-calendars are listed in the Calendars section of the left-hand control panel of your calendar. Each user will see only the sub-calendars that they have access to in the Calendars list.
Smart filter for sub-calendars
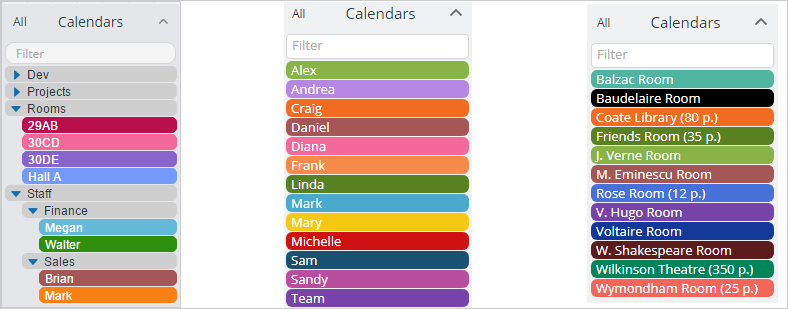
If you have more than 24 sub-calendars, a smart filter will be placed above the sub-calendar list. Start typing in the smart filter to quickly see a shortened list of matching sub-calendars. The calendar will display only events on those matching sub-calendars. Clear the smart filter to restore all sub-calendars (and events) into view.
Here are three examples of the sub-calendar list:
Control sub-calendars in your view
You can toggle sub-calendars on and off from your current calendar view. When a sub-calendar is toggled off, events on it will not be displayed. When you toggle it back on, the events will show back up.
- To toggle on a single sub-calendar (and simultaneously turn all others off), use the Eye icon.
The Eye icon appears on the title bar for a folder or sub-calendar when you hover your mouse over it. On mobile, simply tap the Eye icon to the right of the sub-calendar.
- Add more sub-calendars back to your view by clicking on their title bar.
- Add all sub-calendars back to view by clicking All above the calendar list.
ℹ️ Learn more
Filter events by sub-calendar
You can also filter by sub-calendars without turning them on and off from your calendar view.
To do so, use the filter option below the calendar list.
ℹ️ Learn more