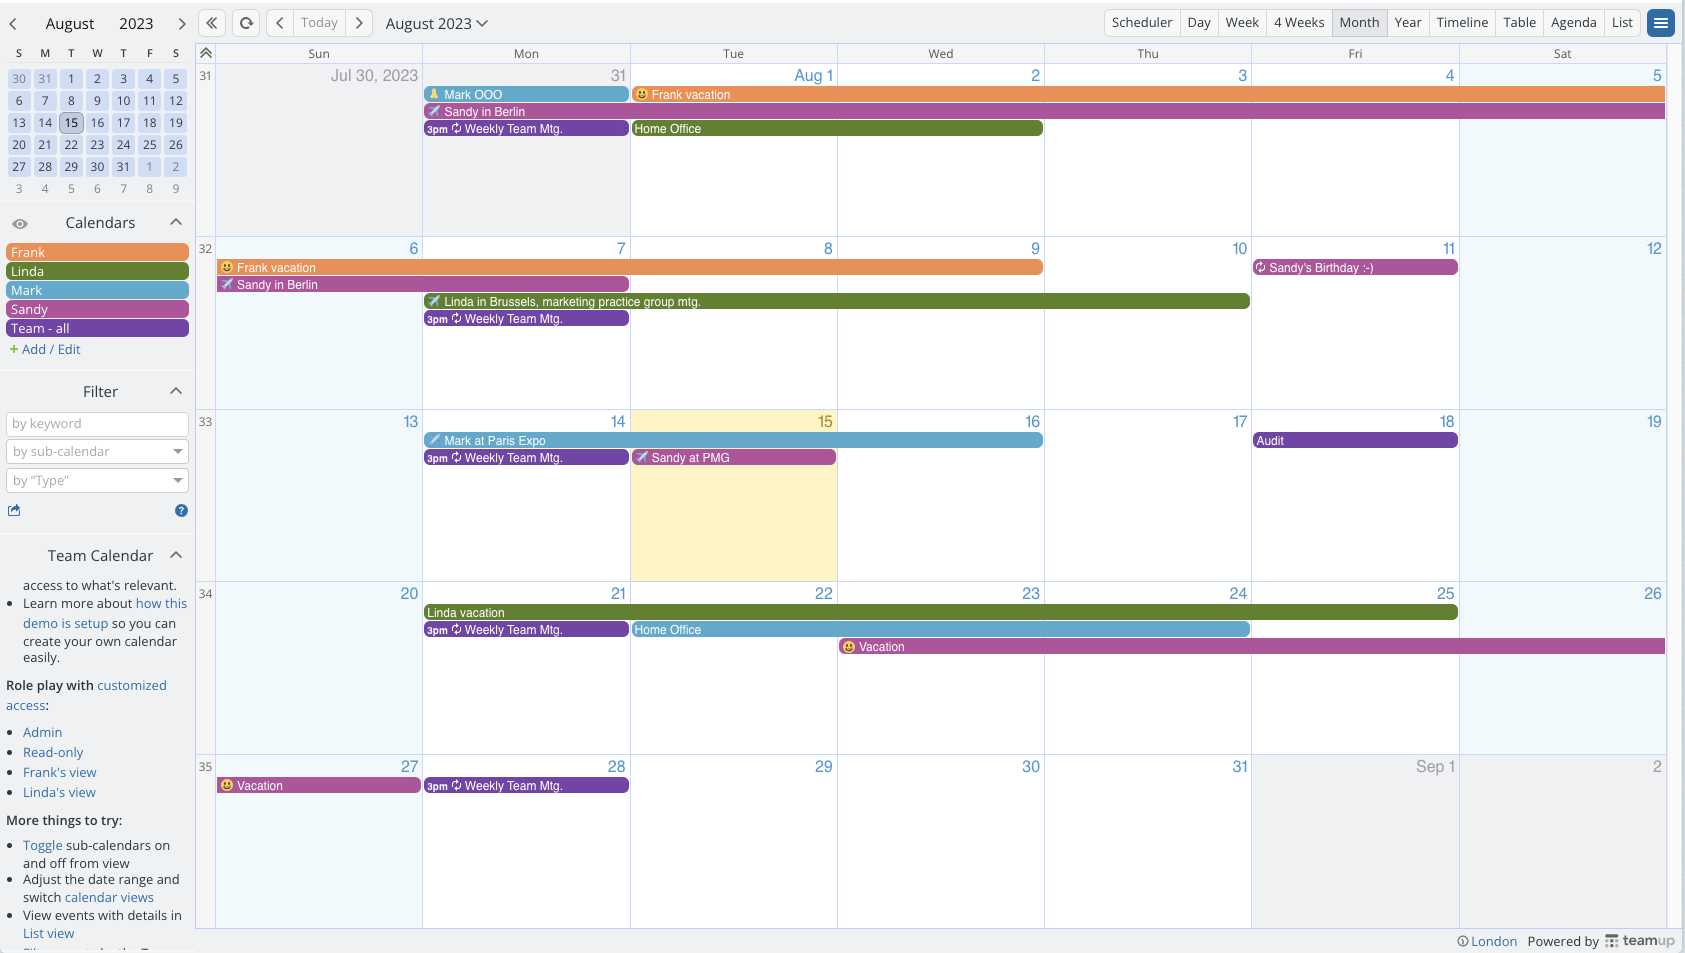
About the Team Availability Calendar live demo
Open the Team Calendar live demo. It’s a color-coded team calendar demonstrating customized access and easy visual cues.
Scenario: team availability for a small business
A small business owner wants a color-coded calendar that allows each employee to update their own schedule. The business owner wants to quickly see availability for each team member and have color-coding for easy visual cues for which calendar item belongs to which employee.
Many small businesses need a reliable way to see team availability and manage all aspects of staff scheduling:
- Shift assignments
- Tasks and responsibilities
- PTO scheduled or requested
- Travel
- Meetings
The employees should be able to add or modify their own events, so they can request time off or add travel and meetings to their own calendars. But they should not be able to change events on another employee’s sub-calendar. The business owner should be able to modify all events on the calendar.
Using this live demo
Explore this scenario by opening the live demo Team Availability calendar, then use the links and tips in the About box (in the left sidebar of the calendar).
- Role play different team members and see what their customized calendar access is like by using the links in the About box. You can switch back and forth between views.
- Work with the calendar itself: try toggling sub-calendars on and off from view, adjust the date range, and switch calendar views.
- Work with events: Use the built-in filters (in the left sidebar) to filter events by sub-calendar, keyword, or the Type custom field. Try using a combination of filters.
- Explore the calendar settings: From the blue menu in the top right corner, select Settings. There you can add and organize sub-calendars to test for your needs, add custom fields, and change any other defaults.
When you’re ready, you can create your own Teamup calendar. Follow the steps below if you want to recreate this scenario for your calendar.
How to set up a color-coded team calendar
This scenario is a good example of a calendar structure set up to manage one dimension. See also how to manage two or more dimensions.
Create sub-calendars
- Create a sub-calendar to identify each employee by going to Settings > Calendars.
- Assign a different color to each employee’s sub-calendar:

If you’ve already created sub-calendars for employees, you can change the colors if needed. Choose contrasting colors to differentiate visually with a glance.
Set up customized access
Next, give access to each employee so that they can only make changes to their own events.
- Go to Settings > Sharing:

- For each employee, apply Modify or Modify my events permission to their own sub-calendar. Give Read-only permission to other sub-calendars. If you set the permissions as shown above, each employee will be able to modify (add, edit, and/or delete) their own events, and view the events of other employees.
- If you already created a calendar and shared access with employees, you can update it by selecting the pencil icon to the right of the existing access:

The result: events will be color-coded by employee. Each employee will only be able to add events to their own calendar, in their assigned color. They will be able to see the events of other employees but not change them.


