With a Teamup calendar, you can share your calendar securely with others by adding users. You can customize access with granular permission levels and organize users in groups. Here’s how to set it up.
The calendar administrator always has centralized control of what is shared from the calendar, by choosing which sub-calendars to share and setting the level of access permission that each user or group is given.
Note: To share an individual event, see this article.
Add user
Only calendar administrators can access settings and manage access to the calendar.
User account
- Open Teamup in a browser.
- Click the blue menu (top right).
- Select Settings.
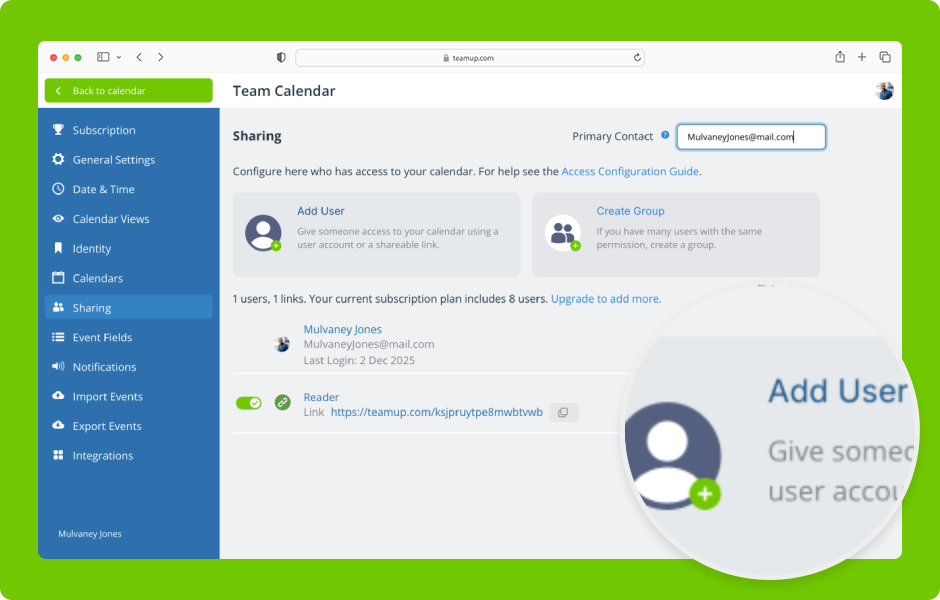
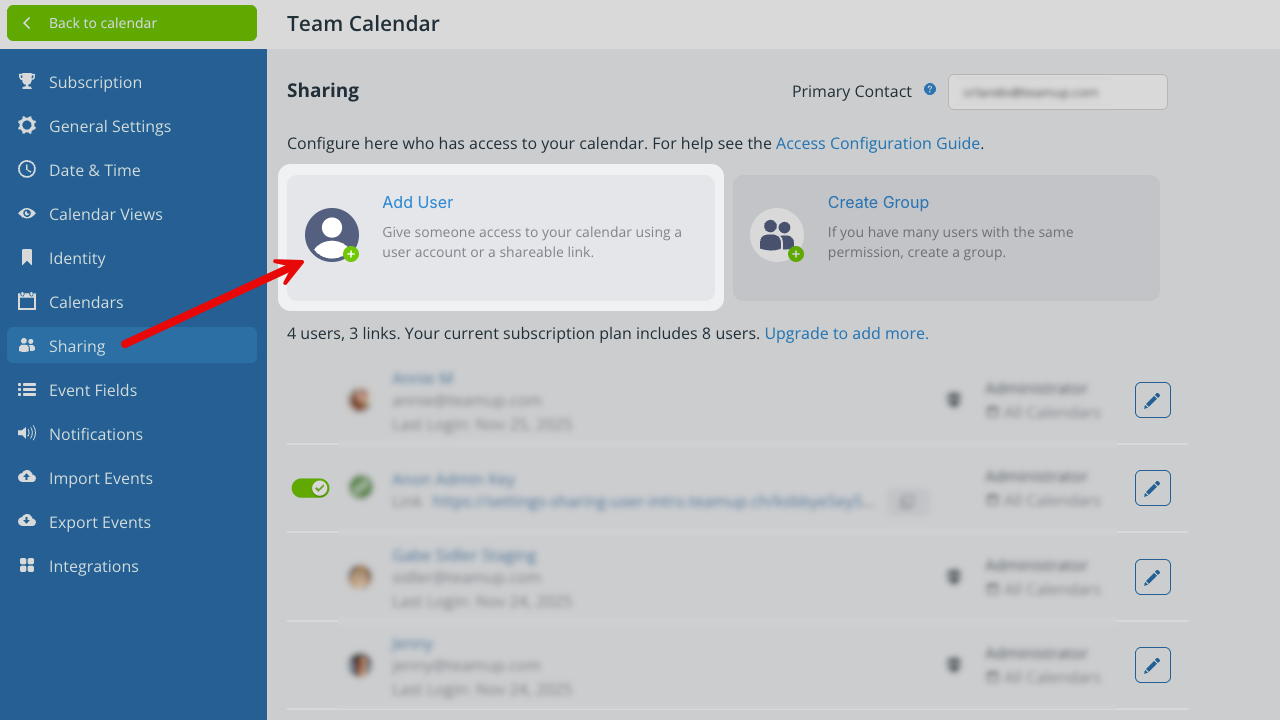
- Go to the Sharing tab.
- Click Add User.
- Enter the email address of the user, then click Add:

- On the next screen, enter the user’s name if the Name field is blank..
- If the email address is not found in the Teamup user database, the user will receive an email invitation to create a user account and access the calendar.
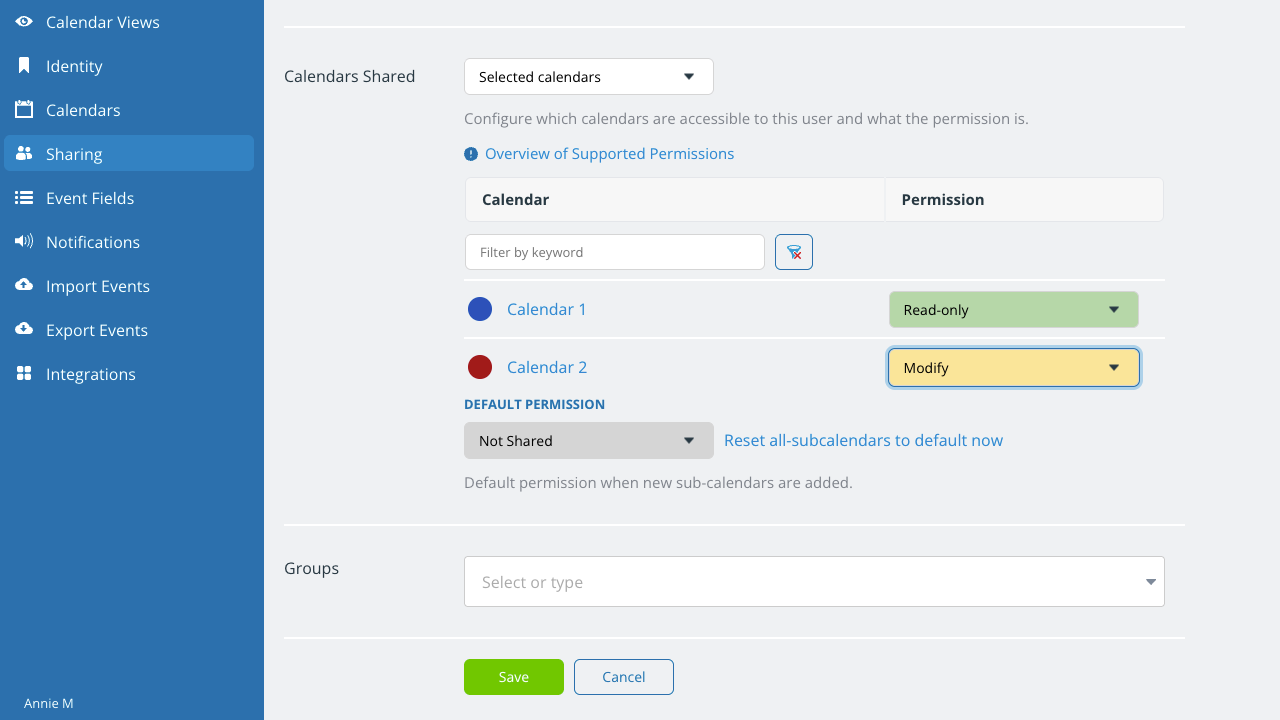
- Scroll to the Calendars Shared section and select which sub-calendars the user can access and assign a permission level to each one:
- Click the green Save button.

Link

Links are a way to give temporary access to your calendar to an individual outside your organization, to share your calendar with a large group, on social media, or with the public. You can use a link to embed Teamup on your own website, too.
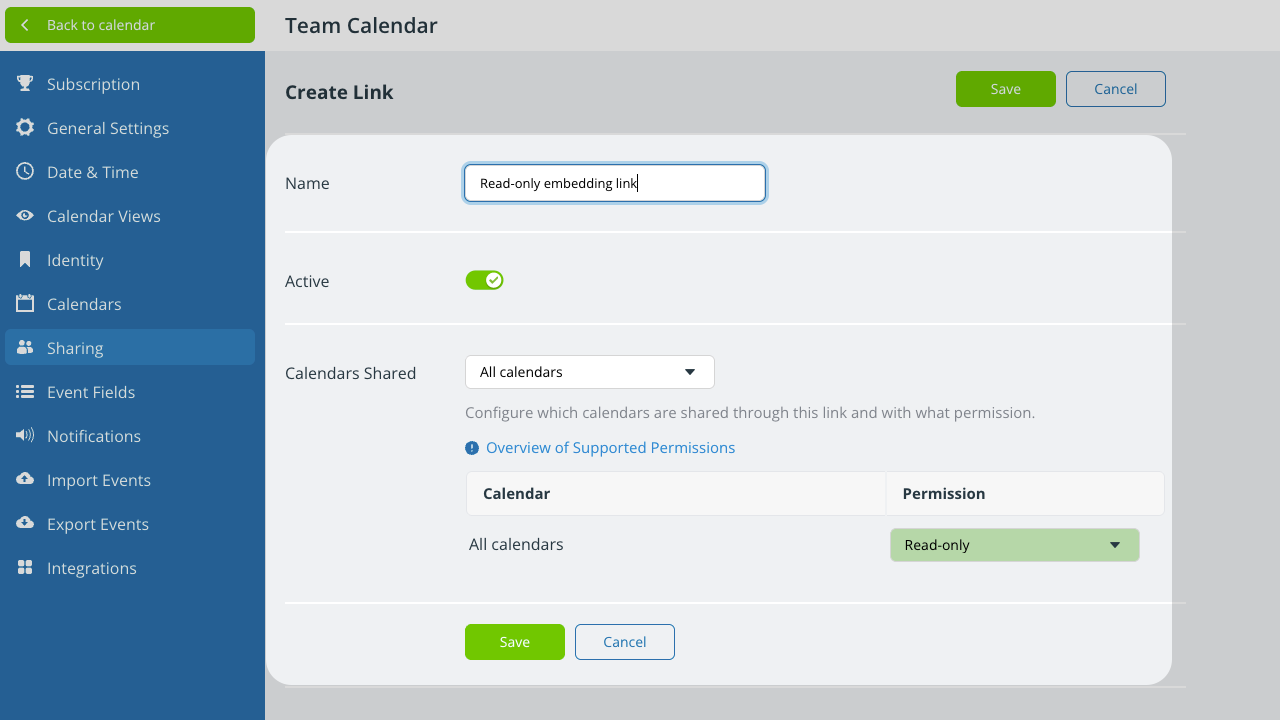
Since anyone can access the calendar via a shareable link, be very careful to set the appropriate permission (read-only is the recommended default).
- Open Teamup in a browser.
- Click the blue menu (top right).
- Select Settings.
- Go to the Sharing tab.
- Click Add User.
- Expand the Link section and click Add.
- On the next screen, type in a name for the link, then configure access in the Calendars Shared section:
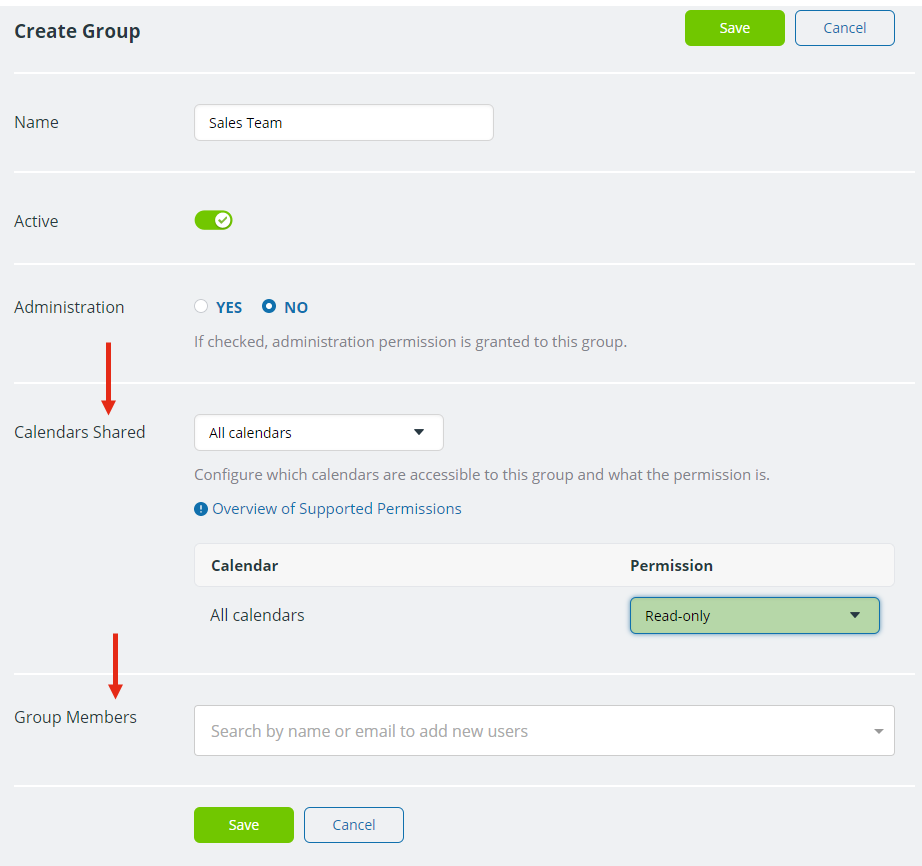
Create a group
Groups are a convenient way to organize users. Let’s say you have a sales team of 10 people. They all need the same access to the calendar. Instead of going through the tedious process of assigning the sub-calendars and permissions for each of these users, you can create a group. You’ll set the access permissions for the entire group, then add individual users to the group.
- Open Teamup in a browser.
- Click the blue menu (top right).
- Select Settings.
- Go to the Sharing tab.
- Click Create Group.
Proceed as shown below to configure group access and add members.
Assign permissions and add members
Choose a name for the group, select which calendars to share, and set the permission level.
If you already have calendar users, you can add them to the group from the drop-down menu at the bottom. You can also add users here by their email address.
Security and group permissions
- Group permissions supersede user permissions: A user who is part of a group will have the calendar access which is assigned to the group.
- For example, if the group has Modify permission to all sub-calendars, every user in the group will have Modify permission to all sub-calendars
- Higher permissions take precedence: A user’s individual permissions are often different than the group permission. Or a user may be a member of two groups with different access permissions. When there is a permission conflict, the higher level of permission takes precedence.
- For example, if a user’s individual permissions are Read-only, but she is part of a group with Add-only permission, she will be given the Add-only access from the group.
- If she is part of two groups, one with Read-only permission and one with Modify permission, she will be given the Modify level access.
- When a user is removed from a group: Removing a user from a group reverts their access to their individual permission settings.
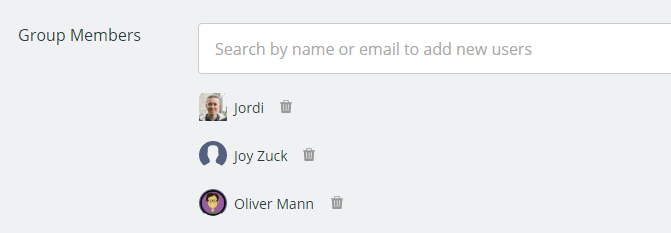
Remove group members
- Go to Settings > Sharing.
- Click the group name to open it.
- Scroll down to the Group Members section.
- Remove members from a group by clicking the trash icon next to the member:
Delete a group
You can also deactivate or delete a group at any time.
- Go to Settings > Sharing.
- Locate the group in the Sharing list.
- To deactivate the group, use the toggle to the left of the group name.
- To delete the group, click the Edit icon to the right of the group name. On the next dialog, use the red Delete button to remove the group from your calendar.

Note: Deleting a group will NOT remove the members of the group from your calendar. They will still be calendar users unless you also remove each user individually.
Add a user from user settings
You can also add users to a group at the bottom of the user setting page when adding a new user or editing an existing user.
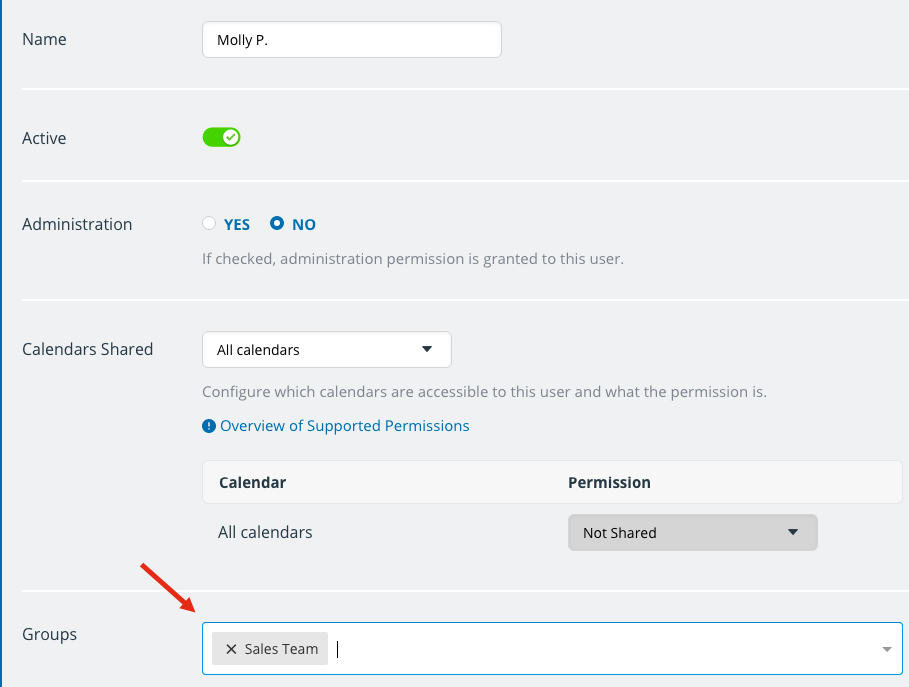
To remove a user from a group, click the X beside the user’s name.
Manage users and groups
The calendar administrator can manage users and adjust access as needed.
View all users
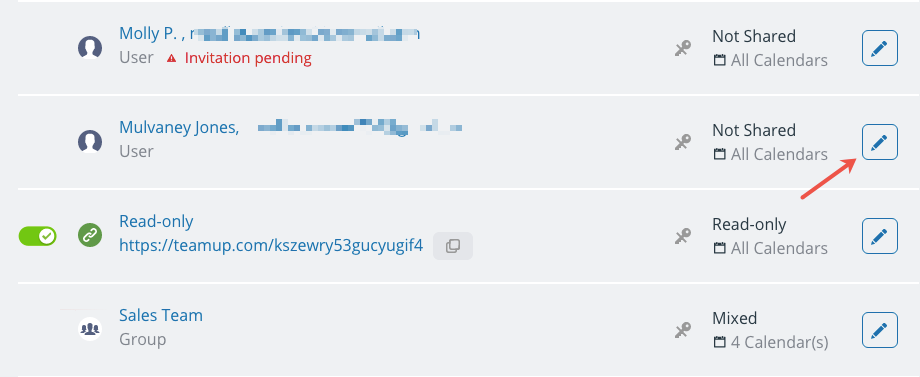
The Sharing section of the calendar settings shows a list of all users, links, and groups. Review this list regularly to keep all access current and appropriate.
- Open Teamup in a browser.
- Click the blue menu (top right) and select Settings.
- Click the Sharing tab to view all users, links, and groups.
- Click the pencil icon to review and edit settings for any user or group.
- Use the toggle to deactivate or reactivate a link.
Filter the list
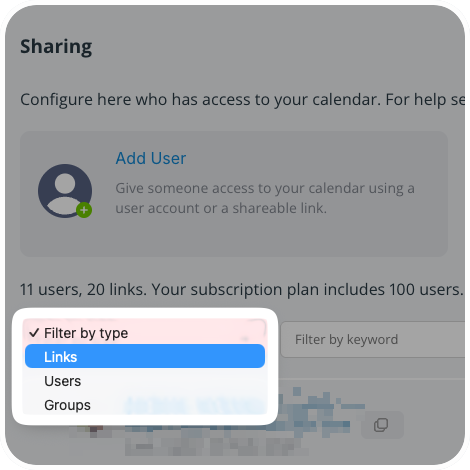
Use the filter at the top to sort by type (links, users, or group). Filter by keyword to quickly find a specific user or group.
Important security notes
- Be careful to assign appropriate permissions. If in doubt, assign a lower permission level; you can always grant a higher access level if needed.
- When a user leaves your organization: Be sure to revoke their calendar access. Go to Settings > Sharing, find the user in the list, then deactivate or delete the user.
- Review access regularly: Check the Sharing list regularly and deactivate or delete any (account users or secret links) which are not current, or which may be out-dated. More details here.