Teamup supports configurable default event fields and custom event fields. Formatted text fields are a type of custom field that provide a large text area with formatting and linking options. It’s similar to the Description field (but without file uploading ability).
About formatted text fields
A single-line text field provides a place for simple reminders, short notes, or URLs. However, a single-line text field does not have any formatting and is limited to short text input.
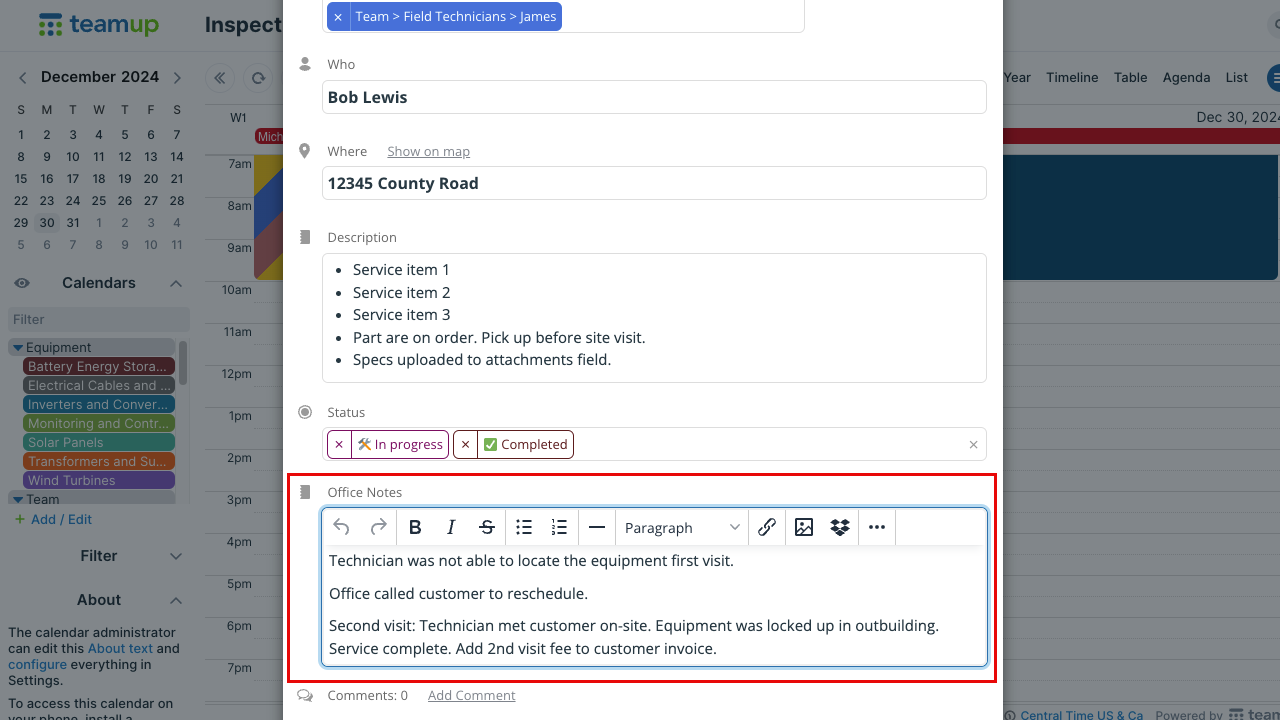
Formatted text fields provide a custom field with the ability to format text, link to websites and documents, and input a lot of text for longer notes. It’s similar to the Description field except the ability to upload files.
Create a formatted text field
- Open Teamup in a browser with administrator access.
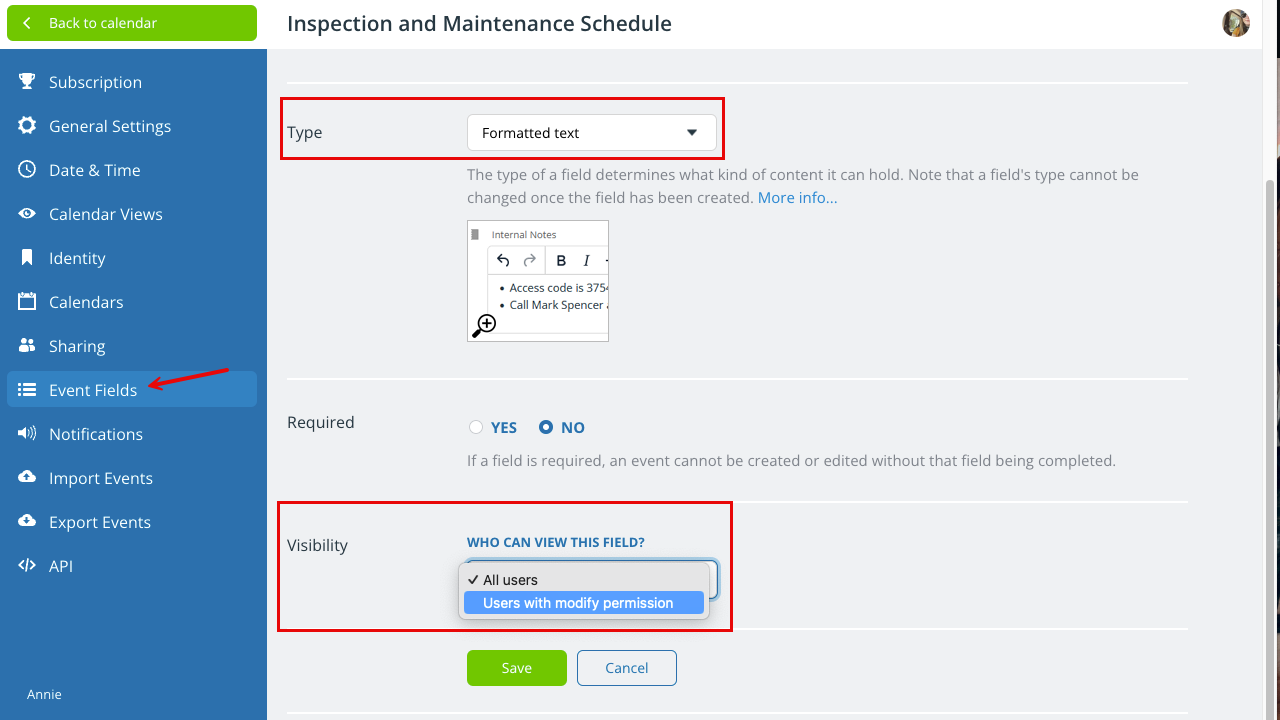
- Go to Settings > Event Fields.
- Click New Field (top right).
- Enter a field name.
- In the Type section, select Formatted text.
- In the Required section, check Yes to make the field required.
- In the Visibility section, select whether the field is visible to All users or only Users with modify permission.
- Click Save.
Manage formatted text fields
Note: You cannot change the field type.
- Open Teamup in a browser with administrator access.
- Go to Settings > Event Fields.
- All active event fields, both default and custom, will be listed. To see deactivated fields, check Show deactivated fields above the list.
Edit a formatted text field
- Click the pencil icon next to the field name.
- To change the field name, put your cursor in the Name field, delete the old name, and type a new one.
- To change the field requirement, in the Required section check Yes (for required) or No (for not required).
- Click Save after making any changes.
Change visibility for a formatted text field
- Click the pencil icon next to the field name.
- Scroll to the Visibility section.
- Select All users or Users with modify permission from the drop-down menu.
- Click Save.
Deactivate/reactivate a custom text field
Click the toggle next to the field name to change its active status.
- A red (X) toggle means the field is deactivated.
- To reactivate a text field, click the toggle to green (√).
Delete a custom text field
- Click the pencil icon next to the field name.
- Click Delete.
- Confirm by clicking Delete Field Forever.
Ways to use a formatted text field
The ability to control visibility for this field makes it powerful and flexible.
In many organizations, there are multiple users or groups of users. Some users are involved in working with calendar data; they have modify permission which allows them to add, update, reschedule, and remove events. Other users are only able to view the calendar data; they have read-only permission.
With the formatted text field, you can share information among the group of modify users without making it visible to the read-only users. This can be helpful when there are discussions among certain teams or roles that should not be shared with other groups. Or when there are notes, questions, or other details that need to captured for internal use but not shared with public calendar viewers.
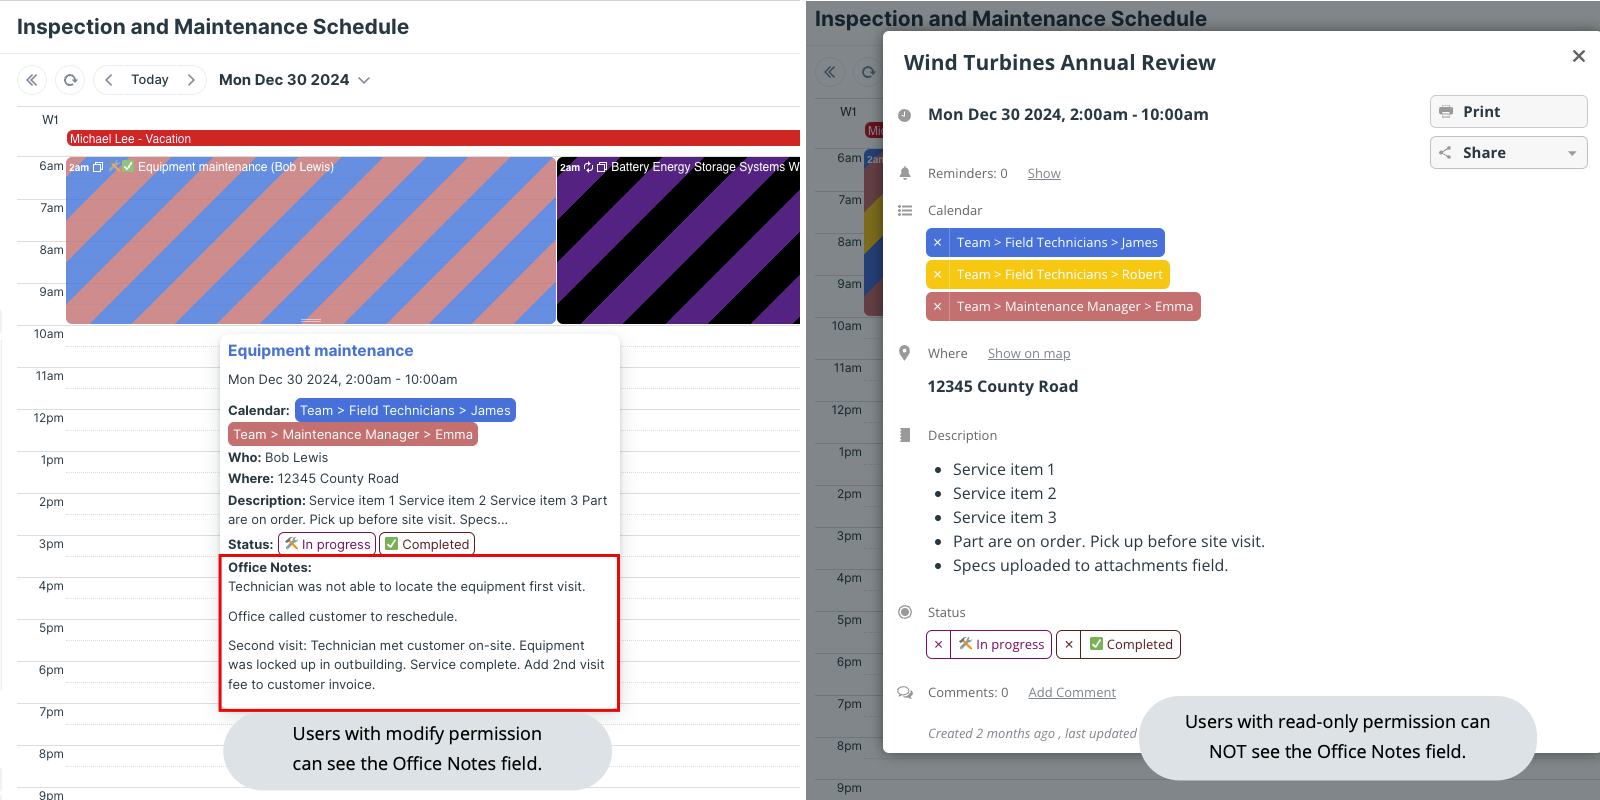
For example, a service company adds a formatted text field called Office Notes. It’s used by the office administrators who schedule service calls, speak with customers, and assign technicians. It’s set to be visible only to users with modify permission. The crew members have read-only permission to the calendar, so they can view their scheduled jobs and get all the information needed. They’re not able to see the Office Notes field. The image above shows a side-by-side view of the same event; what the office staff can see is on the left, and what the field techs can see is on the right.