Teamup supports configurable default event fields and custom event fields. Single-line text fields are a type of custom field. Custom text fields help keep information organized and easy to find.
About custom text fields
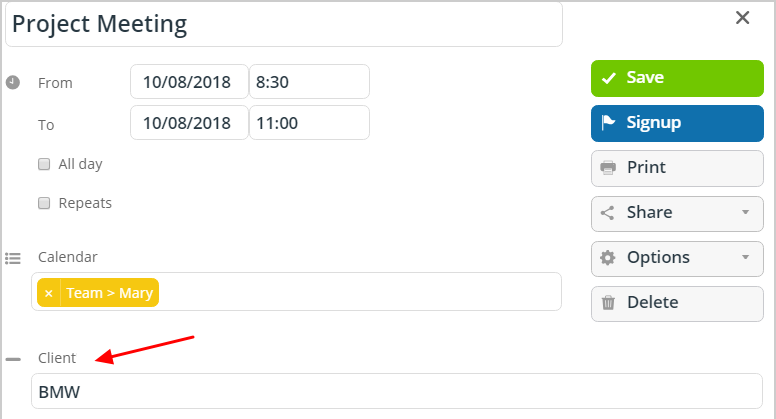
A custom text field is a simple text-entry form similar to the default Who field.
- Text fields allow a single line of text input.
- Each custom text field is shown in its own column in Table view.
- A link added to a custom text field becomes clickable.
- Text field contents can be displayed beside the event title.
- Text field contents are included in keyword filters and search queries.
Create a custom text field
- Open Teamup in a browser with administrator access.
- Go to Settings > Event Fields.
- Click New Field (top right).
- Enter a field name.
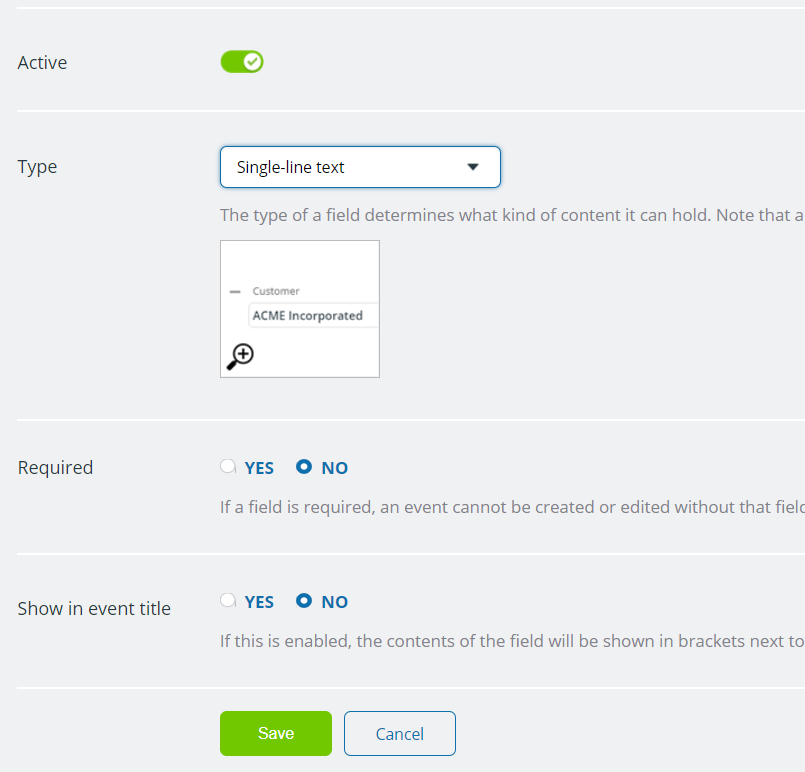
- In the Type section, select Single-line text.
- If desired, check Yes to make the field required and/or show contents in the event title.
- In the Visibility section, select the option you want from the menu.
- Click Save.
Manage custom text fields
- Open Teamup in a browser with administrator access.
- Go to Settings > Event Fields.
- All active event fields, both default and custom, will be listed. To see deactivated fields, check Show deactivated fields above the list.
Edit a custom text field
- Click the pencil icon next to the field name. You cannot change the field type.
- To change the field name, put your cursor in the Name field, delete the old name, and type a new one.
- To change the field requirement, in the Required section check Yes (for required) or No (for not required).
- To change the field contents display, in the Show in event title section, check Yes (to show in the event title) or No.
- Click Save after making any changes.
Deactivate/reactivate a custom text field
Click the toggle next to the field name to change its active status.
- A red (X) toggle means the field is deactivated.
- To reactivate a text field, click the toggle to green (√).
Delete a custom text field
- Click the pencil icon next to the field name.
- Click Delete.
- Confirm by clicking Delete Field Forever.
Ways to use a single-line text field
- Track client names for appointments
- Require users to enter contact email when making a reservation
- Add document links for scheduled jobs
- Set up a dedicated field for Zoom meeting links.
