With a Teamup-Slack integration, your team can be instantly notified of changes on your Teamup Calendar via Slack channels.
Having Teamup notifications sent to Slack can help your team stay up-to-date on plans and schedules, streamline communication, and reduce the number of emails and messages to process.
This article explains how the calendar administrator can connect Teamup with Slack and post Teamup change notifications to Slack channels. Other calendar users, see this article.
Get Teamup notifications in Slack

The Slack integration enables pop-up alerts on desktop or mobile devices via your Slack app. If your team frequently communicates via Slack, having calendar notifications there can make it easier for everyone to stay updated.
Note that changes to past events will only trigger notifications if the calendar is on a paid plan.
Set up a Slack integration
Step 1: Connect Teamup and Slack
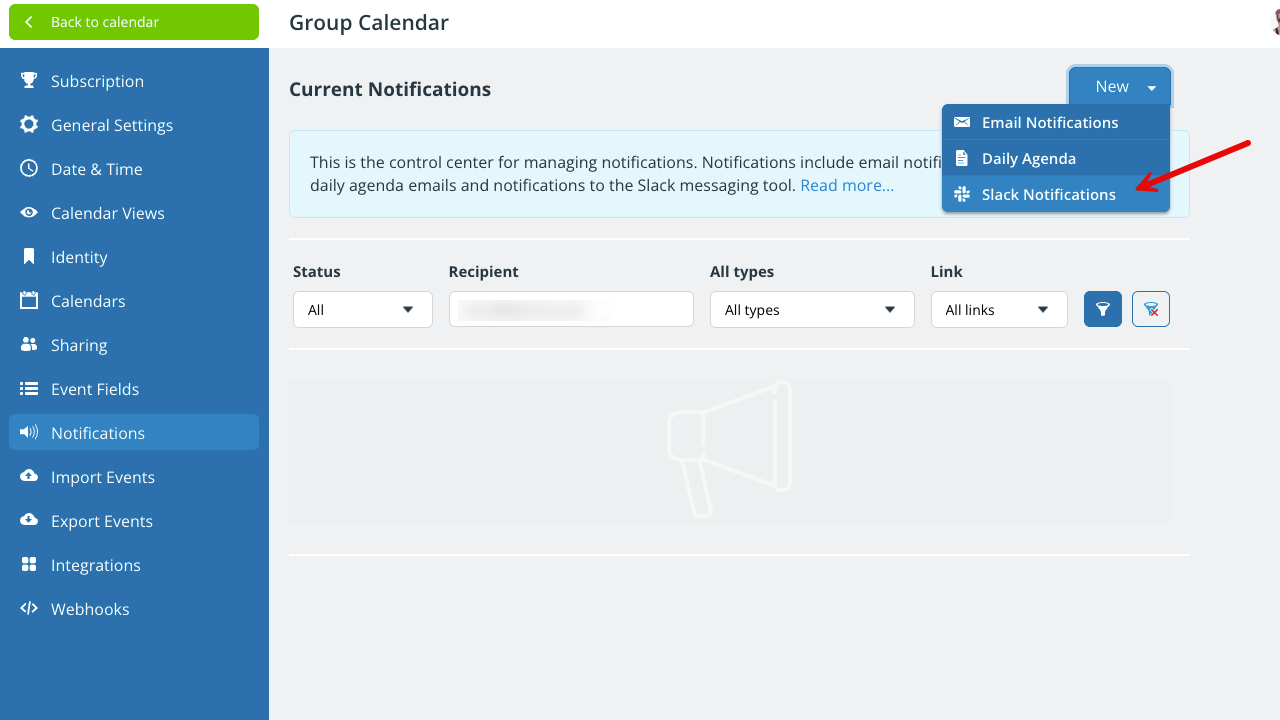
- Open Teamup in a browser.
- Go to Settings > Notifications.
- Click New.
- Select Slack Notifications.
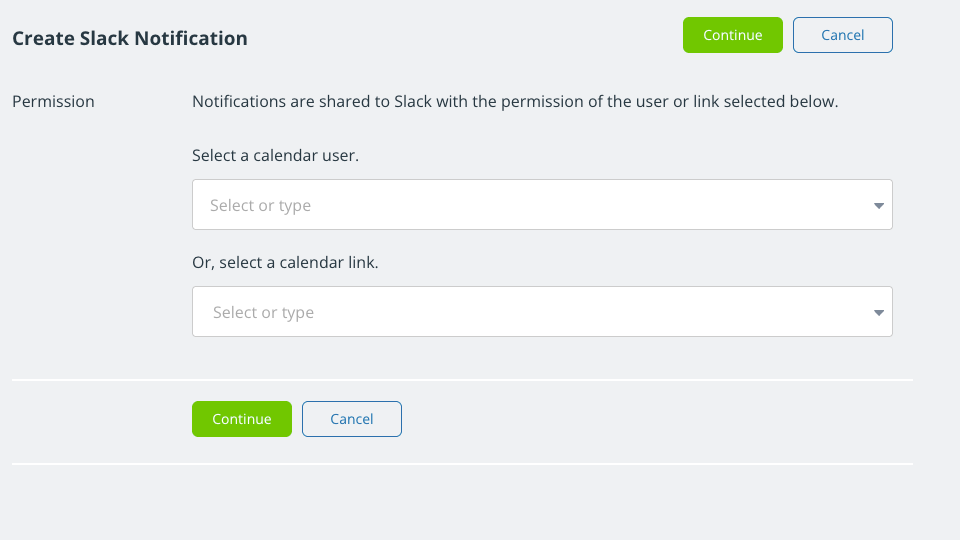
- Select a calendar user or secure link to use for the notification permission. Click Continue.

- On the next screen, click Add to Slack.
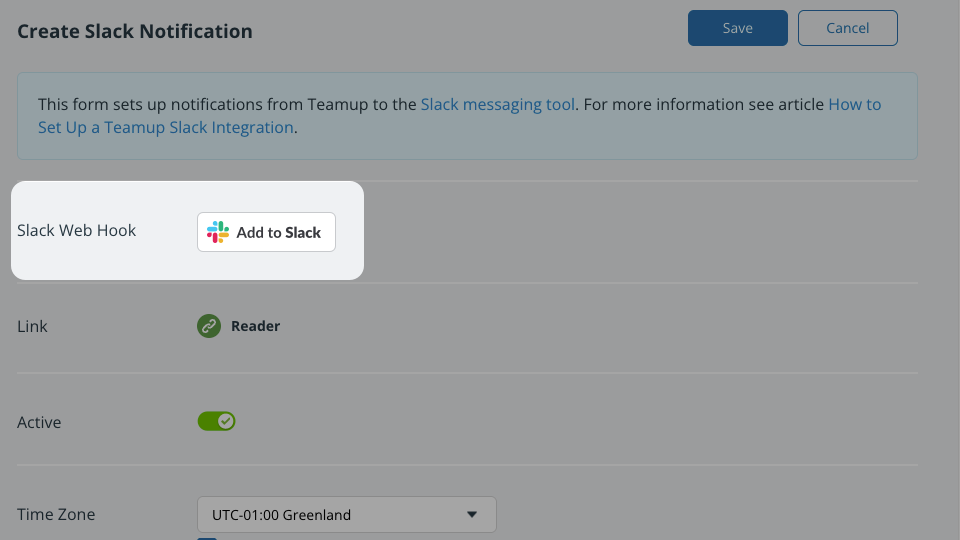
This will take you to Slack.com to obtain the necessary authorization:
- If prompted, log into Slack.
- Select the Slack team and channel.
- Click Allow.
After authorizing Teamup, you will be redirected back to Teamup settings to complete the integration.
Setting the notification permission
Each Teamup notification sent to Slack will contain links back to the event and the calendar. The user or link you choose determines the access level applied to those notification links.
If you choose a user, only other authorized users will be able to open the notification links.
If you choose a link, be sure it is a link with access permissions that are appropriate for all members of the channel. Use a read-only link or create a customized link specifically for the members of the Slack channel.
Part 2: Configure notifications
After completing authorization, you’ll be taken back to Teamup settings to configure the notifications sent to Slack.
In the Sub-Calendars section:
- Set up notifications for all sub-calendars at once or individually for each sub-calendar.
- Select the notification type: All changes, New events, or Important changes. Important changes include newly created events and date/time changes to existing events.
- When done, click Save.

Set up notifications for all calendars
In the All calendars row, click the Changes menu and select the notification type. Click Save.
Set up notifications for individual calendars
For each calendar, click the Changes menu and select the notification type for that sub-calendar. Select None if you do not want any notifications for a particular calendar. Click Save.
Test the Slack integration
- Add a new (future) event or make a change to a future event on your Teamup calendar.
- The change notification should appear on your chosen Slack channel within seconds.
- Click on the calendar name in the post on your Slack channel and the calendar opens. Make sure that the calendar link is the one you intended to use and appropriate for all members of the channel, in particular, that it is not a link with the administrator rights or other inappropriate modifying permissions.
Manage Slack notifications
- Open Teamup in a browser.
- Go to Settings > Notifications to see an overview of all existing notifications. The list will include all notifications set up by all users. Filter to see only the Slack notifications.
- Use the toggle to deactivate or activate a notification subscription.
- Click the pencil icon to modify or delete notifications.
- If you want to remove the Teamup-Slack integration completely, it’s also important to remove it within Slack: Go to the app directory, select the Configuration tab, and revoke the respective authorizations.