
If you’ve tried to upload an edited photo on your iOS device before, you may have found that the original version of the photo gets uploaded to your Teamup calendar by default.
To avoid this issue:
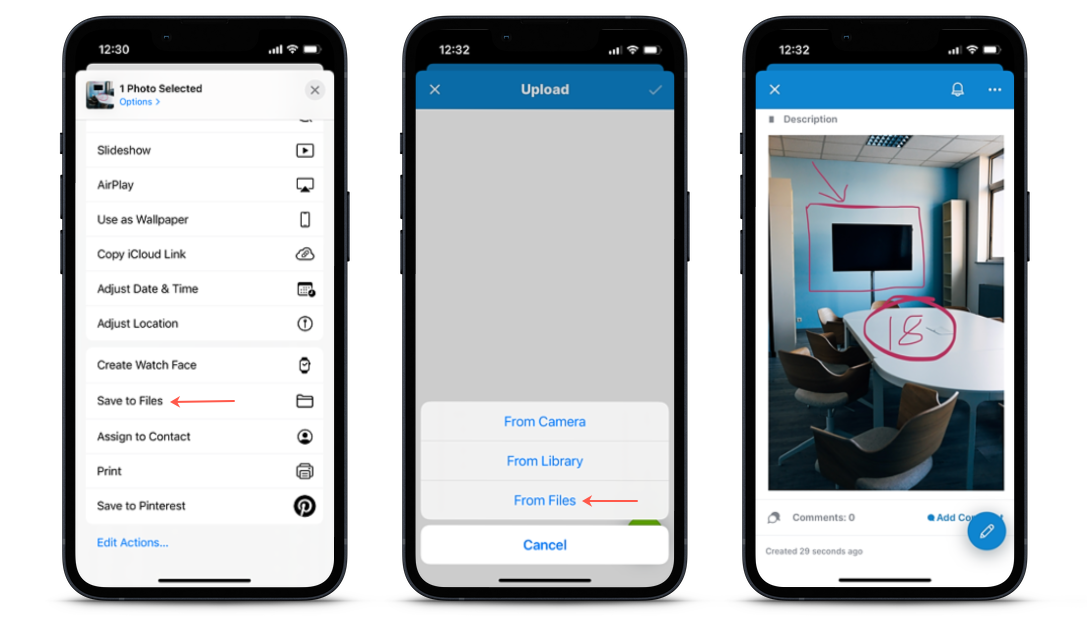
Save the edited photo to Files, rather than to the photo gallery. When you upload the photo to Teamup, select “From Files” as the upload source.
- Edit/annotate the photo as needed and save the changes (click Done).
- View the edit photo and tap Share.
- Choose Save to Files. You may need to scroll down to see this option.
- In the Teamup app, tap Upload.
- Tap the green + button in the bottom right.
- Select From Files.
- Select the edited photo and tap Open.
- Choose the size and select visible image or clickable link.
- Save the event.
This method will solve the issue so that you have the edited version of the image uploaded to the event in your Teamup calendar.