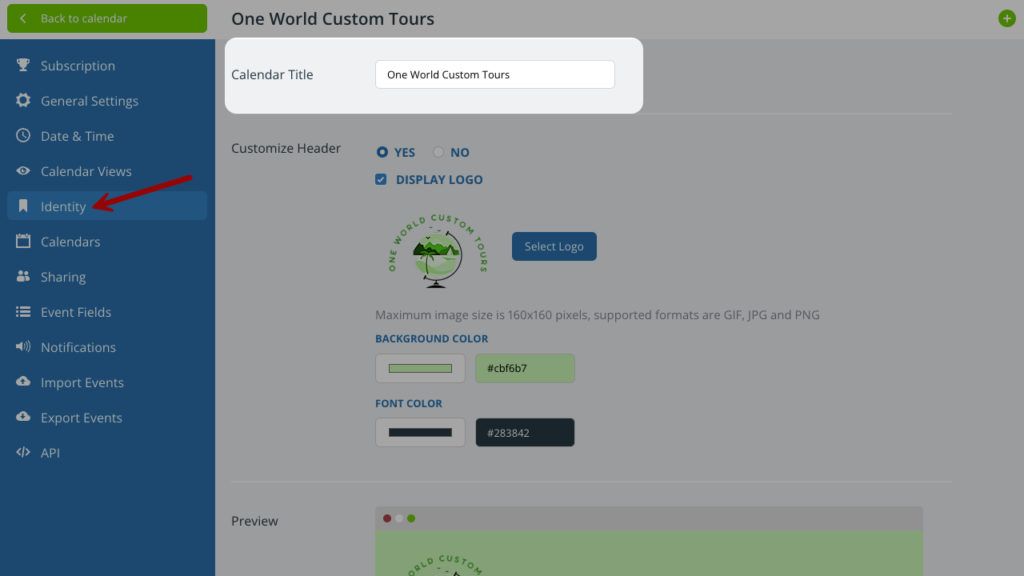
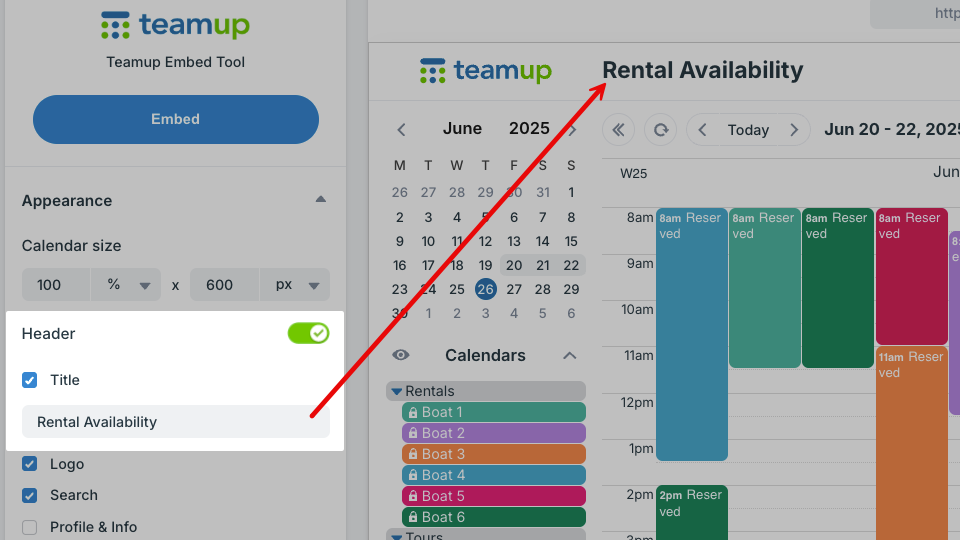
You can rename a Teamup calendar in the calendar settings. This changes the title of your master calendar. It’s also possible to customize the calendar title for an embedded Teamup calendar or a shareable calendar link. See here for how to change the name of a sub-calendar.
Change the calendar title
Only the calendar administrator can access full settings and change the calendar title.
- Open Teamup in a browser.
- Click on the blue menu (top right).
- Select Settings.
- Click on the Identity section. Enter a new name in the Calendar Title box.
- Your changes will be saved automatically.
Customize the displayed title
You can customize the displayed title for an embedded calendar or a shareable calendar link.
Embedded calendar
Use the Teamup Embed Wizard:
- In the Appearance section, find the Header options.
- Make sure the Header toggle is on (green/√) so the header is visible.
- Check the box for Title.
- Enter the custom title in the text field below the Title option.
Use link parameters:
- Append the title link parameter to a secure calendar link.
- Use the secure link with the appended title parameter to embed the calendar in your website.
Shareable calendar link
If your sales staff uses the calendar for training and vacation days, and your admin staff uses it to enter their vacation days only, you may wish to differentiate these uses with different calendar names.
Customize the calendar name shown by appending a calendar link parameter to the calendar link.
To do so, append ?title= followed by the name you want for the appropriate calendar link.
Click on the links below to see this name variation in action:
Sales staff:
- Without title parameter: https://teamup.com/ksxvgno2yj1uv2g7cb
- With title parameter: https://teamup.com/ksxvgno2yj1uv2g7cb?title=Sales+Staff+Schedule
Admin staff:
- Without title parameter: https://teamup.com/kstrzy6ojncpi9ozzb
- With title parameter: https://teamup.com/kstrzy6ojncpi9ozzb?title=Admin+Staff+Schedule


