A Teamup Calendar always has at least one sub-calendar and can have multiple sub-calendars. The calendar administrator can set up customized access by selecting which sub-calendars to share and configuring access permissions for each user.
Add a user
Here is an overview of the steps. More details below.
- Open Teamup in a browser.
- Click the blue menu (top right).
- Select Settings.
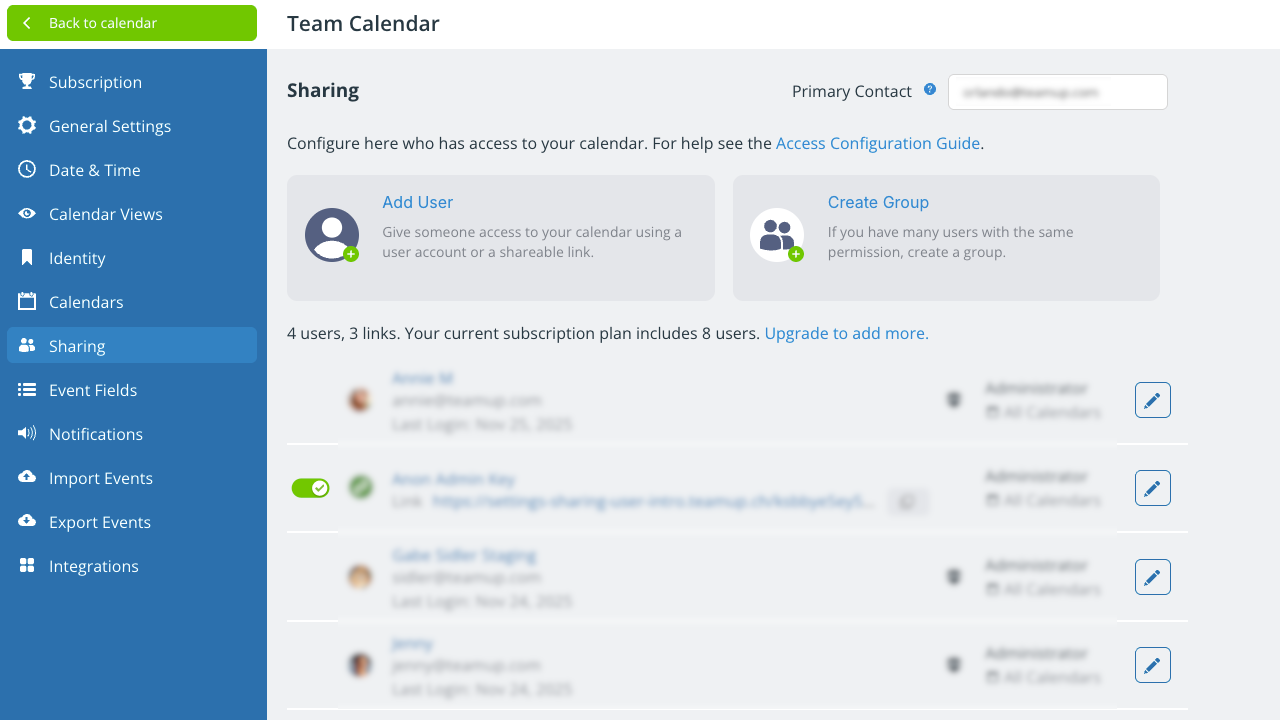
- Go to the Sharing tab.
- Click Add User.
- Enter the email address of the person to add.
- In the Calendars Shared section, choose Selected calendars.
- Set a permission level for each sub-calendar.
- Click Save when finished.
Share selected calendars
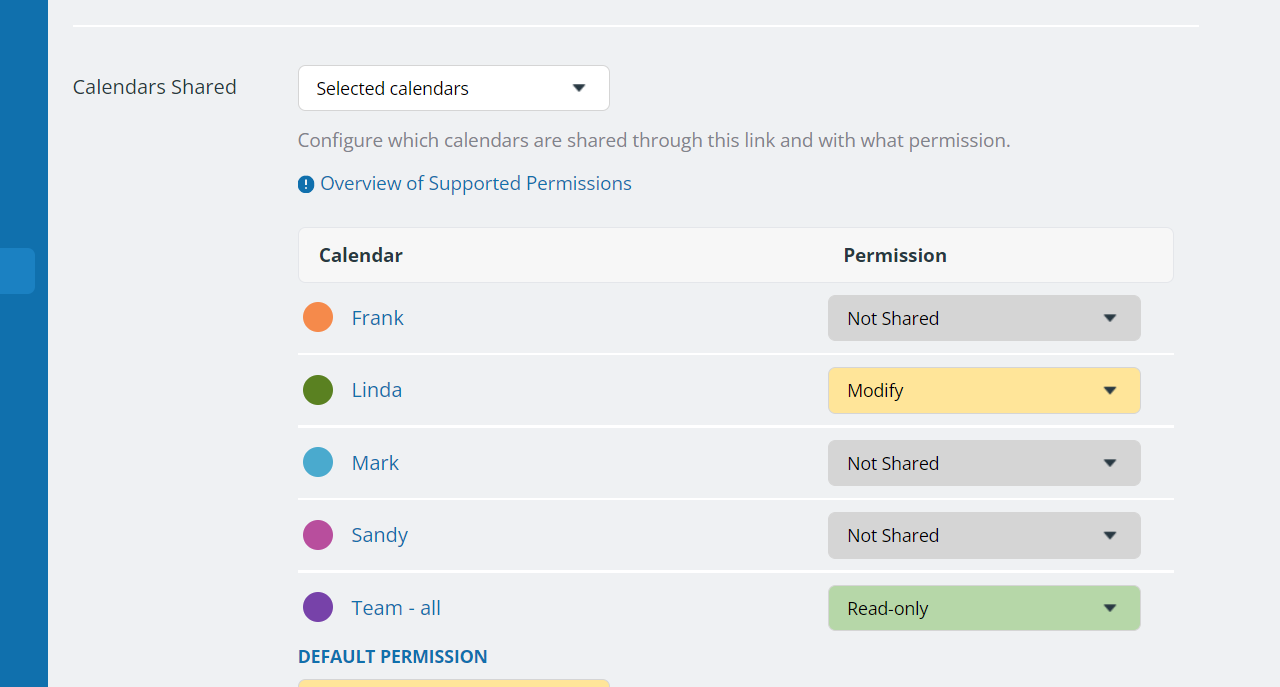
The calendar administrator can choose which calendars any user can access, and assign a permission individually for each sub-calendar.
- When adding a user, scroll to the Calendars Shared section.
- Choose Selected calendars from the drop-down menu.
- Beside each calendar name, use the drop-down Permission menu to select a permission level.
- For any calendar you do not want the user to access, set the permission to Not Shared.
Set the permission levels
When sharing selected calendars (instead of all calendars), you need to assign a permission level to each calendar individually.
Use the drop-down Permission menu beside each calendar to set the permission level for that sub-calendar. You can always adjust the assigned permission.
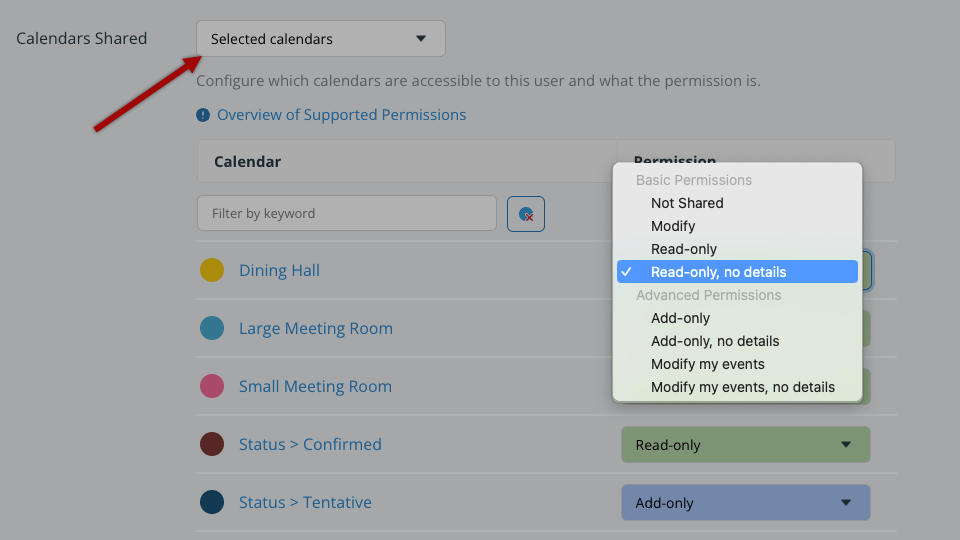
Choose from these permission levels:
- Not Shared: Prevents the user from any access to the calendar.
- Modify: Allows the user to view, modify, create and delete calendar events.
- Read-only: Allows the user to view calendar events including details but not make changes.
- Read-only, no details: Allows the user to view calendar events with details hidden. No changes are allowed.
- Add-only: Allows the user to add new events and view but not modify events added by other users. The user can modify their own newly added events during the current browser session (up to approximately 30 minutes).
- Add-only, no details: Same as Add-only but the details of any existing events are hidden.
- Modify-my-events: Allows the user to add new events and modify any existing events they created. They can read but nod modify events added by others.
- Modify-my-events, no details: Allows the user to add new events and modify any existing events they created. The details of events created by others are hidden.
Set a user’s default permission
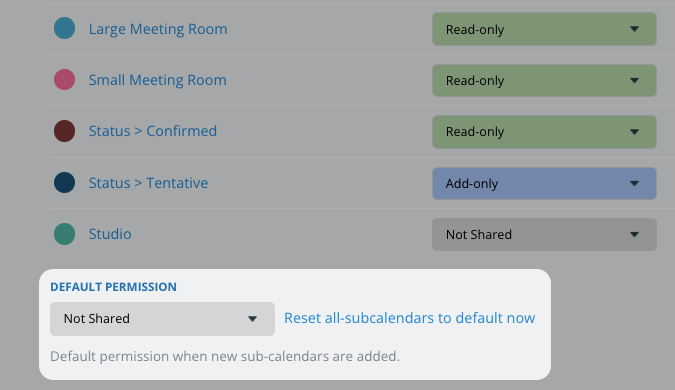
The default permission setting for a user determines what permission level they will have for any new calendars created. For example, if you set this permission to Not Shared, then by default the user will NOT have access to any new sub-calendars. You can adjust this setting for each user as needed.
- For most users, it’s wise to set the default permission to Not Shared or Read-only to prevent unauthorized access to new sub-calendars or unwanted changes to the calendar.
- For users who have an active calendar management role that necessitates having access to all sub-calendars, adjust the setting as needed to allow default access to new calendars.
Manage user access
Modify access for a user
To change a user’s customized access:
- Go to Settings > Sharing.
- Find the individual user in the list.
- Click the pencil icon by the user’s name.
- Scroll down to the calendar list and modify the permissions as needed, then Save.
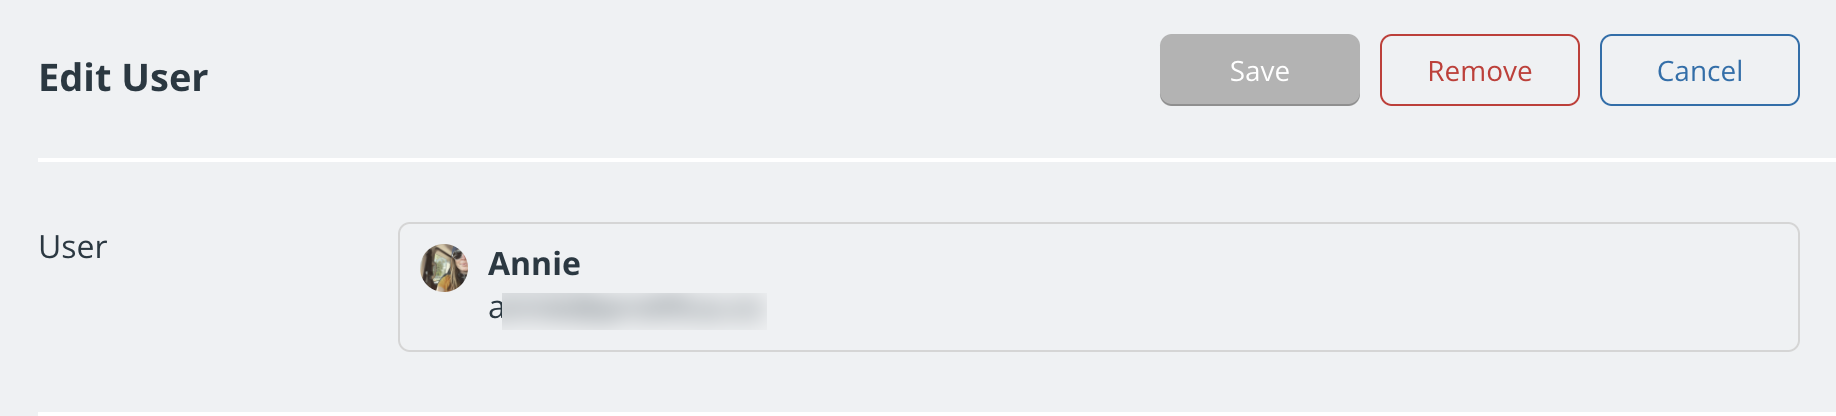
Revoke a user’s access
The calendar administrator maintains central control of the calendar and can remove access for any account user. For example, if someone leaves your organization and they should no longer have access to the calendar, you can remove their calendar access completely:
- Go to Settings > Sharing.
- Find the individual user whose access must be removed on the list. If you have a long sharing list with many users and links, use the filters.
- Click the pencil icon by the user’s name.
- Click the Remove button: