If your team is using Slack, the popular real-time messaging application, you can set up a Teamup-Slack integration. With a Teamup-Slack integration, your team can be instantly notified of changes on your Teamup Calendar via Slack channels.
Having changes to your Teamup Calendar sent to your Slack group channel can help your team stay up-to-date on plans and schedules, streamline communication, and reduce the number of emails and messages to process.
This article explains how a Teamup Calendar administrator can set up a Slack integration and post Teamup Calendar notifications to Slack channels. For calendar users who do not have administrator access, see this article on how to set up Teamup Calendar notifications to Slack.
Teamup Calendar notifications in Slack
Here’s an example of how Teamup Calendar notifications appear on a Slack group channel:

If you are currently using Slack but not Teamup Calendar, create a Teamup Calendar now. It is easy and free.
Teamup Calendar also supports notifications by email. The Slack integration makes it possible for you to receive pop-up alerts on desktop or mobile devices via Slack.
How to set up a Slack integration
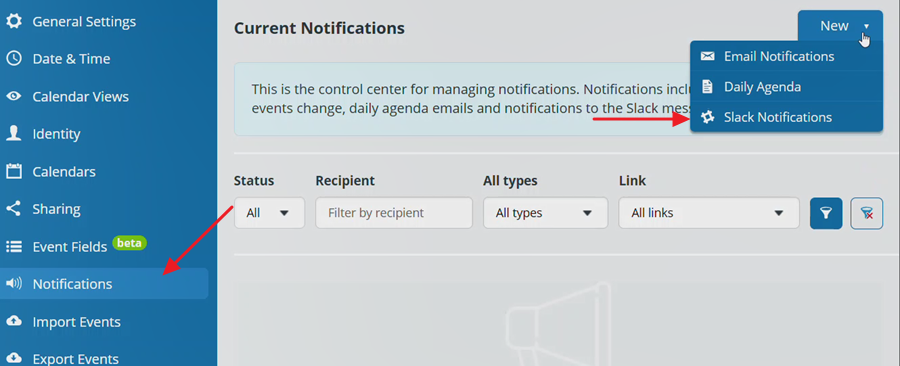
Part 1: Initiate the Slack integration in Teamup
- Open your calendar in a web browser.
- Go to Settings > Notifications.
- Click New. From the drop-down menu, select Slack Notifications:
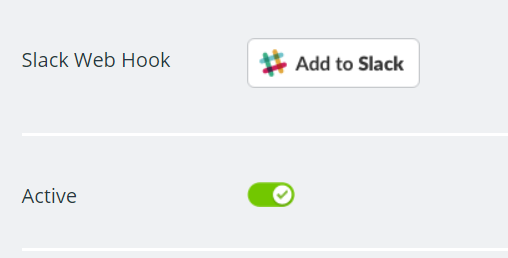
- Click the “Add to Slack” button. Now you will be taken to a page on Slack where you can authorize Teamup to post notifications. Do not click the Save button yet.
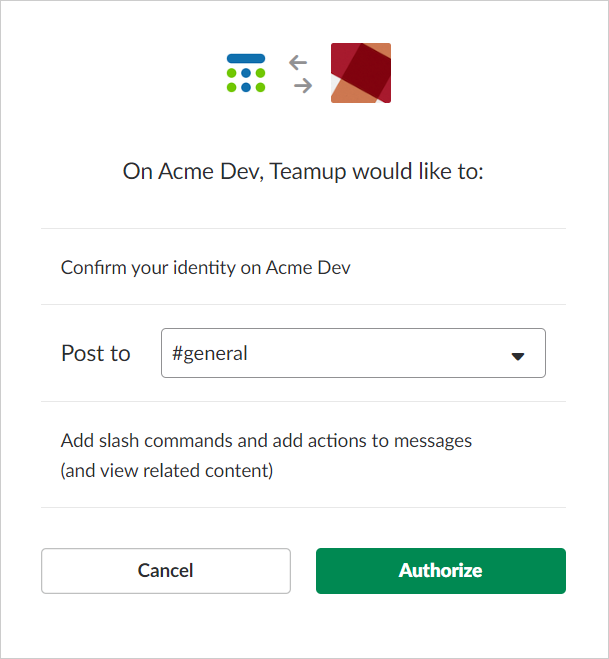
Part 2: Authorize Teamup to post on Slack
- Select the Slack team that you want to integrate and the channel where you want to post the notifications, e.g. the #general channel.
- Click the Authorize button to give Teamup permission to post messages to your selected Slack channel.
After authorizing Teamup, you will be redirected back to Teamup Settings to omplete the setup of the integration.
Part 3: Complete the Slack integration on Teamup
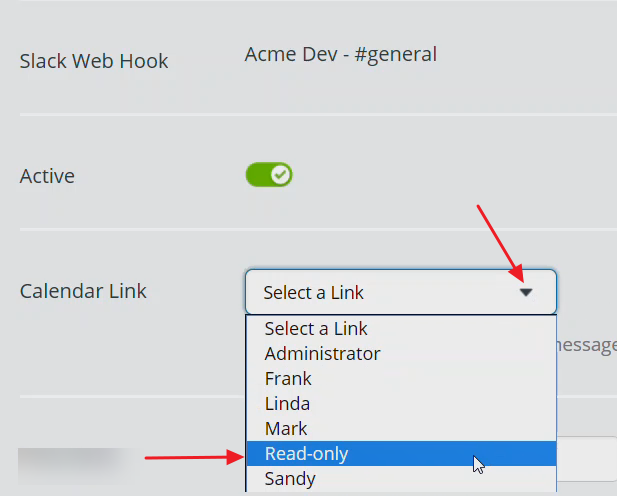
- Select a calendar link to use for the notifications:
- Make sure it is a link with access permissions that are appropriate for all members of the channel. Note that all notifications posted on Slack will contain the calendar link, which allows members of the channel to click through and open the calendar to see more details or take actions if needed. It is therefore very important to ensure that the calendar link used for notifications is set with appropriate calendar permissions for all members of the Slack group channel. In most cases, it is recommended to use a read-only link or create a customized link specifically for the members of this slack channel, unless an existing link is appropriate for the channel, e.g. a read-only link:
- Choose the sub-calendars: you can choose to receive notifications for changes on all sub-calendars, or on selected (one or more specific) sub-calendars.
- Choose the type of changes for notifications: You can select All changes, New events only, or Important changes. Important changes include newly created events and date/time changes to existing events.
- When done, click the Save button.
Note that changes of past events will only trigger notifications if the calendar is on a Premium plan.
How to test the Slack integration
- Add a future dated event to your Teamup Calendar. The notification post should appear on your chosen Slack channel within seconds.
- Click on the calendar name in the post on your Slack channel and the calendar opens. Make sure that the calendar link is the one you intended to use and appropriate for all members of the channel, in particular, that it is not a link with the administrator rights or other inappropriate modifying permissions.
How to stop Slack notifications
You may need to remove or change the Slack integration from your Teamup Calendar for various reasons:
- You no longer need a Slack integration for any group channels.
- You have accidentally set up duplicate integrations and want to remove one or more.
- You have changed the Slack group channel used and need to change the integration.
- You have an employee who set up a Slack integration for notifications on their private channel, and they have left the organization.
It’s easy for a calendar administrator with an administrator link to review, modify, or delete a Slack integration or any other notification. There are two essential steps: remove (or disable) the integration from Teamup, and remove the integration from Slack.
Here are the steps:
- Remove the integration from Teamup
In your Teamup Calendar, go to Settings > Notifications to see an overview of all existing notifications that have been set up, by all users of the calendar.
The list of notifications will include all notifications set up by all users, including both administrator and non-administrators, as well as Slack integrations for group channels and private channels, email notifications, and the Teamup Daily Agenda.
You can filter to see only the Slack notifications, and add, edit or remove any of these notifications:
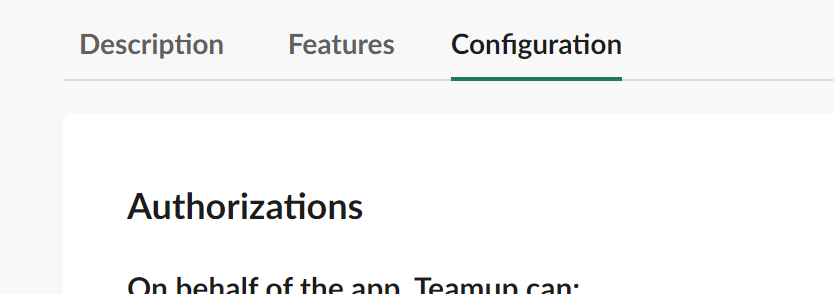
- Remove the integration from Slack
It’s also important to remove the Teamup-Slack integration from within Slack: Go to the app directory, select the Configuration tab, and revoke the respective authorizations.