The date and time format in Zapier can be tricky. Use Zapier’s Formatter to customize the date and time formatting. This helps ensure the important date/time information will be displayed in a user-friendly format and can be read correctly.
The Zap for sending SMS messages to confirm client appointments is a great example:
1. Add a Formatter Step
In the Zap editor, create a new Action step, or click the plus + icon to add a step to your Zap. Select Format. In this Zap, the Formatter step should come right after the Trigger.
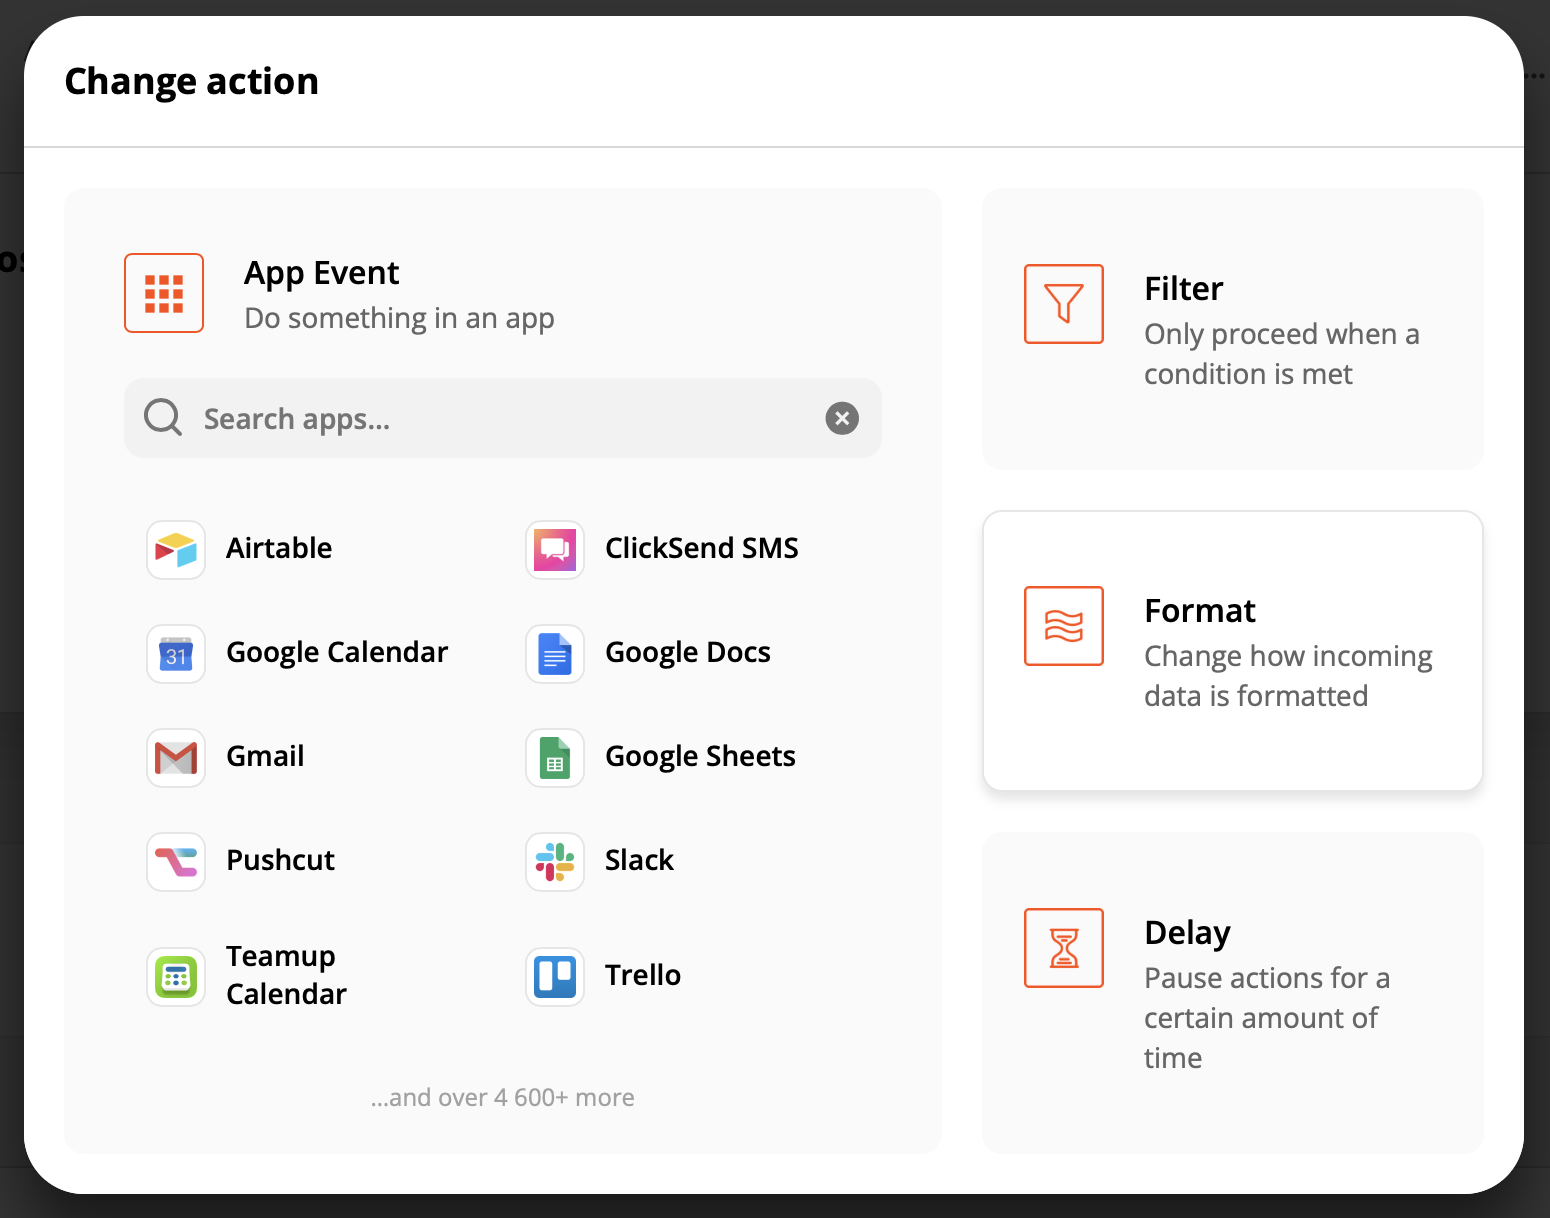
2. Choose the Action Event
In the dropdown menu, choose the Date/Time option:

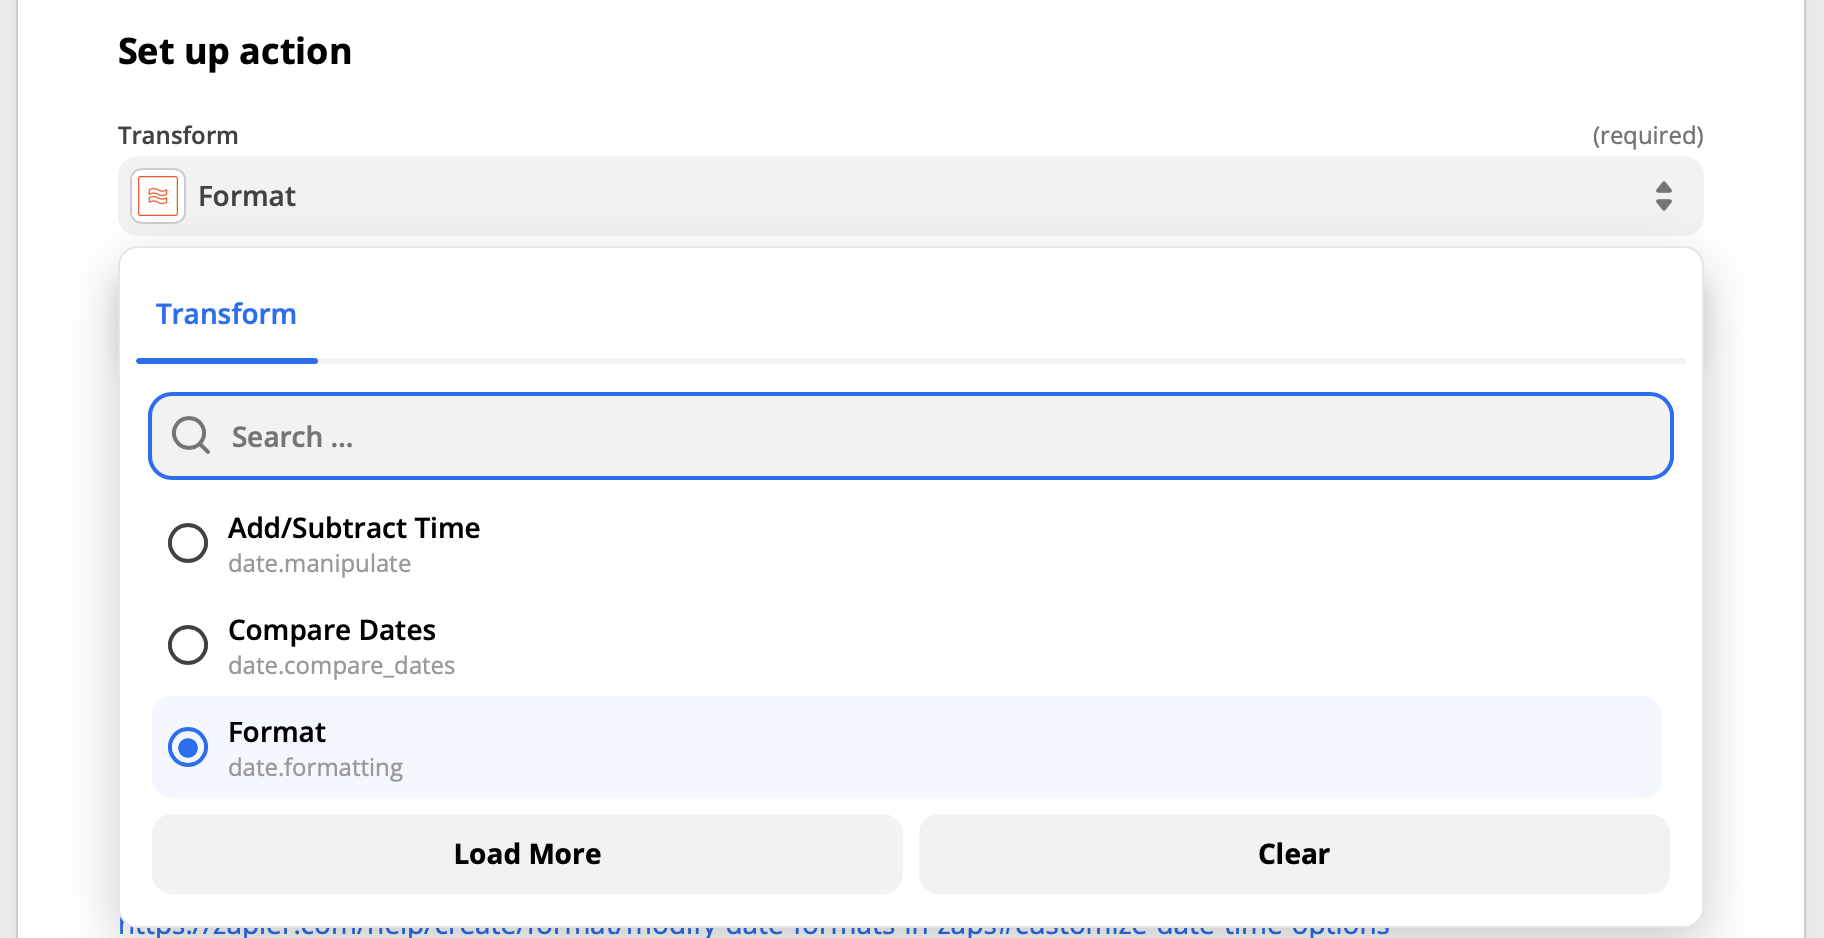
3. Choose the Format transformation
Under Transform, select Format:
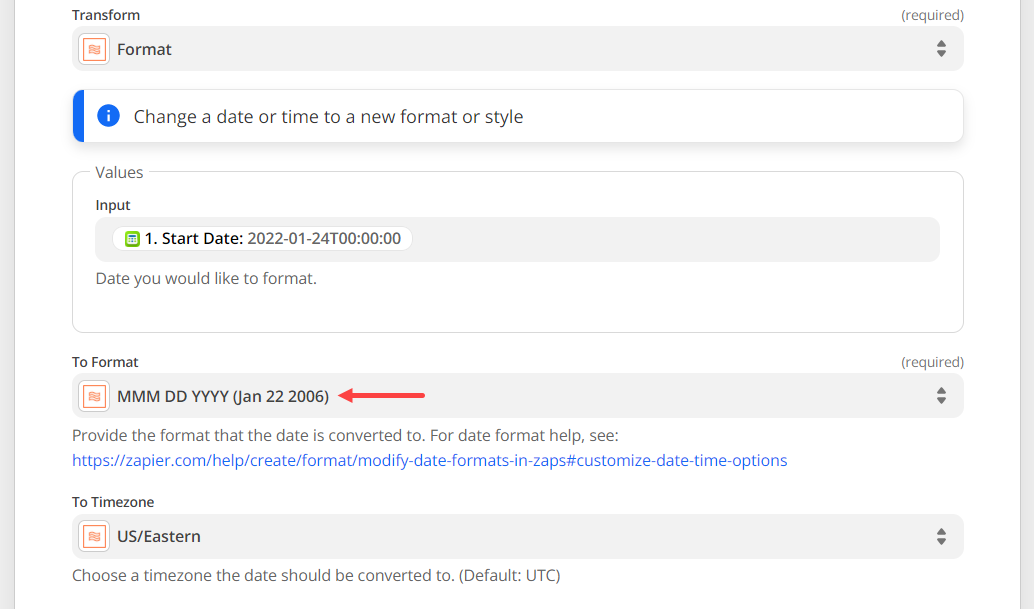
4. Set up the Format
- In the Values > Input field add a Start Date, End Date or any date from the Teamup event.
- In the To Format field, choose the preferred date format you’d like to use. The date input value from Teamup contains both the date and time information. If you want to display the date only, choose the YYYY-MM-DD format to strip the time from the date input.
- In the To Timezone field, choose your timezone, e.g.: US/Eastern, to ensure the date is displayed correctly in the correct time zone.
The other two fields, the From Format and From Timezone, are not needed in most cases. You can leave the From Format blank and the From Timezone as is.
Choose from preformatted options
In the To Format section, you can choose a format from the dropdown list:
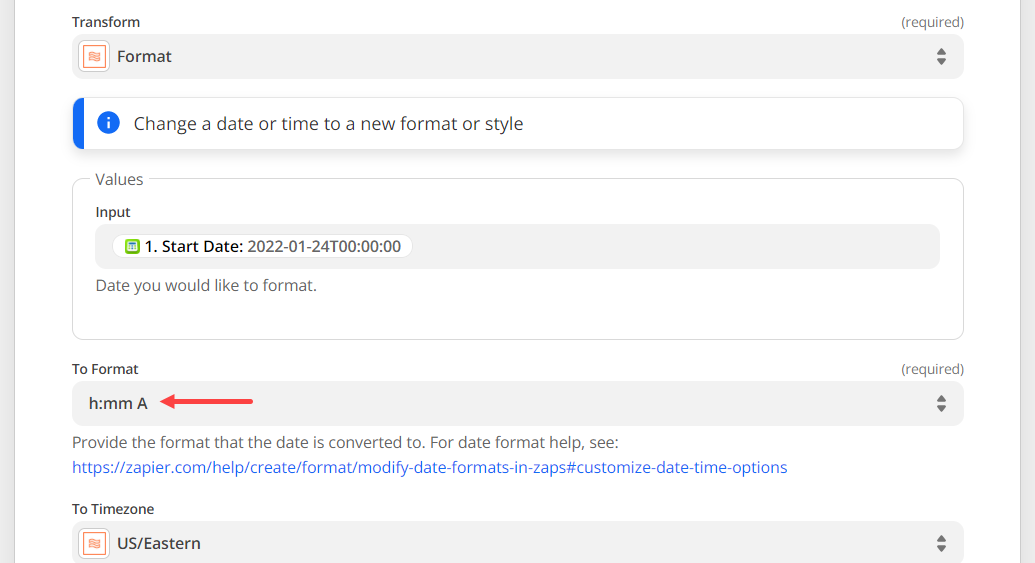
Set up a custom format
If you’d like to display the date without time, then display the time without seconds, you can add another Format step to get a custom output with time only. To do this, select the Custom tab (instead of choosing value from the dropdown options):

Then you can specify your option, e.g., type HH:mm into the field for 19:00 or h:mm A for 7:00 PM if you’d like to display the time only. See the full list of available custom format options.
5. Test the Formatter
Before moving to the next action, test the Formatter. Click the Test & Review button. When everything is set up correctly, you will see the green check mark along with the formatted date or time output.

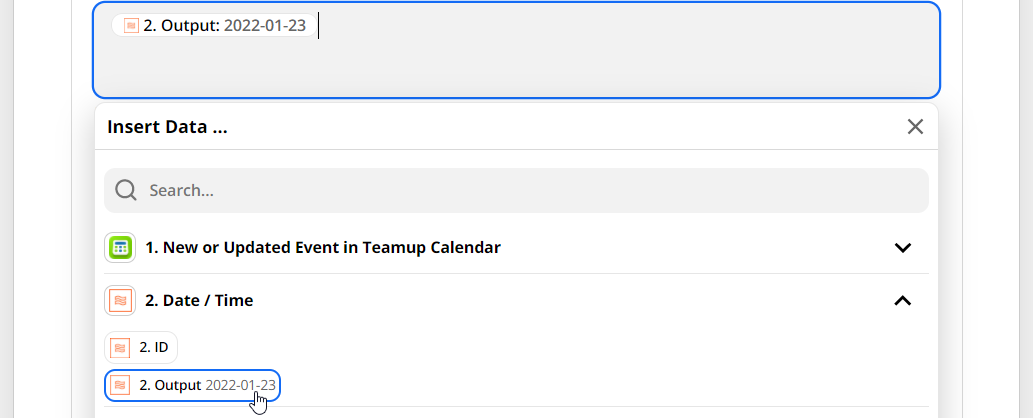
6. Choose the formatted date
Don’t skip this step! To use the nicely formatted date and/or time in the additional Zap Steps, go to the next Action. Click into the field and choose Date/Time > Output.
We hope this helps you set up Teamup Zaps in just the right way for your workflow.